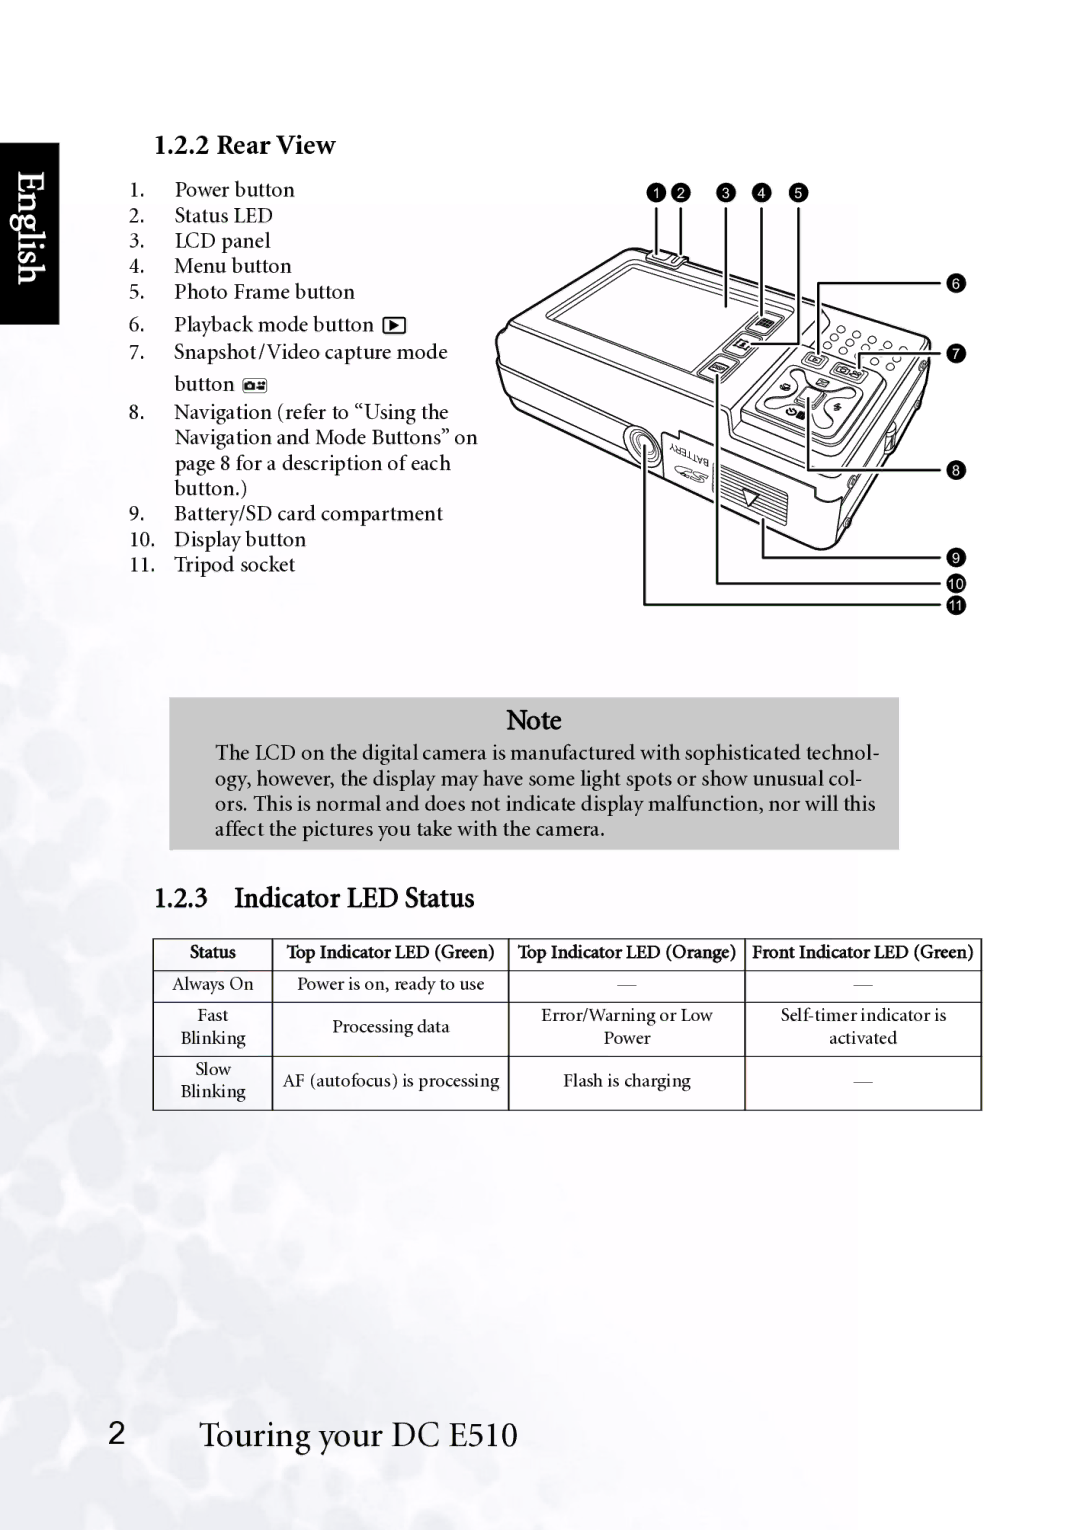
1.2.2 Rear View
English
1.Power button
2.Status LED
3.LCD panel
4.Menu button
5.Photo Frame button
6.Playback mode button ![]()
7.Snapshot/Video capture mode button ![]()
8.Navigation (refer to “Using the Navigation and Mode Buttons” on page 8 for a description of each button.)
9.Battery/SD card compartment
10.Display button
11.Tripod socket
1 | 2 | 3 | 4 | 5 |
|
|
|
| 6 |
|
|
|
| 7 |
| YR |
|
|
|
| TTE |
|
|
|
| BA |
|
| 8 |
|
|
|
| |
|
|
|
| 9 |
|
|
|
| 10 |
|
|
|
| 11 |
Note
The LCD on the digital camera is manufactured with sophisticated technol- ogy, however, the display may have some light spots or show unusual col- ors. This is normal and does not indicate display malfunction, nor will this affect the pictures you take with the camera.
1.2.3 Indicator LED Status
Status | Top Indicator LED (Green) | Top Indicator LED (Orange) | Front Indicator LED (Green) | |
|
|
|
| |
Always On | Power is on, ready to use | — | — | |
|
|
|
| |
Fast | Processing data | Error/Warning or Low | ||
Blinking | Power | activated | ||
| ||||
|
|
|
| |
Slow | AF (autofocus) is processing | Flash is charging | — | |
Blinking | ||||
|
|
| ||
|
|
|
|
2Touring your DC E510
