Controls and functions
Control panel
English
|
| 1 |
| 3 | 2 |
| 4 |
|
| 5 |
|
| 6 |
|
7 | 7 |
|
| 6 |
|
| 8 |
|
9 | 10 |
|
11 | 12 |
|
13 |
|
|
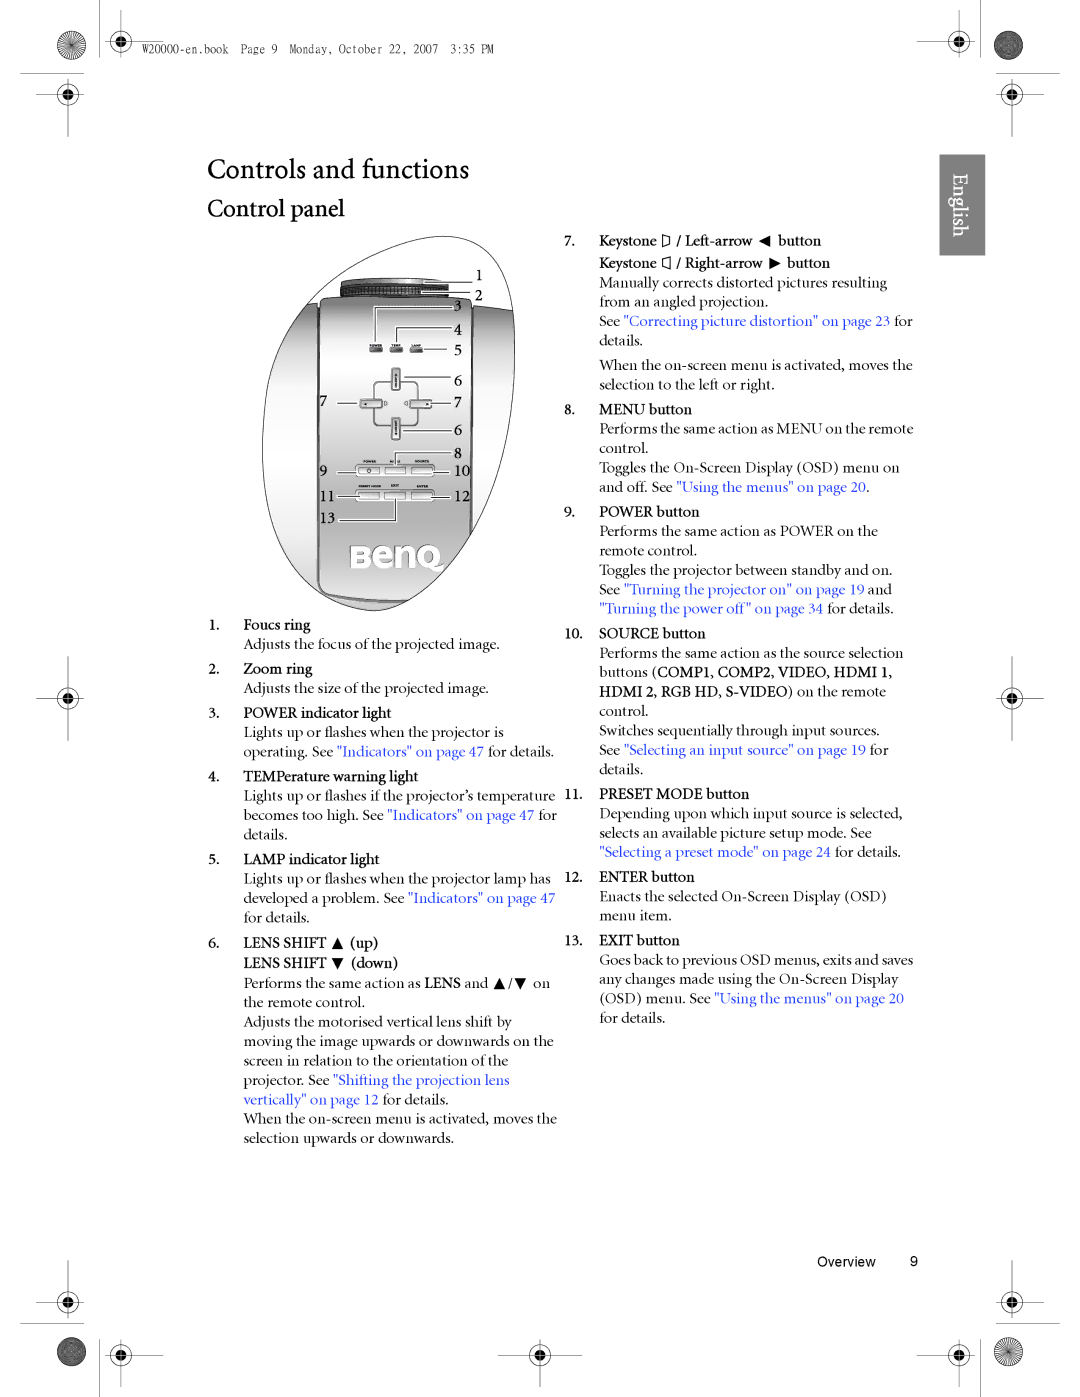
1.Foucs ring
Adjusts the focus of the projected image.
2.Zoom ring
Adjusts the size of the projected image.
3.POWER indicator light
Lights up or flashes when the projector is operating. See "Indicators" on page 47 for details.
4.TEMPerature warning light
Lights up or flashes if the projector’s temperature becomes too high. See "Indicators" on page 47 for details.
5.LAMP indicator light
Lights up or flashes when the projector lamp has developed a problem. See "Indicators" on page 47 for details.
6.LENS SHIFT  (up) LENS SHIFT
  (down)
Performs the same action as LENS and ![]() /
/![]() on the remote control.
on the remote control.
Adjusts the motorised vertical lens shift by moving the image upwards or downwards on the screen in relation to the orientation of the projector. See "Shifting the projection lens vertically" on page 12 for details.
When the
7.Keystone ![]() /
/ ![]() button
button
Keystone ![]() /
/ ![]() button Manually corrects distorted pictures resulting from an angled projection.
button Manually corrects distorted pictures resulting from an angled projection.
See "Correcting picture distortion" on page 23 for details.
When the
8.MENU button
Performs the same action as MENU on the remote control.
Toggles the
9.POWER button
Performs the same action as POWER on the remote control.
Toggles the projector between standby and on. See "Turning the projector on" on page 19 and "Turning the power off" on page 34 for details.
10.SOURCE button
Performs the same action as the source selection buttons (COMP1, COMP2, VIDEO, HDMI 1, HDMI 2, RGB HD,
Switches sequentially through input sources. See "Selecting an input source" on page 19 for details.
11.PRESET MODE button
Depending upon which input source is selected, selects an available picture setup mode. See "Selecting a preset mode" on page 24 for details.
12.ENTER button
Enacts the selected
13.EXIT button
Goes back to previous OSD menus, exits and saves any changes made using the
Overview 9