Chapter 2: Overview
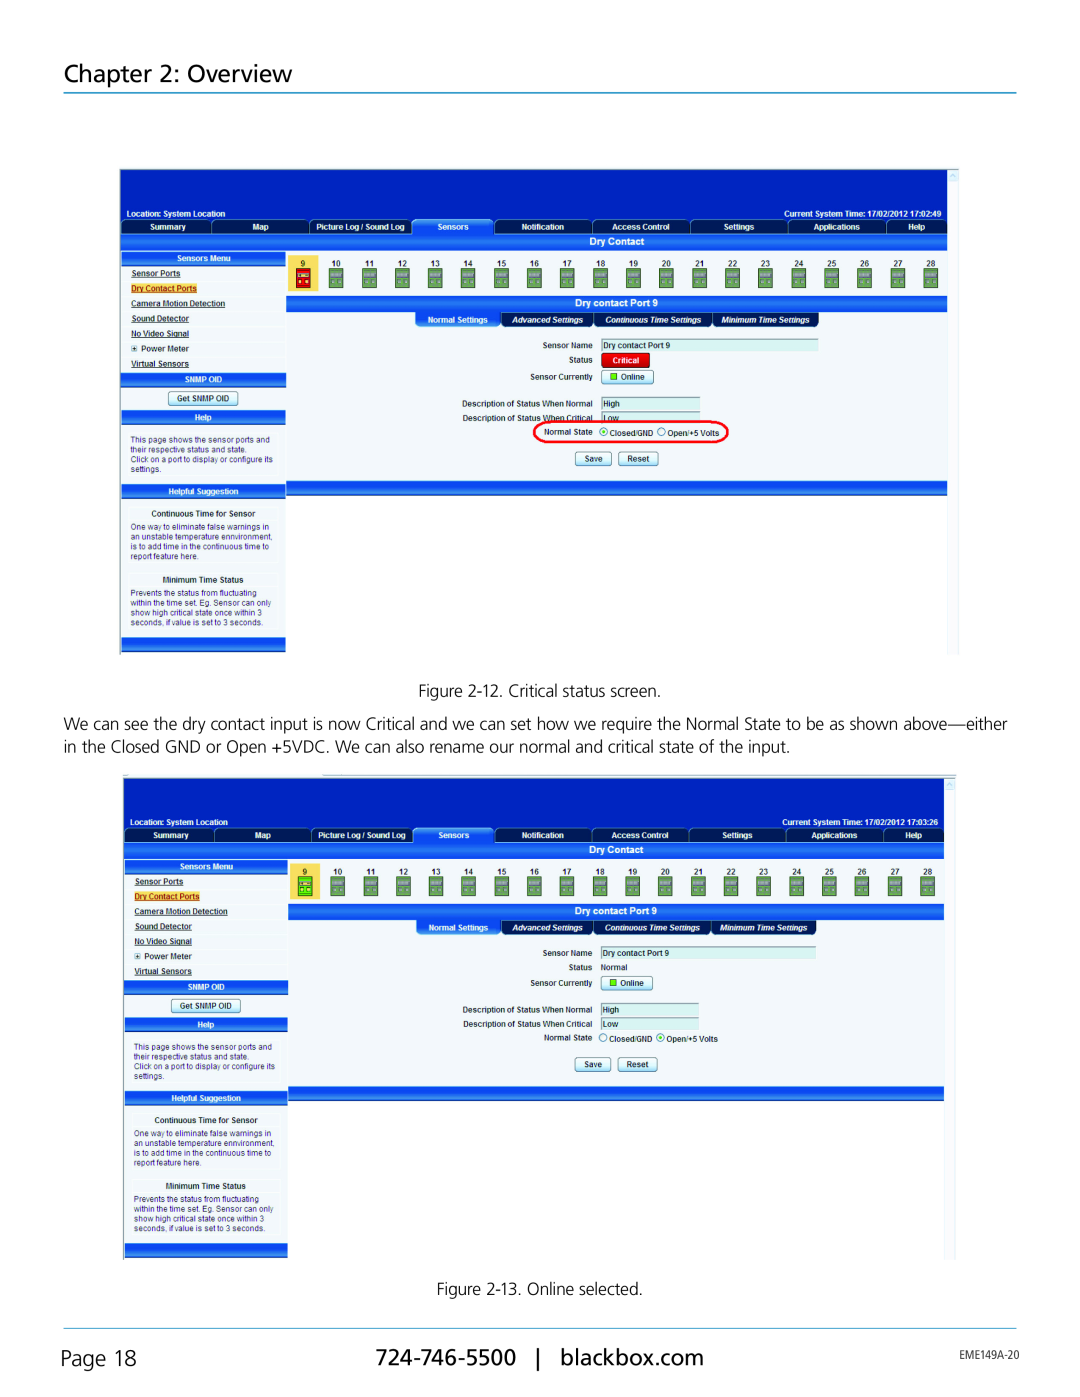
Figure 2-12. Critical status screen.
We can see the dry contact input is now Critical and we can set how we require the Normal State to be as shown
Figure 2-13. Online selected.
Page 18 | ||
|
|