AutoDome 700 Series IP PTZ Camera | Using the AutoDome 700 Series en | 9 |
|
|
|
Using the AutoDome 700 Series Web Server
To configure the camera using the AutoDome 700 Series server, do the following:
1.Set the IP address on the PC to 192.168.0.10 to ensure that the PC and the AutoDome 700 Series are on the same Subnet.
2.Launch Microsoft Internet Explorer and navigate to the following URL: http://192.168.0.1 The Web browser opens the Livepage for the AutoDome 700 Series; a security warning message is displayed.
3.Check the Always Trust box, then click YES.
4.Click the Settings link, located at the top of the Livepage.
5.Click the Service Settings link, located in the left pane of the Settings window.
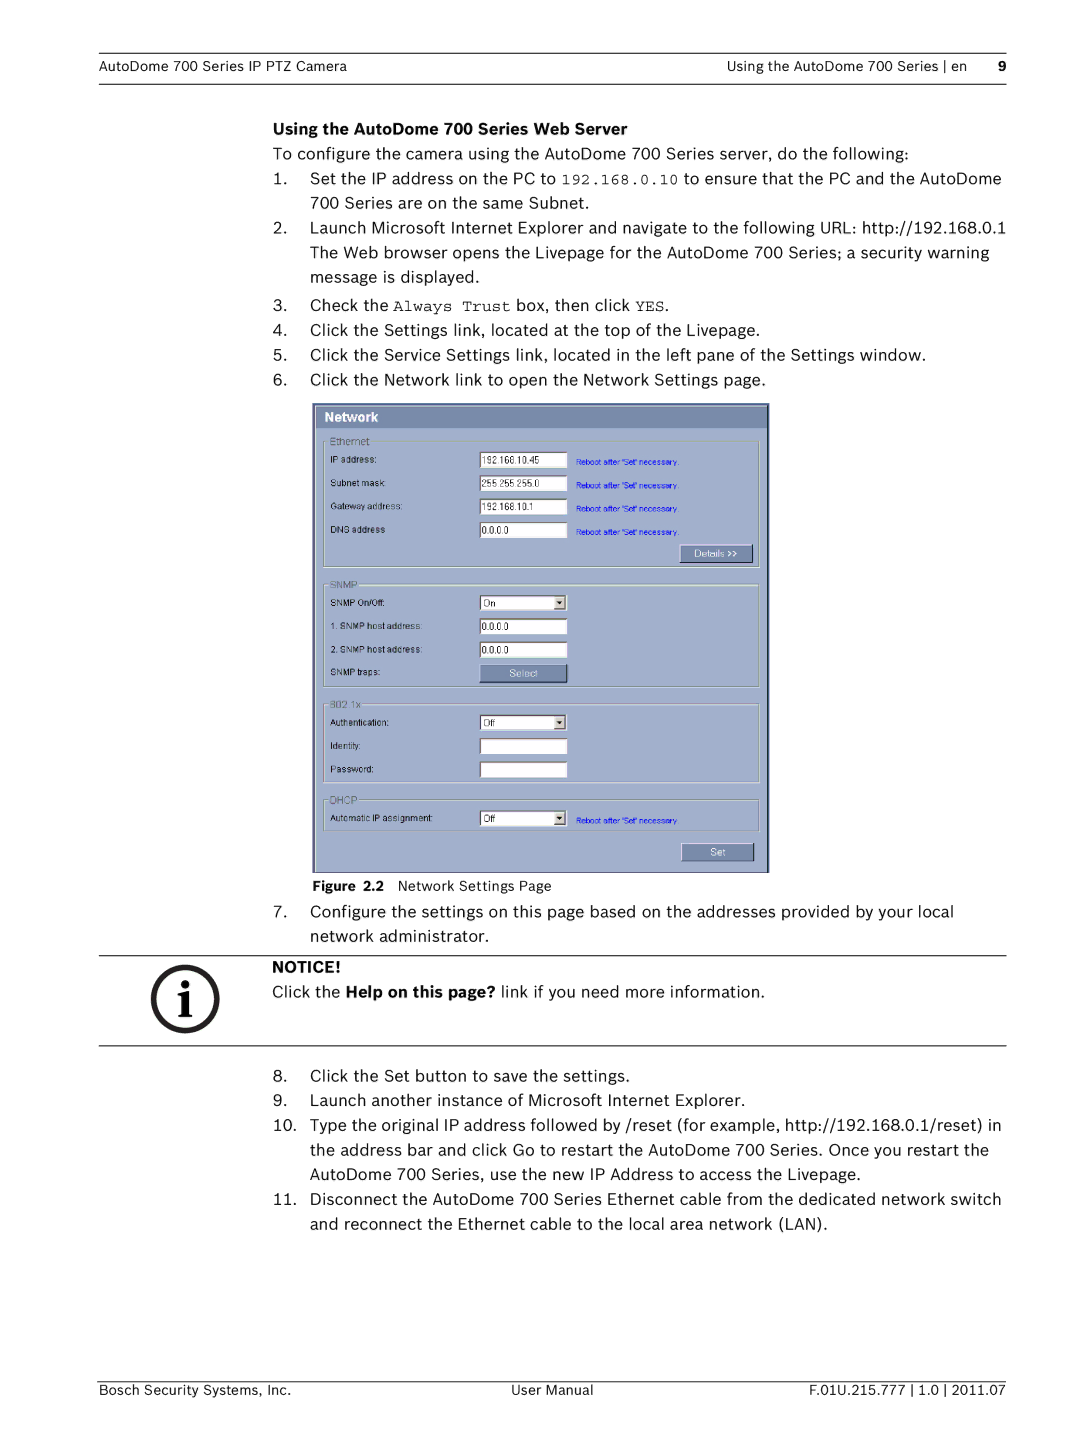
6.Click the Network link to open the Network Settings page.
Figure 2.2 Network Settings Page
7.Configure the settings on this page based on the addresses provided by your local network administrator.
NOTICE!
Click the Help on this page? link if you need more information.
8.Click the Set button to save the settings.
9.Launch another instance of Microsoft Internet Explorer.
10.Type the original IP address followed by /reset (for example, http://192.168.0.1/reset) in the address bar and click Go to restart the AutoDome 700 Series. Once you restart the AutoDome 700 Series, use the new IP Address to access the Livepage.
11.Disconnect the AutoDome 700 Series Ethernet cable from the dedicated network switch and reconnect the Ethernet cable to the local area network (LAN).
Bosch Security Systems, Inc. | User Manual | F.01U.215.777 1.0 2011.07 |
