6. DISMOUNTING THE LOADER
![]() CAUTION
CAUTION ![]()
ALWAYS PARK LOADER WITH MATERIAL BUCKET OR AUTHORIZED BUSH HOG ATTACHMENT ATTACHED TO THE LOADER.
BEFORE LEAVING THE TRACTOR SEAT, LOWER ATTACHMENT OR LOADER BOOM TO GROUND, STOP ENGINE, LOCK BRAKES, RELIEVE HYDRAULIC PRESSURE AND REMOVE KEY.
DO NOT STAND, WALK, OR WORK UNDER A RAISED LOADER OR ATTACHMENT UNLESS IT IS SECURELY BLOCKED OR HELD IN POSITION. ACCIDENTAL MOVEMENT OF A CONTROL LEVER/LEVERS OR LEAKS IN THE HYDRAULIC SYSTEM COULD CAUSE THE LOADER TO DROP, OR ATTACHMENT TO DUMP, CAUSING SEVERE INJURY.
DO NOT ALLOW BYSTANDERS IN LOADER WORK AREA.
IMPORTANT: Never allow weight of tractor to be placed on parking stands when mounting or dis- mounting loader.
Position the tractor/loader on a hard level surface. Raise loader boom assembly. Position the bucket 90° to the ground. Then lower the loader boom until front edge of bucket is resting on the ground. Refer to Figure 1.
Remove the two clevis pins holding the two parking stands in the storage position. Refer to Figure 2.
![]() 1
1
2
Figure 2
(1)Clevis pin 5/8" x
(2)Clevis pin 5/8" x 4", one each side of loader.
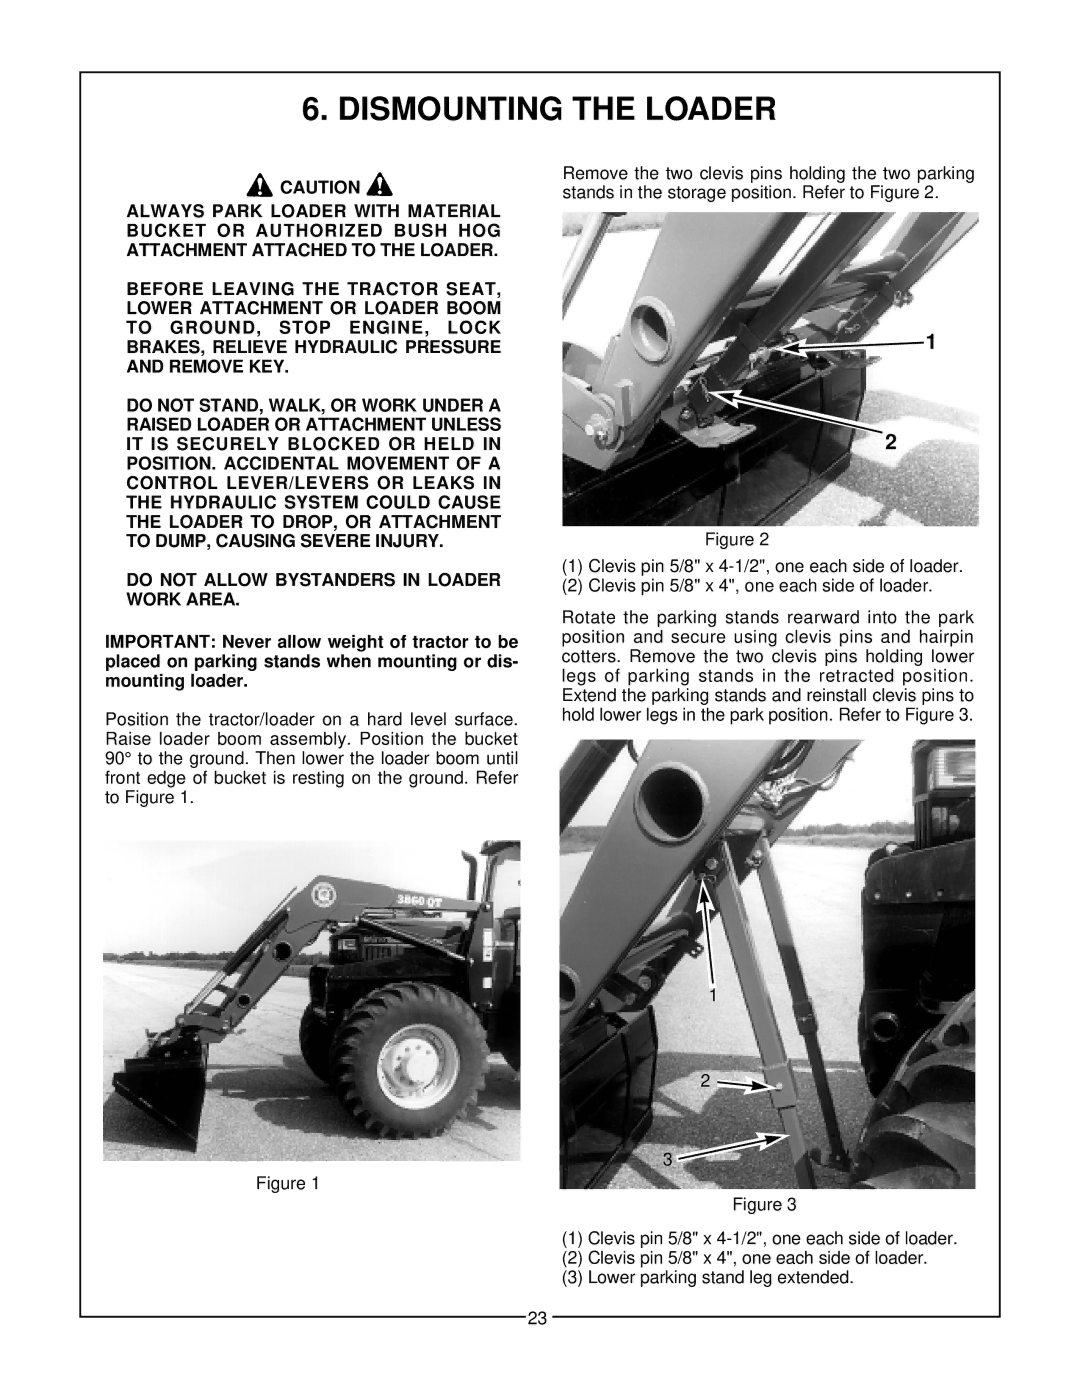
Rotate the parking stands rearward into the park position and secure using clevis pins and hairpin cotters. Remove the two clevis pins holding lower legs of parking stands in the retracted position. Extend the parking stands and reinstall clevis pins to hold lower legs in the park position. Refer to Figure 3.
1
2 ![]()
![]()
3 ![]()
Figure 1
Figure 3
(1)Clevis pin 5/8" x
(2)Clevis pin 5/8" x 4", one each side of loader.
(3)Lower parking stand leg extended.
23