Screw the red refl ectors into the rear grommets on the storage bag.
Screw the white refl ectors into the front grommets on the passenger compartment.
Push the two safety fl ag rods together and guide the bottom end into the hole located in the plastic end cap in the upper left rear frame tube. Push the rod in until it stops.
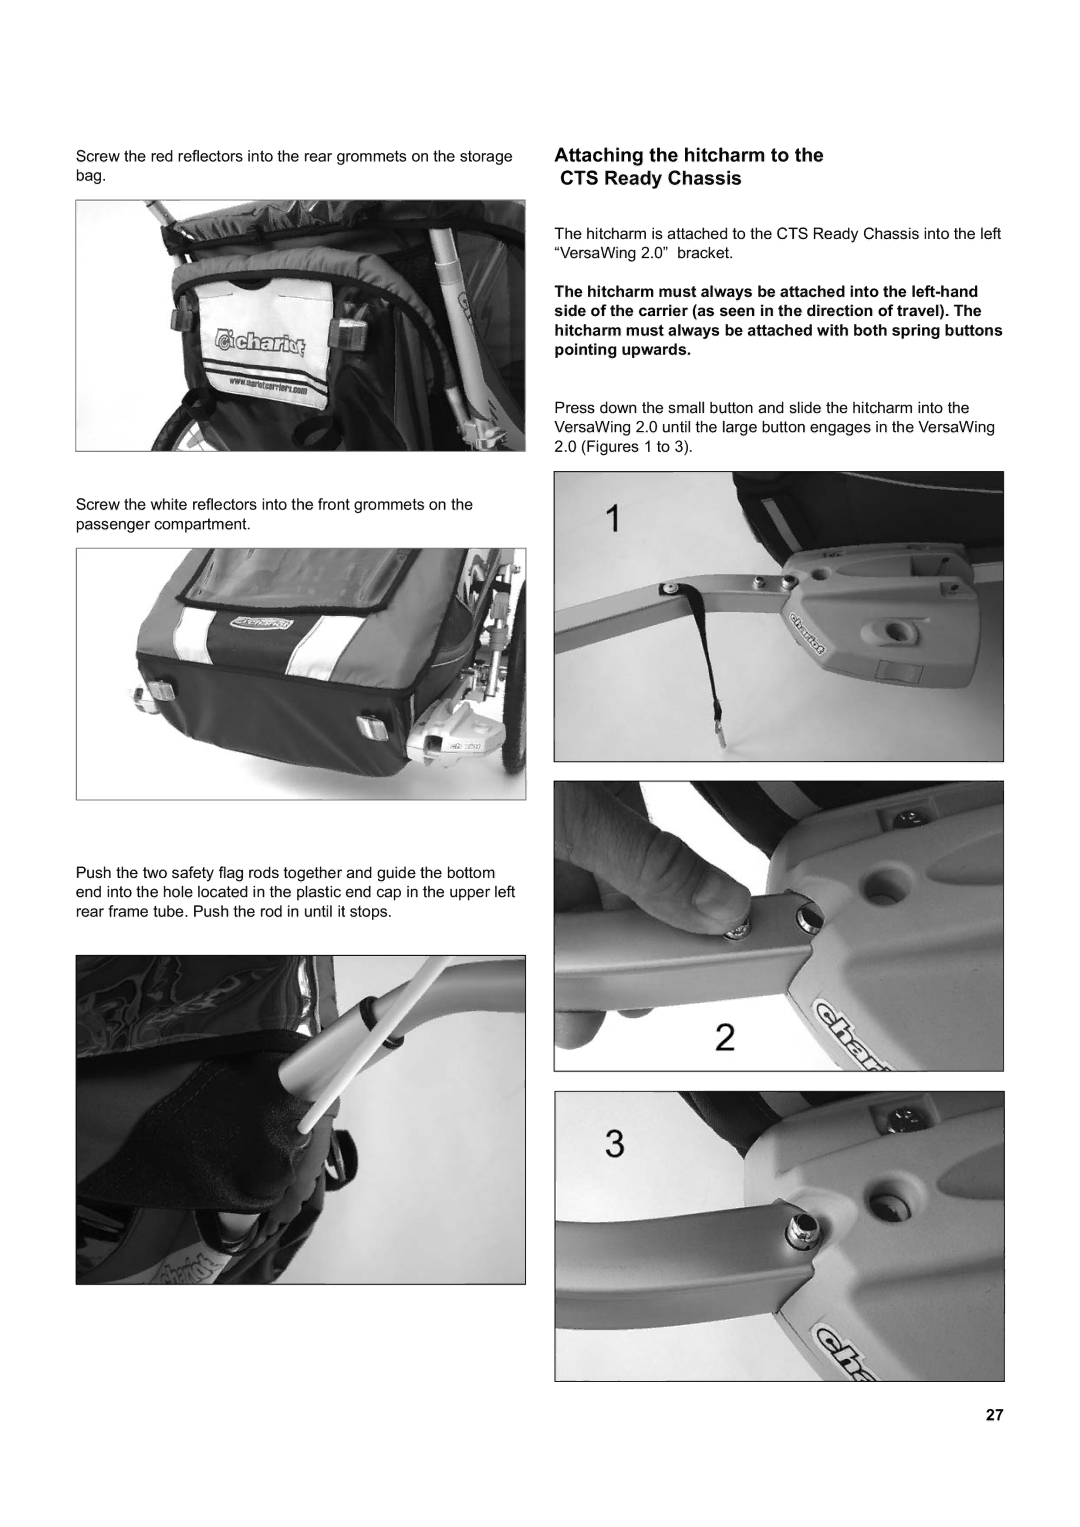
Attaching the hitcharm to the
CTS Ready Chassis
The hitcharm is attached to the CTS Ready Chassis into the left “VersaWing 2.0” bracket.
The hitcharm must always be attached into the
Press down the small button and slide the hitcharm into the VersaWing 2.0 until the large button engages in the VersaWing 2.0 (Figures 1 to 3).
27