
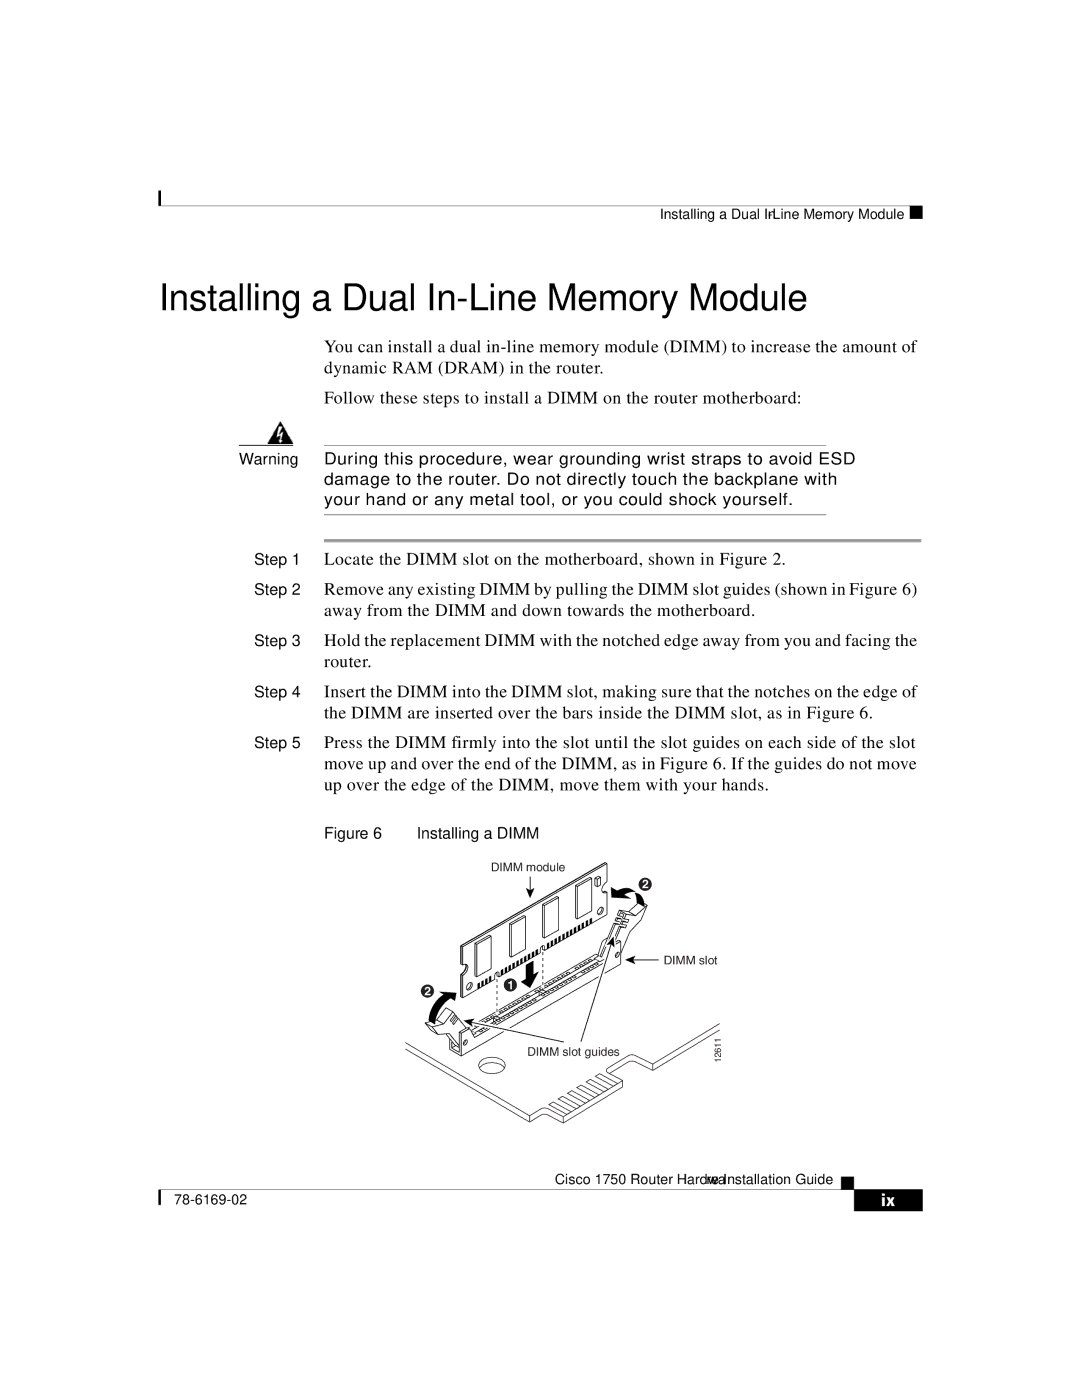
CISCO1750 specifications
The Cisco Systems CISCO1750 is a versatile, high-performance router designed to meet the needs of medium-sized businesses and enterprise environments. Known for its reliability and scalability, the CISCO1750 serves as a gateway to advanced networking solutions, offering a range of features and technologies that enhance functionality and connectivity.One of the main characteristics of the CISCO1750 is its modular design, allowing users to customize the router according to their specific requirements. With various interface cards and network modules available, users can expand the router's capabilities to accommodate additional connections and services. This modularity makes the CISCO1750 a cost-effective solution, as organizations can invest in the hardware they need without overspending on unnecessary features.
The CISCO1750 supports multiple WAN interfaces, including T1/E1 and DSL connections, making it suitable for diverse network environments. It also includes integrated Ethernet switching, supporting both Fast Ethernet and Gigabit Ethernet interfaces. This allows the router to handle high-speed data transfers efficiently while ensuring reliable connectivity between various local devices.
In terms of software capabilities, the CISCO1750 runs on the Cisco IOS (Internetwork Operating System), providing advanced routing protocols like OSPF, EIGRP, and BGP. This enables the router to efficiently manage network traffic, optimize performance, and ensure high availability. The inclusion of advanced security features, such as IPsec VPN support and access control lists, helps safeguard sensitive data while maintaining robust network integrity.
Scalability is another key feature of the CISCO1750. As organizations grow and their networking needs evolve, the router can adapt by supporting additional users and devices. The device can also be integrated with other Cisco products for a unified networking infrastructure, ensuring seamless operations across the entire organization.
The CISCO1750 is designed with a focus on ease of management. Users can configure and monitor the device through a user-friendly command-line interface or GUI-based management tools. Additionally, the router supports SNMP (Simple Network Management Protocol), enabling administrators to monitor network performance and troubleshoot issues effectively.
In summary, the Cisco Systems CISCO1750 is a powerful and flexible router that meets the demands of modern enterprise networking. With its modular design, support for various interfaces, advanced routing capabilities, robust security features, and ease of management, it stands out as a reliable choice for organizations looking to enhance their network infrastructure.