
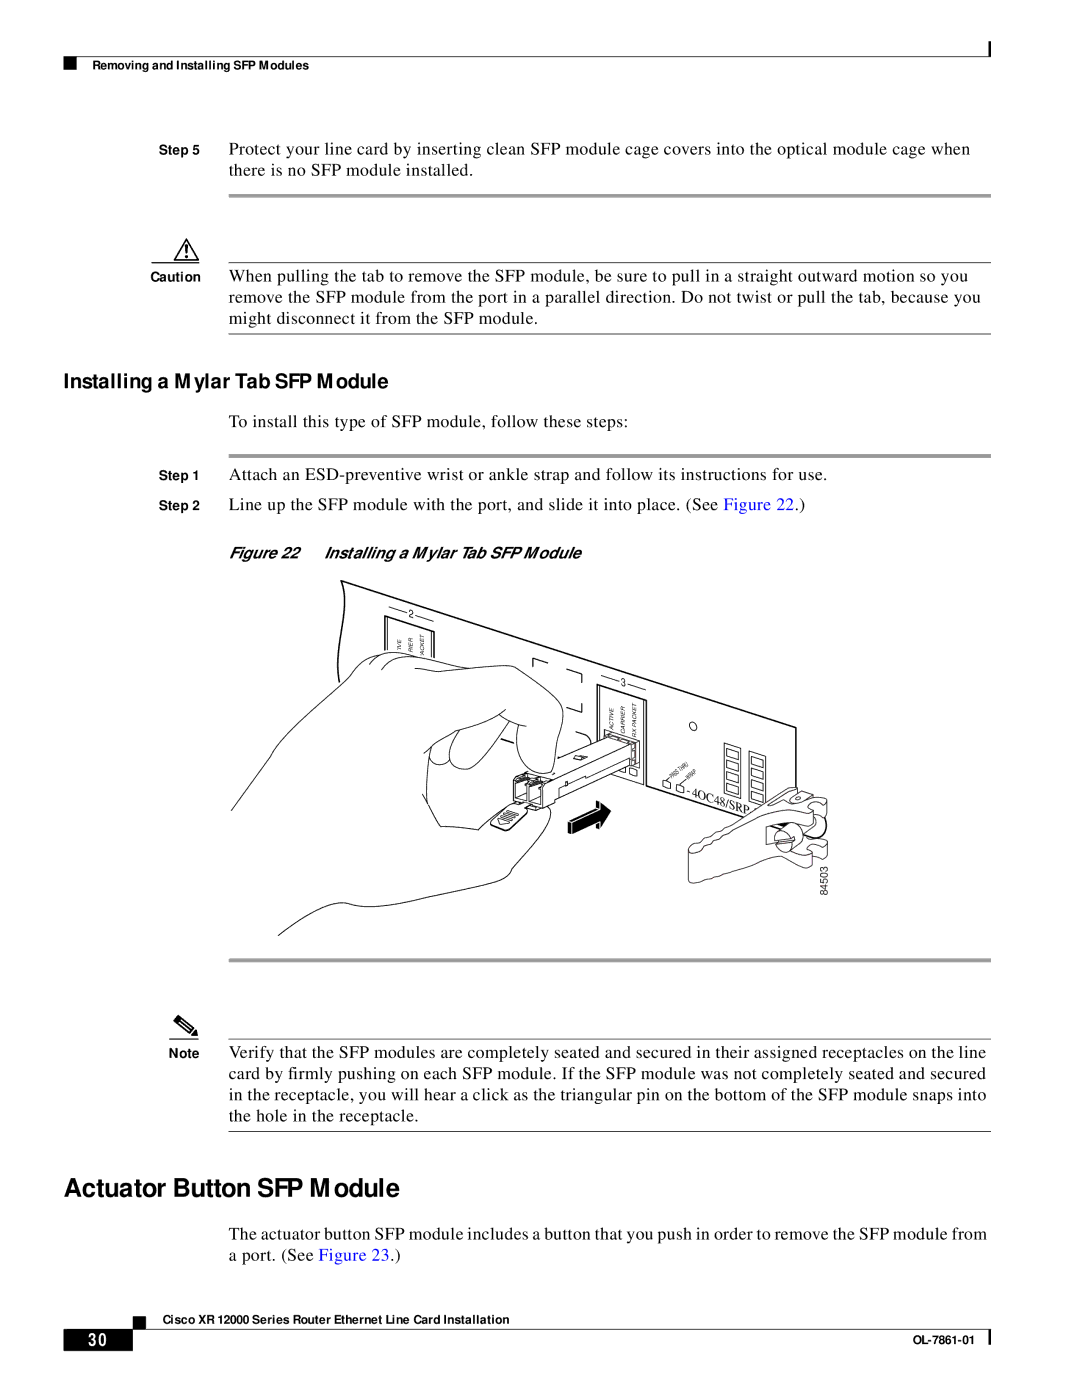
OL-7861-01 specifications
Cisco Systems OL-7861-01 is a robust and versatile device designed to meet the demands of modern networking environments. As part of Cisco's extensive portfolio of networking and communication solutions, the OL-7861-01 is tailored for organizations seeking high performance and reliability. The device is primarily deployed in voice over IP (VoIP) solutions, effectively enhancing communication capabilities across various sectors.One of the standout features of the OL-7861-01 is its support for the latest VoIP technologies. This functionality allows organizations to implement efficient and cost-effective communication systems. Users benefit from crystal-clear voice quality, reduced latency, and improved overall user experience during calls. The device is equipped with advanced codecs, including wideband audio support, ensuring high-definition voice clarity.
In terms of enterprise readiness, the OL-7861-01 boasts seamless integration with Cisco’s Unified Communications Manager, enabling centralized management of communication systems. This integration simplifies deployment and management, allowing administrators to monitor system performance and access a range of administrative tools. Additionally, the device supports full duplex communication, ensuring that users can speak and listen simultaneously without interruptions.
The OL-7861-01 stands out with its robust security measures, which are crucial for protecting sensitive information during transmissions. It incorporates features such as secure RTP (SRTP) and transport layer security (TLS) to safeguard voice data against unauthorized access. This encryption capability is vital for organizations handling confidential communications.
The technological architecture of the OL-7861-01 is designed for scalability and flexibility. Organizations can easily expand their communication capabilities by integrating additional devices or users without significant infrastructure changes. This feature is essential for businesses anticipating growth or needing to adapt to changing communication demands.
Another notable characteristic of the OL-7861-01 is its user-friendly interface. The device is designed with an intuitive layout, allowing users to navigate features effortlessly. Coupled with customizable settings, end-users can tailor their communication experience to suit specific needs.
In summary, Cisco Systems OL-7861-01 is a powerful networking solution that brings together advanced VoIP capabilities, robust security features, and seamless integration with Cisco's communication ecosystem. Its scalability and user-friendly design make it an ideal choice for organizations looking to enhance their communication systems and improve overall productivity.