Installation
Installing the Rails
Installing the Rails
Procedure
Step 1 Remove the mounting template (Cisco
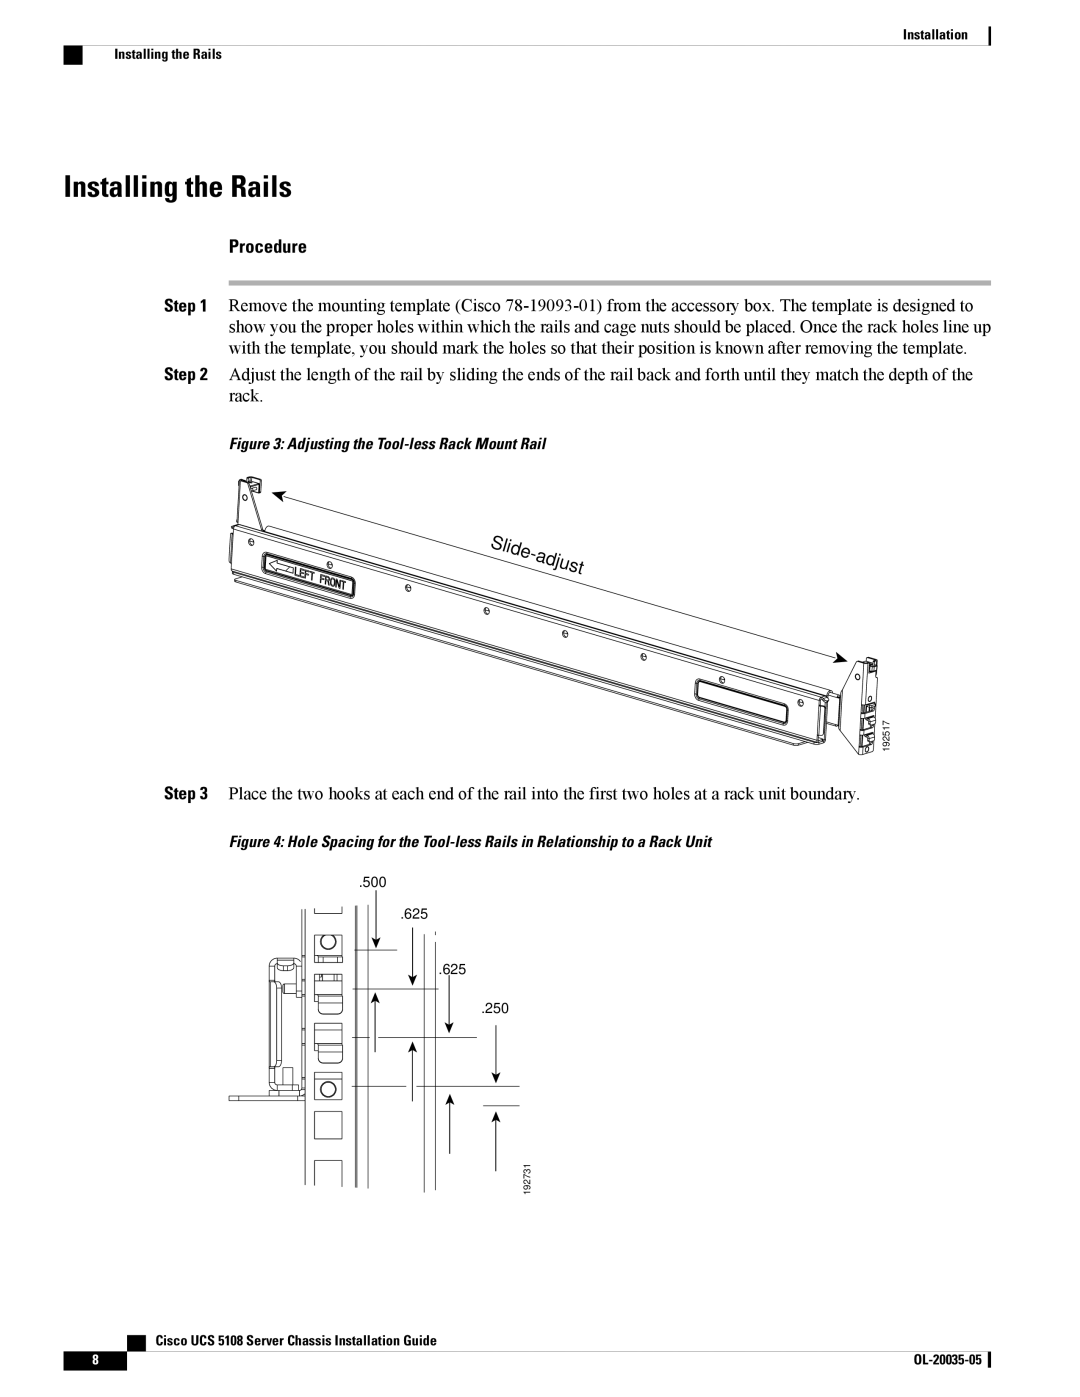
Step 2 Adjust the length of the rail by sliding the ends of the rail back and forth until they match the depth of the rack.
Figure 3: Adjusting the Tool-less Rack Mount Rail
 192517
Step 3 Place the two hooks at each end of the rail into the first two holes at a rack unit boundary.
Figure 4: Hole Spacing for the Tool-less Rails in Relationship to a Rack Unit
.500
.625
.625
.250
192731
Cisco UCS 5108 Server Chassis Installation Guide
8 |