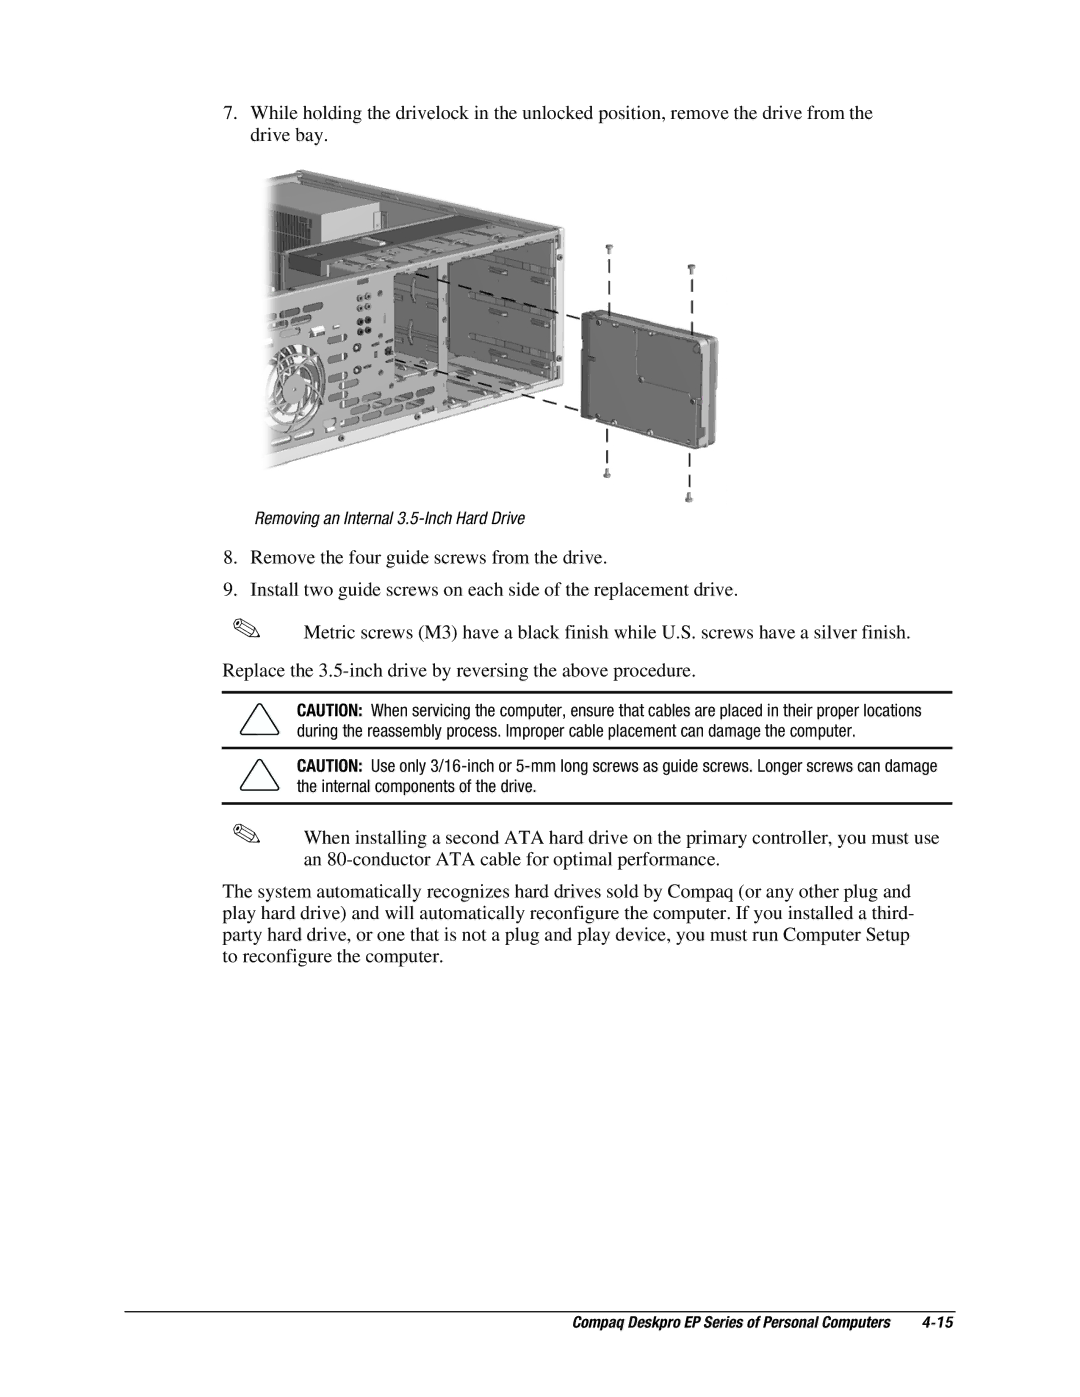
7.While holding the drivelock in the unlocked position, remove the drive from the drive bay.
Removing an Internal 3.5-Inch Hard Drive
8.Remove the four guide screws from the drive.
9.Install two guide screws on each side of the replacement drive.
✎Metric screws (M3) have a black finish while U.S. screws have a silver finish. Replace the
CAUTION: When servicing the computer, ensure that cables are placed in their proper locations during the reassembly process. Improper cable placement can damage the computer.
CAUTION: Use only
✎When installing a second ATA hard drive on the primary controller, you must use an
The system automatically recognizes hard drives sold by Compaq (or any other plug and play hard drive) and will automatically reconfigure the computer. If you installed a third- party hard drive, or one that is not a plug and play device, you must run Computer Setup to reconfigure the computer.
Compaq Deskpro EP Series of Personal Computers |