Installation
2. After five seconds, the VPI LED will switch ON again.
3. At this time, the adapter resets its configuration to the factory default settings and automatically restarts.
The significant factory settings in the AV200 Wall Mount F are presented below:
•Default IP is 10.10.1.69
•Default configuration password is “paterna”
•Default factory reset password is “betera”
•Default network ID is the public network ID
•Default Encryption Key is none.
2.4.3LED Definitions
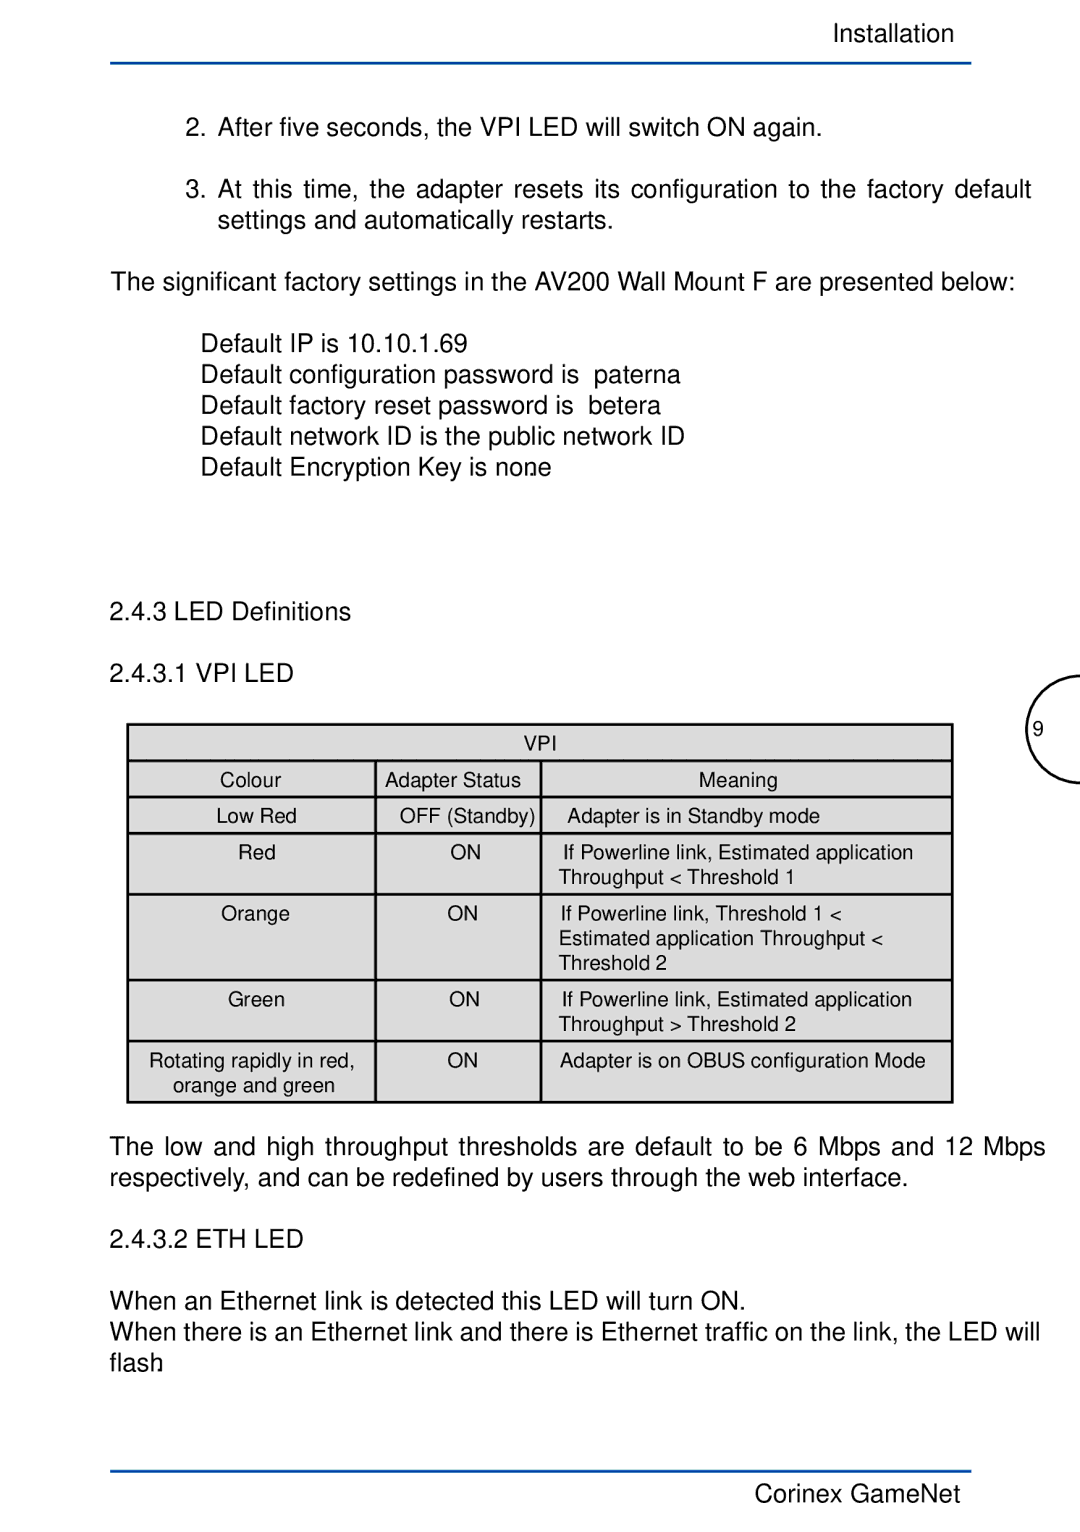
2.4.3.1 VPI LED
VPI
Colour | Adapter Status | Meaning |
|
|
|
Low Red | OFF (Standby) | Adapter is in Standby mode |
|
|
|
Red | ON | If Powerline link, Estimated application |
|
| Throughput < Threshold 1 |
|
|
|
Orange | ON | If Powerline link, Threshold 1 < |
|
| Estimated application Throughput < |
|
| Threshold 2 |
|
|
|
Green | ON | If Powerline link, Estimated application |
|
| Throughput > Threshold 2 |
|
|
|
Rotating rapidly in red, | ON | Adapter is on OBUS configuration Mode |
orange and green |
|
|
|
|
|
9
The low and high throughput thresholds are default to be 6 Mbps and 12 Mbps respectively, and can be redefined by users through the web interface.
2.4.3.2 ETH LED
When an Ethernet link is detected this LED will turn ON.
When there is an Ethernet link and there is Ethernet traffic on the link, the LED will flash.