This power tool is equipped with a
This plug requires a mating
WARNING: TO MAINTAIN PROPER TOOL GROUND- ING WHENEVER THE OUTLET YOU ARE PLAN- NING TO USE FOR THIS POWER TOOL IS OF THE
TWO PRONG TYPE, DO NOT REMOVE OR ALTER THE GROUNDING PRONG IN ANY MANNER. USE
AN ADAPTER AS SHOWN AND ALWAYS CON-
NECT THE GROUNDING PRONG TO KNOWN GROUND.
It is recommended that you have a qualified electri- cian replace the two prong outlet with a properly grounded three prong outlet.
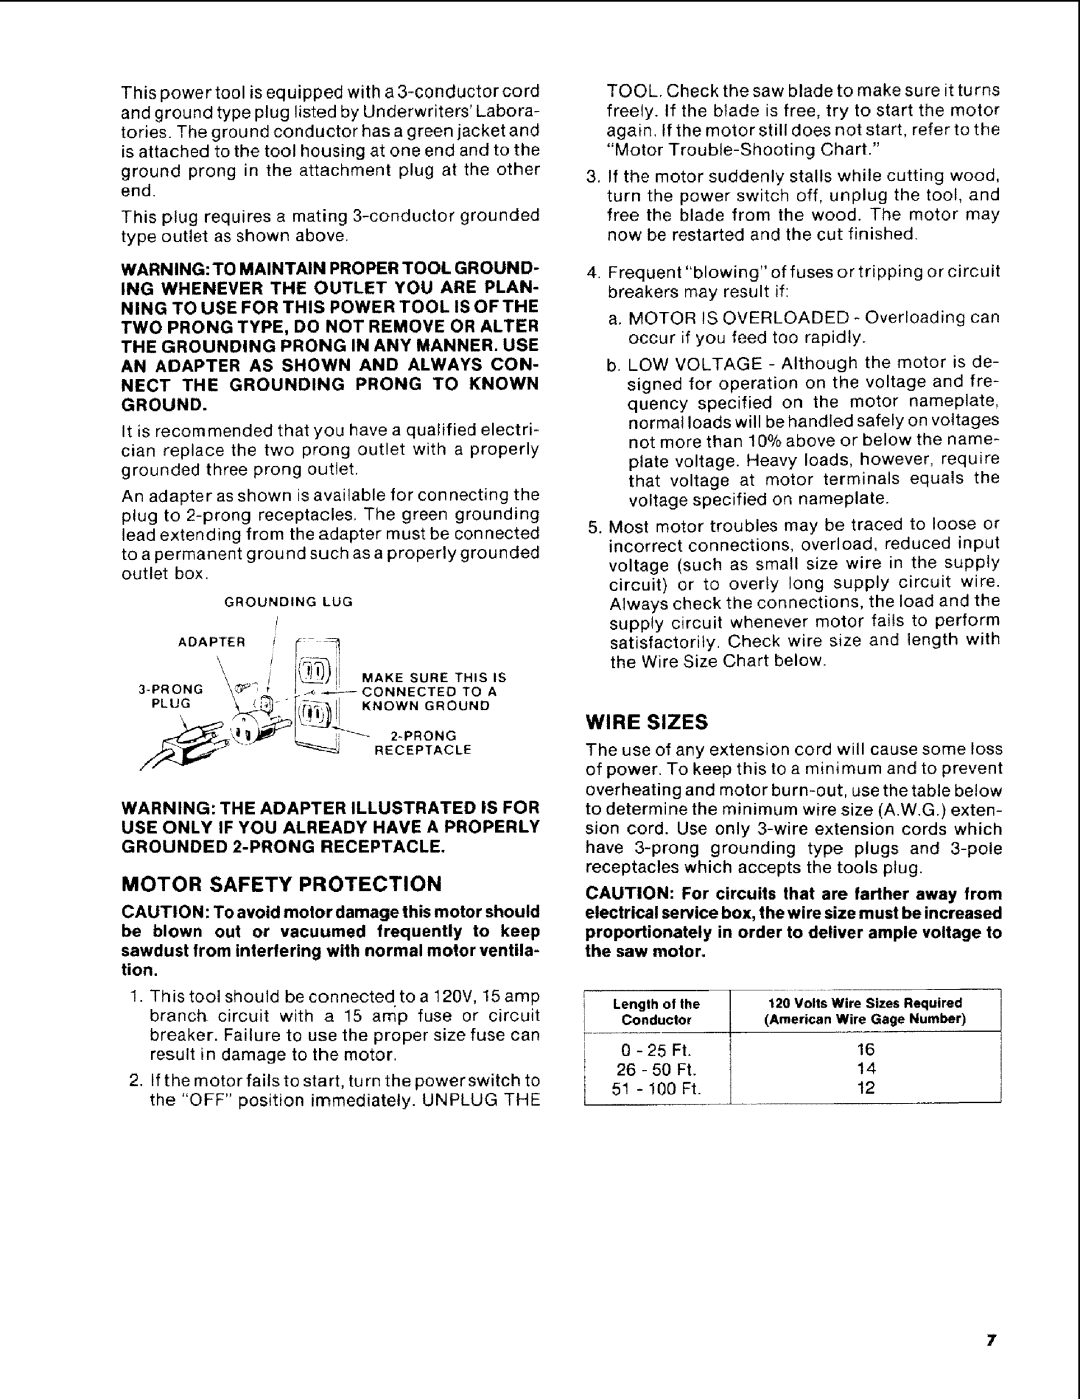
An adapter as shown is available for connecting the plug to
GROUNDING LUG
/
ADAPTER | I | _: _ |
|
|
|
| |
| \\ | _ I | I{'_T_) il | MAKE | SURE | THIS | IS |
\_ | '._._ | CONNECTED | TO | A | |||
PLUG | \ | _ | " I_II | KNOWN | GROUND |
| |
|
| ||||||
| _" | " | RECEPTACLE |
|
| ||
WARNING: THE ADAPTER ILLUSTRATED IS FOR USE ONLY IF YOU ALREADY HAVE A PROPERLY GROUNDED
MOTOR SAFETY PROTECTION
CAUTION: To avoid motor damage this motor should be blown out or vacuumed frequently to keep
sawdust from interfering with normal motor ventila- tion.
1.This tool should be connected to a 120V, 15 amp branch circuit with a 15 amp fuse or circuit breaker. Failure to use the proper size fuse can result in damage to the motor.
2.If the motor fails to start, turn the power switch to the "OFF" position immediately. UNPLUG THE
TOOL. Check the saw blade to make sure it turns freely. If the blade is free, try to start the motor again. If the motor still does not start, refer to the "Motor
. If the motor suddenly stalls while cutting wood, turn the power switch off, unplug the tool, and free the blade from the wood. The motor may now be restarted and the cut finished.
4.Frequent "blowing" of fuses or tripping or circuit breakers may result if:
a. MOTOR IS OVERLOADED - Overloading can occur if you feed too rapidly.
b.LOW VOLTAGE - Although the motor is de- signed for operation on the voltage and fre-
quency specified on the motor nameplate, normal loads will be handled safely on voltages not more than 10% above or below the name-
plate voltage. Heavy loads, however, require that voltage at motor terminals equals the voltage specified on nameplate.
5.Most motor troubles may be traced to loose or incorrect connections, overload, reduced input
voltage (such as small size wire in the supply circuit) or to overly long supply circuit wire. Always check the connections, the load and the supply circuit whenever motor fails to perform satisfactorily. Check wire size and length with the Wire Size Chart below.
WIRE SIZES
The use of any extension cord will cause some loss of power. To keep this to a minimum and to prevent overheating and motor
CAUTION: For circuits that are farther away from electrical service box, the wire size must be increased proportionately in order to deliver ample voltage to the saw motor.
Length of the | 120 Volts | Wire | Sizes Required | |
Conductor | (American | Wire | Gage Number) | |
0 | - 25 Ft. |
| 16 | |
26 - 50 Ft. |
| 14 | ||
51 | - 100 Ft. |
| 12 | |