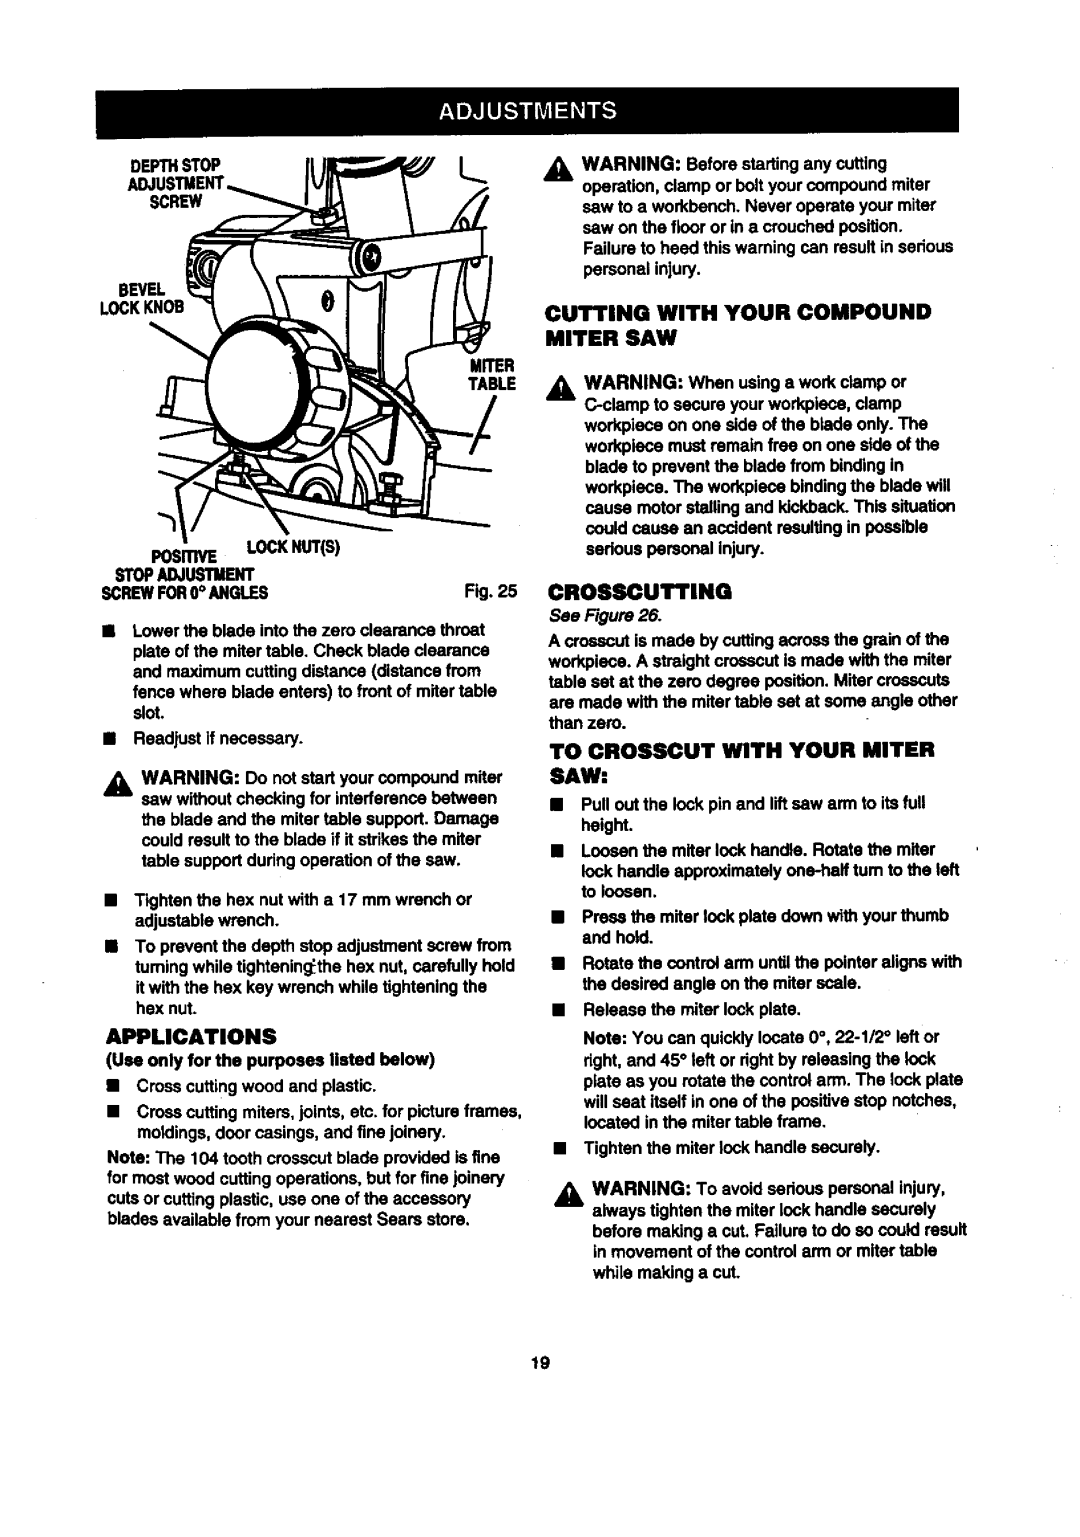
DEPTHSTOPL...
SCREW
BEVEL
MITER
TABLE
POSITIVE LOCKNUT(S) STOPADJUSTMENT
SCREWFOR0° ANGLESFig,25
Lower the blade into the zero clearance throat
plate of the miter table. Check blade clearance and maximumcutting distance (distancefrom
fence where blade enters) to front of miter table slot.
•Readjust if necessary.
_k WARNING: Do not start yourcompound miter sew withoutchecking for interference between the blade and the miter table support. Damage could resultto the blade if it strikesthe miter table supportduring operation of the saw.
•Tightenthe hex nut with a 17 mm wrench or adjustablewrench.
•To preventthe depth stop adjustment screw from tuming while tightening_thehex nut, carefully hold
it with the hex key wrench while tighteningthe hsx nut.
APPLICATIONS
(Use only for the purposes nsted below)
•Cross cuttingwood and plastic.
•Cross cuffing miters,joints, etc. for pictureframes, moldings,door casings, and fine joinery.
Note: The 104 tooth crosscutblade provided is fine for mostwood cutting operations,but for fine joinery cuts or cuffingplastic, use one of the accessory blades available from your nearest Sears store.
WARNING: Beforestarting any cutting operation,clamp or bolt your compoundmiter saw to a workbench. Never operate your miter
sew on the floor or in a crouchedposition. Failure to heed this warningcan result in serious personal injury.
CUTTING WITH YOUR COMPOUND
MITER SAW
_, WARNING: When using a work clamp or
CROSSCUTTING
See Figure 26.
A crosscutis made by cutting acrossthe grain of the workplace. A straightcrosscutis made with the miter table set at the zero degree position. Miter crosscuts are made with the miter table set at some angle other then zero.
TO CROSSCUT WITH YOUR MITER SAW:
•Pull out the lock pin and lift sew arm to its full height.
•Loosen the miter lock handle. Rotate the miter
lock handle
•Press the miter lock plate down with your thumb and hold.
•Rotate the controlarm untilthe pointer aligns with the desired angle on the miter scale,
•Release the miter lock plate.
Note: You can quicklylocate 0 °,
•Tighten the miter lock handle securely.
WARNING: To avoidsedous personalinjury, always tighten the miter lock handle securely
before making a cut. Failure to do so could result in movement of the controlarm or miter table
while making a cut.
19