Alignment
Guard Installation Steps/Align Riving
Knife to Blade
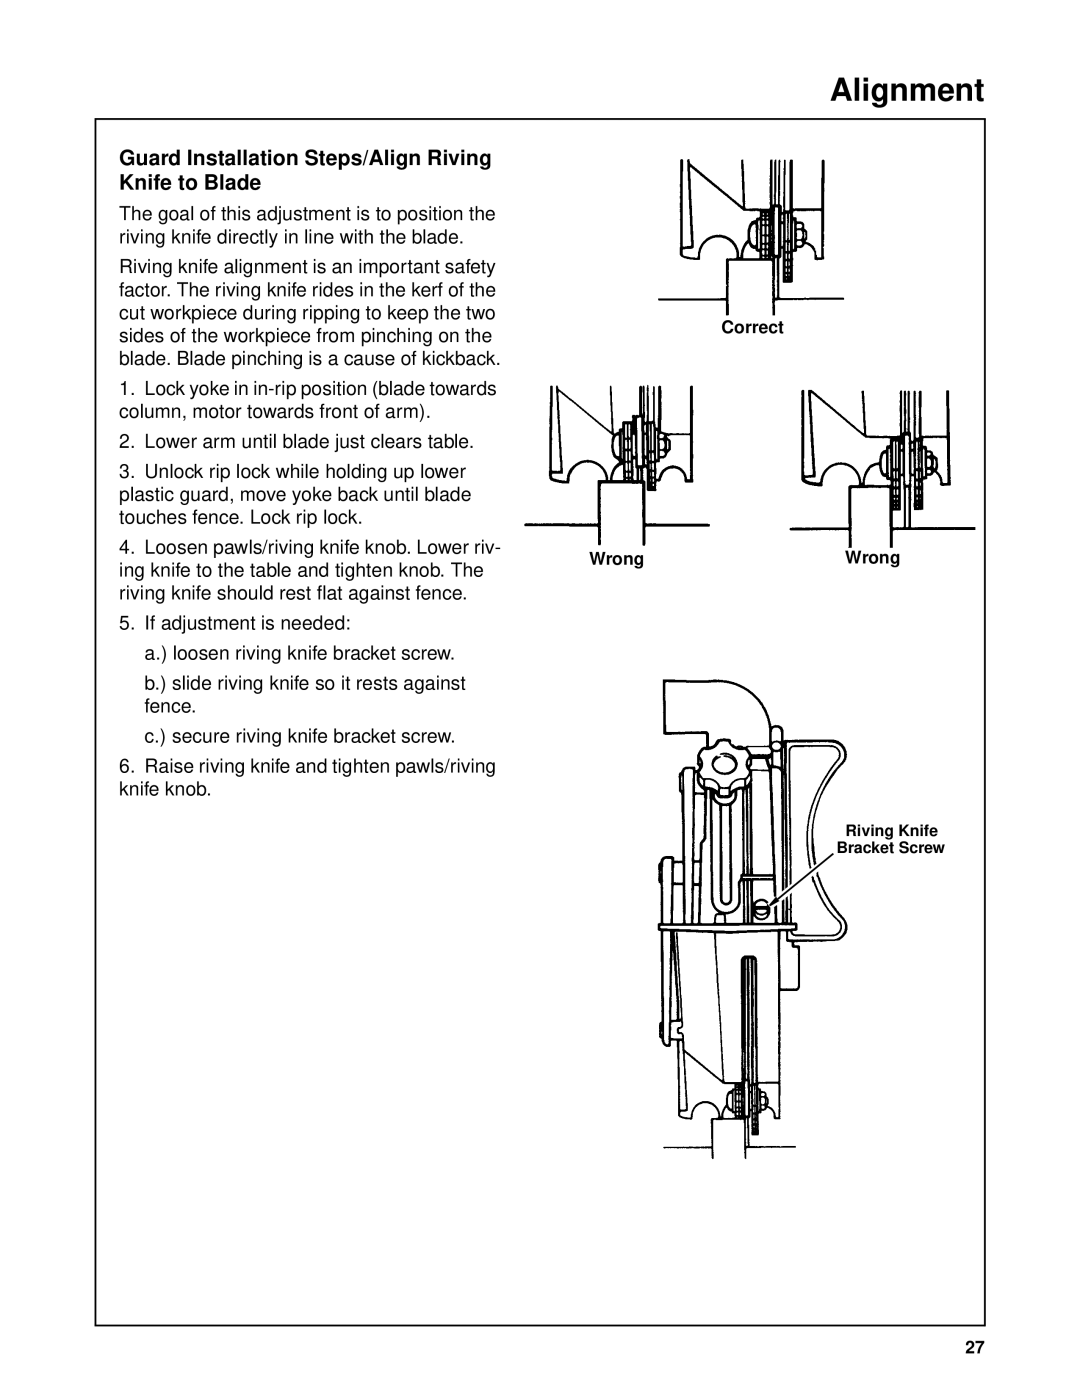
The goal of this adjustment is to position the riving knife directly in line with the blade.
Riving knife alignment is an important safety factor. The riving knife rides in the kerf of the cut workpiece during ripping to keep the two
sides of the workpiece from pinching on the |
| Correct | ||
|
| |||
blade. Blade pinching is a cause of kickback. |
|
| ||
1. | Lock yoke in |
|
| |
column, motor towards front of arm). |
|
| ||
2. | Lower arm until blade just clears table. |
|
| |
3. | Unlock rip lock while holding up lower |
|
| |
plastic guard, move yoke back until blade |
|
| ||
touches fence. Lock rip lock. |
|
| ||
4. | Loosen pawls/riving knife knob. Lower riv- | Wrong | Wrong | |
ing knife to the table and tighten knob. The | ||||
|
| |||
riving knife should rest flat against fence.
5.If adjustment is needed:
a.) loosen riving knife bracket screw.
b.) slide riving knife so it rests against fence.
c.) secure riving knife bracket screw.
6.Raise riving knife and tighten pawls/riving knife knob.
Riving Knife
Bracket Screw
27