| Frequently Asked Questions |
Step 4: Click Apply and then Continue.
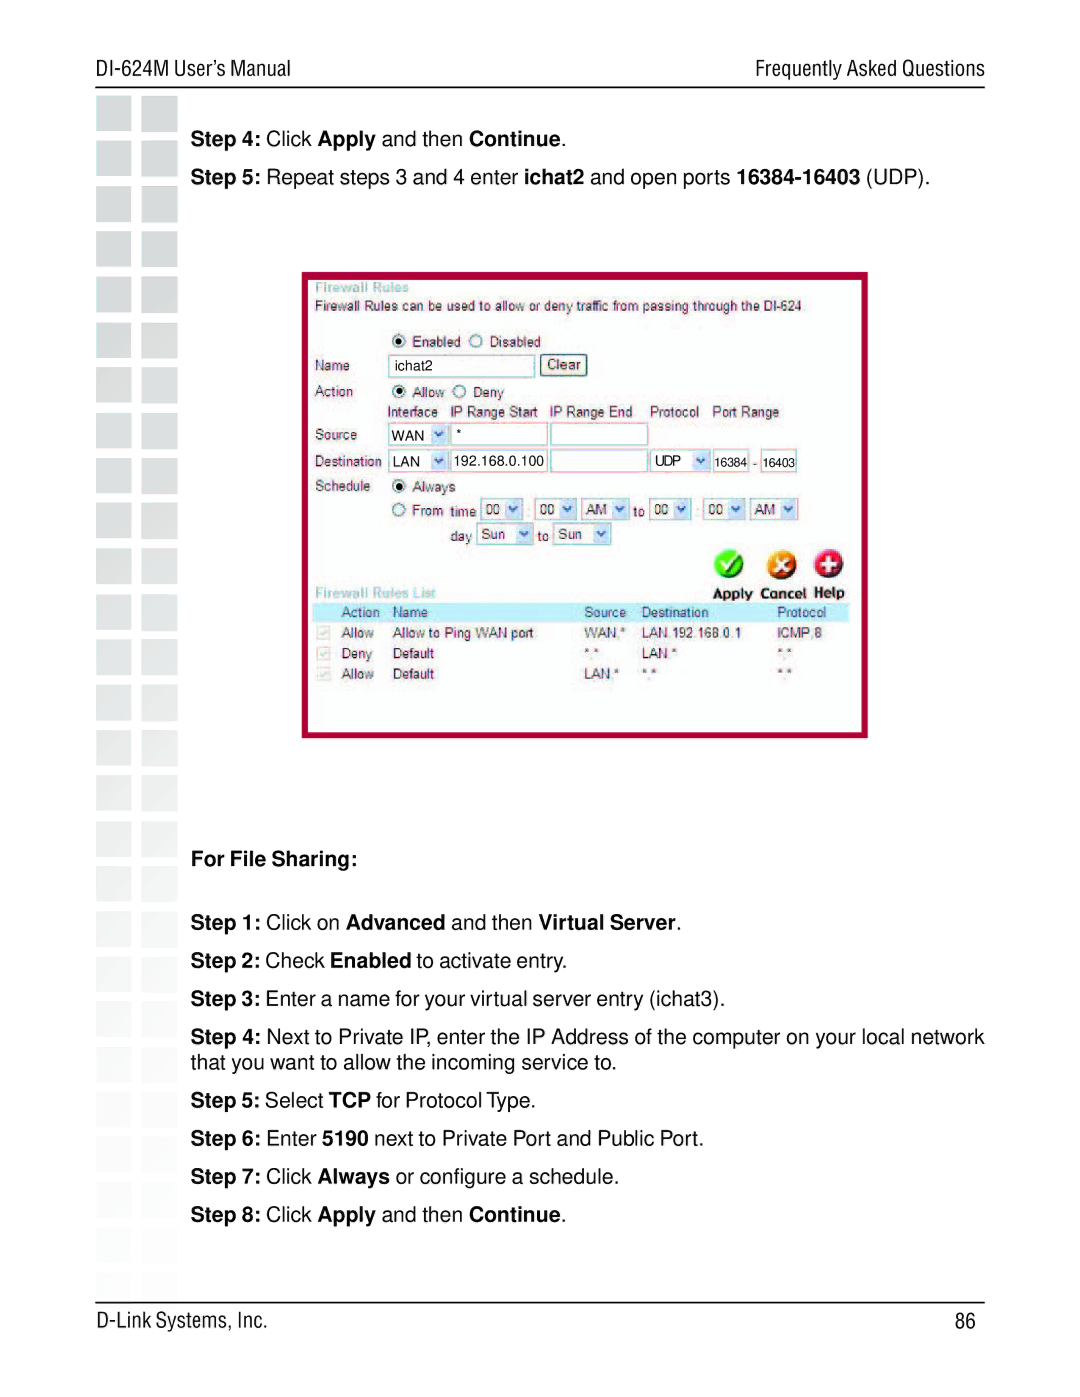
Step 5: Repeat steps 3 and 4 enter ichat2 and open ports
ichat2 |
|
|
WAN | * |
|
LAN | 192.168.0.100 | UDP |
16384 16403
For File Sharing:
Step 1: Click on Advanced and then Virtual Server.
Step 2: Check Enabled to activate entry.
Step 3: Enter a name for your virtual server entry (ichat3).
Step 4: Next to Private IP, enter the IP Address of the computer on your local network that you want to allow the incoming service to.
Step 5: Select TCP for Protocol Type.
Step 6: Enter 5190 next to Private Port and Public Port.
Step 7: Click Always or configure a schedule.
Step 8: Click Apply and then Continue.
86 |
