Frequently Asked Questions (continued)
Why can´t I access the Web-based configuration? (continued)
How can I assign a Static IP Address in Windows 98/Me? (continued)
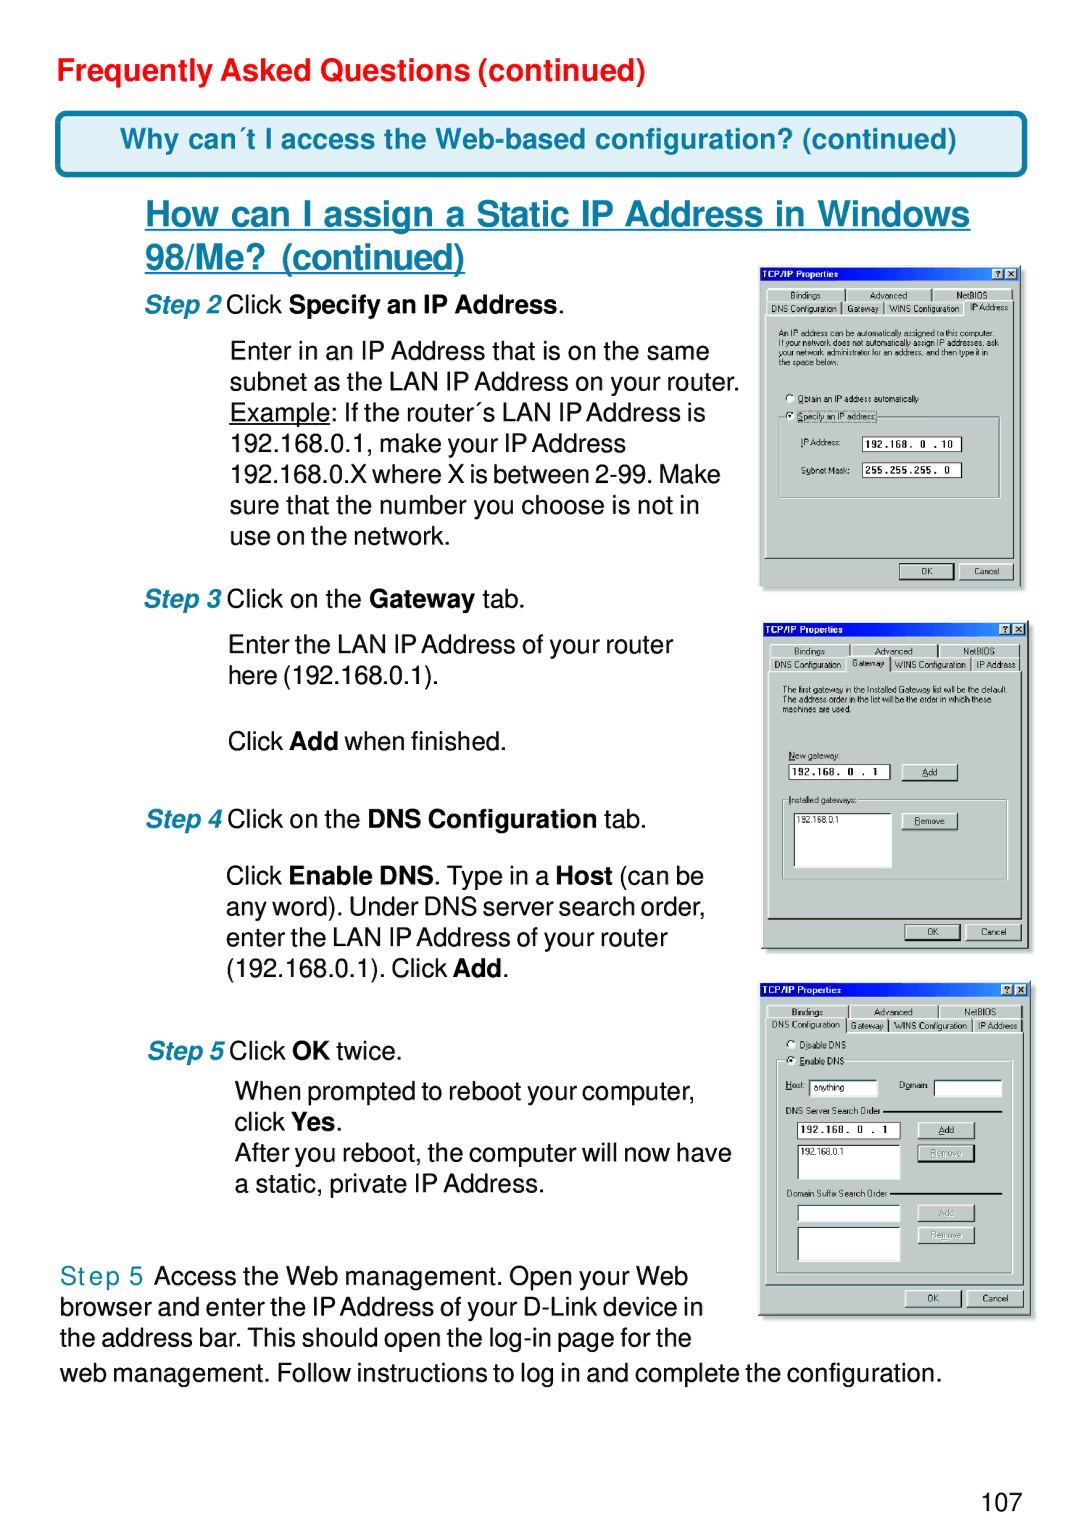
Step 2 Click Specify an IP Address.
Enter in an IP Address that is on the same subnet as the LAN IP Address on your router. Example: If the router´s LAN IP Address is 192.168.0.1, make your IP Address 192.168.0.X where X is between
Step 3 Click on the Gateway tab.
Enter the LAN IP Address of your router here (192.168.0.1).
Click Add when finished.
Step 4 Click on the DNS Configuration tab.
Click Enable DNS. Type in a Host (can be any word). Under DNS server search order, enter the LAN IP Address of your router (192.168.0.1). Click Add.
Step 5 Click OK twice.
When prompted to reboot your computer, click Yes.
After you reboot, the computer will now have a static, private IP Address.
Step 5 Access the Web management. Open your Web browser and enter the IP Address of your
web management. Follow instructions to log in and complete the configuration.
107