Setting the AUTO-ON TIMER (cont’d)

5)All of the settings are now registered. TURN

THE UNIT “OFF” USING THE I/O SWITCH.

6)To set the AUTO-ONtimer, the unit must be turned to the “off” position (non-operational).

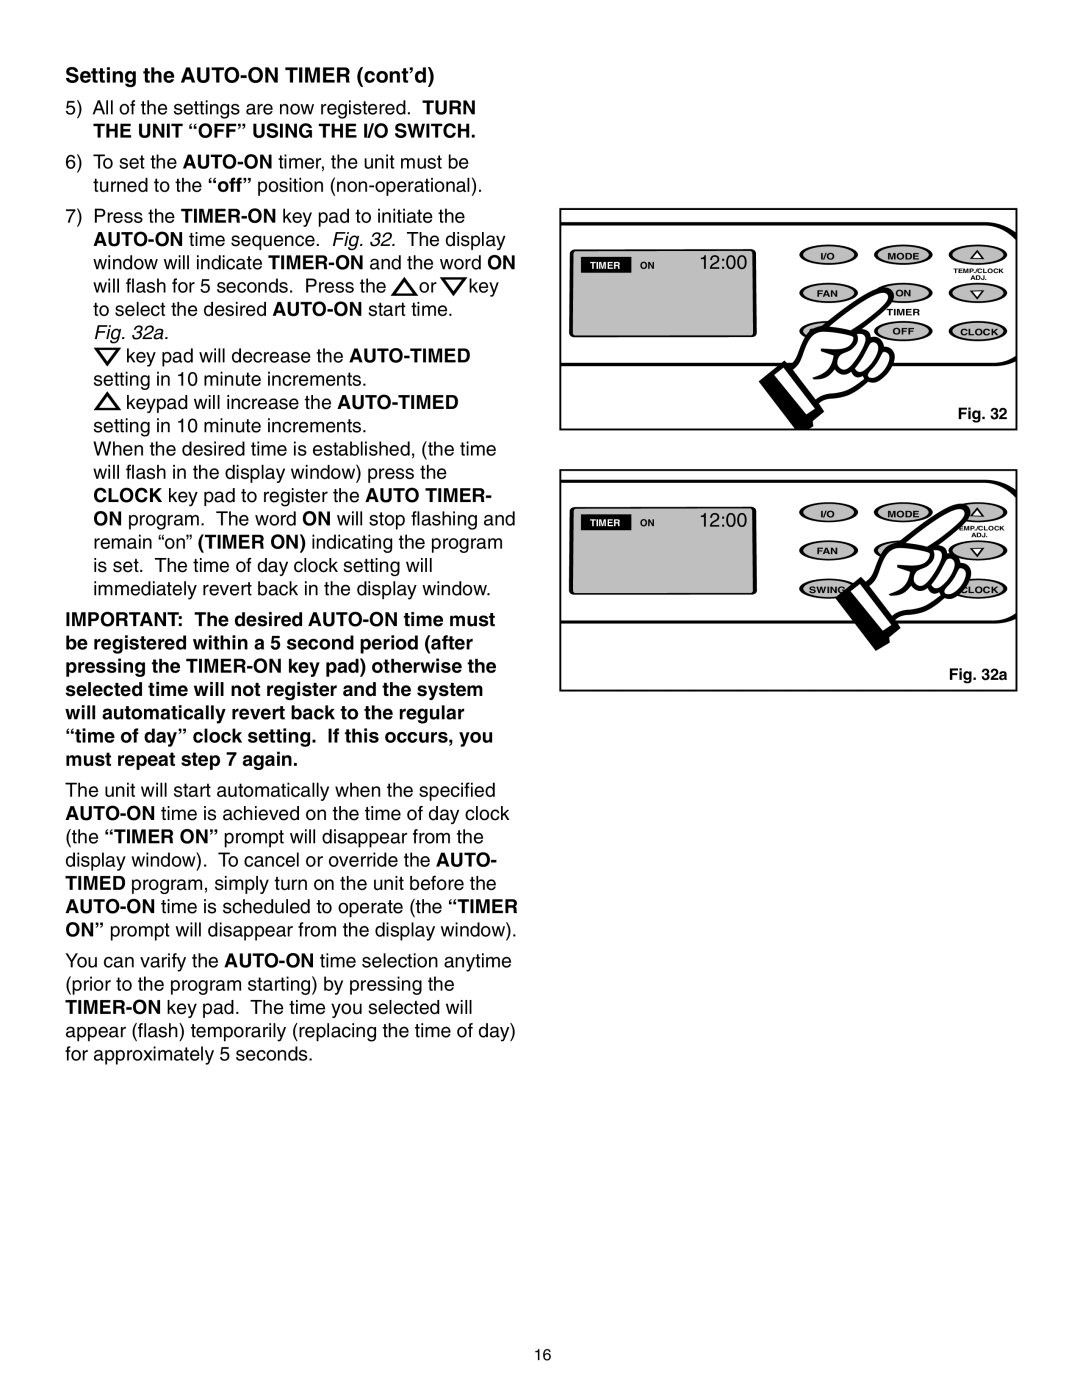
7)Press the TIMER-ONkey pad to initiate the AUTO-ONtime sequence. Fig. 32. The display

window will indicate TIMER-ONand the word ON

will flash for 5 seconds. Press the orkey to select the desired AUTO-ONstart time.

Fig. 32a.

key pad will decrease the AUTO-TIMEDsetting in 10 minute increments.

keypad will increase the AUTO-TIMEDsetting in 10 minute increments.

When the desired time is established, (the time will flash in the display window) press the CLOCK key pad to register the AUTO TIMER- ON program. The word ON will stop flashing and remain “on” (TIMER ON) indicating the program is set. The time of day clock setting will immediately revert back in the display window.

IMPORTANT: The desired AUTO-ON time must be registered within a 5 second period (after pressing the TIMER-ON key pad) otherwise the selected time will not register and the system will automatically revert back to the regular “time of day” clock setting. If this occurs, you must repeat step 7 again.

The unit will start automatically when the specified AUTO-ONtime is achieved on the time of day clock (the “TIMER ON” prompt will disappear from the display window). To cancel or override the AUTO- TIMED program, simply turn on the unit before the AUTO-ONtime is scheduled to operate (the “TIMER ON” prompt will disappear from the display window).

You can varify the AUTO-ONtime selection anytime (prior to the program starting) by pressing the TIMER-ONkey pad. The time you selected will appear (flash) temporarily (replacing the time of day) for approximately 5 seconds.

TIMER ON

12:00

I/O

MODE


TEMP./CLOCK


ADJ.


FAN

ON


TIMER


SWING

OFF

CLOCK

Fig. 32

TIMER ON

12:00

I/O

MODE


TEMP./CLOCK


ADJ.


FAN

ON


TIMER


SWING

OFF

CLOCK

Fig. 32a

16

Page 34
Image 34
Danby SPAC8499 manual Setting the AUTO-ON Timer cont’d, All of the settings are now registered. Turn