Remote Control Operating
Instructions
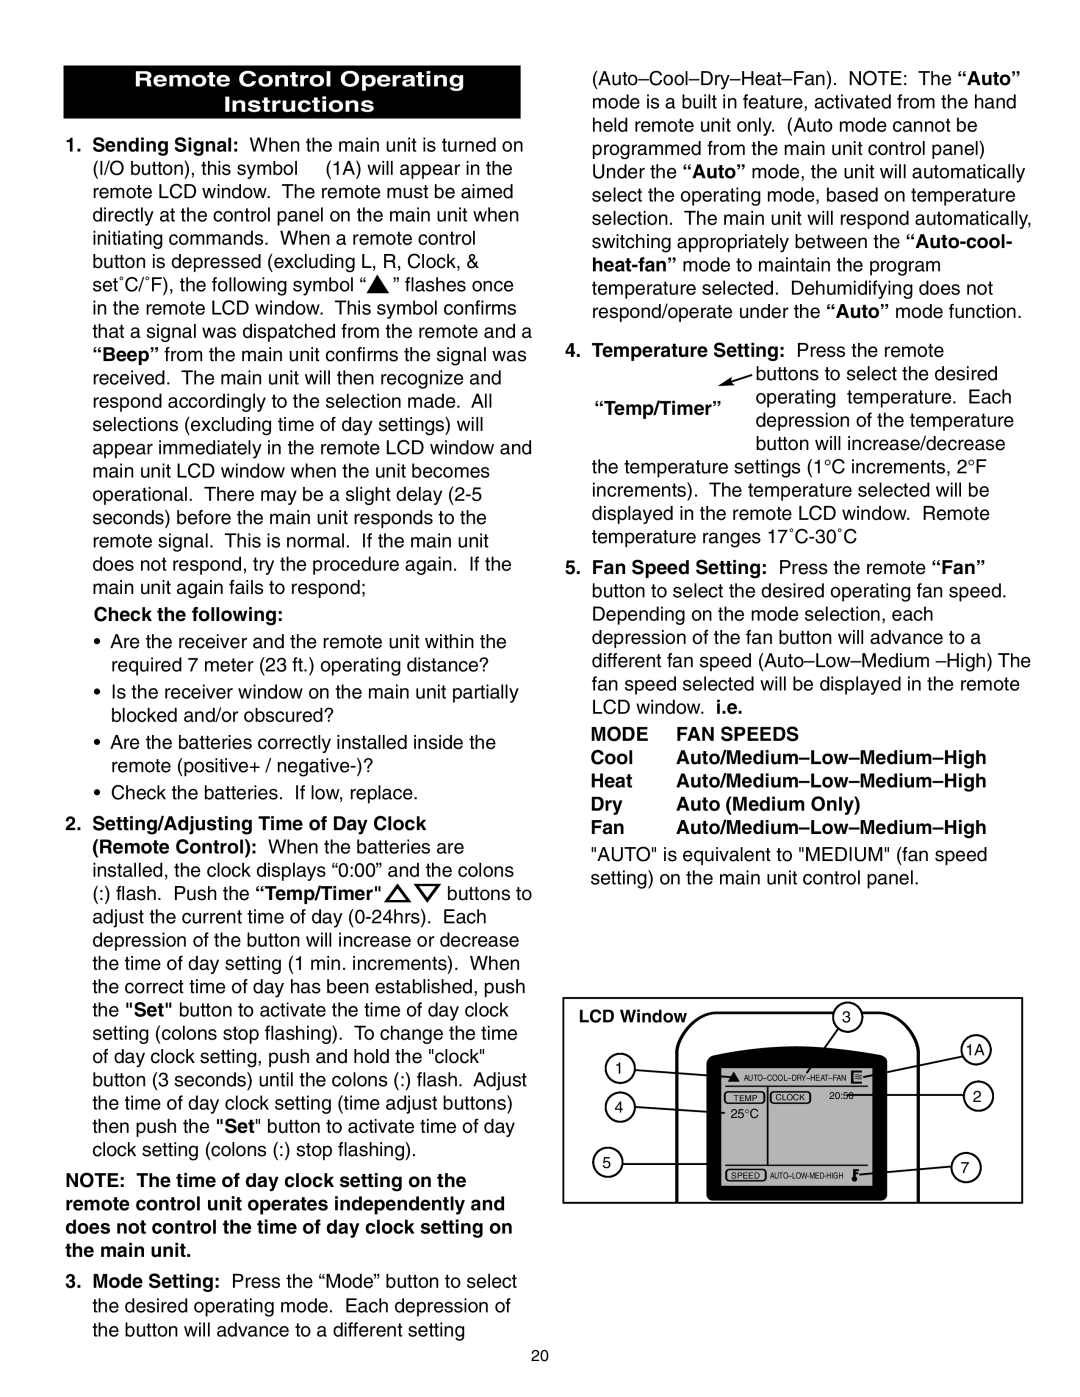
1. Sending Signal: When the main unit is turned on |
(I/O button), this symbol (1A) will appear in the |
remote LCD window. The remote must be aimed |
directly at the control panel on the main unit when |
initiating commands. When a remote control |
button is depressed (excluding L, R, Clock, & |
set˚C/˚F), the following symbol “ ” flashes once |
in the remote LCD window. This symbol confirms |
that a signal was dispatched from the remote and a |
“Beep” from the main unit confirms the signal was |
received. The main unit will then recognize and |
4. Temperature Setting: Press the remote
![]() buttons to select the desired
buttons to select the desired
respond accordingly to the selection made. All |
selections (excluding time of day settings) will |
appear immediately in the remote LCD window and |
“Temp/Timer”
operating temperature. Each depression of the temperature button will increase/decrease
main unit LCD window when the unit becomes | ||
operational. There may be a slight delay | ||
seconds) before the main unit responds to the | ||
remote signal. This is normal. If the main unit | ||
does not respond, try the procedure again. If the | ||
main unit again fails to respond; |
| |
Check the following: |
| |
• Are the receiver and the remote unit within the | ||
| required 7 meter (23 ft.) operating distance? | |
• | Is the receiver window on the main unit partially | |
| blocked and/or obscured? |
|
• | Are the batteries correctly installed inside the | |
| remote (positive+ / |
|
• | Check the batteries. If low, replace. |
|
2. Setting/Adjusting Time of Day Clock |
| |
(Remote Control): When the batteries are | ||
installed, the clock displays “0:00” and the colons | ||
(:) flash. Push the “Temp/Timer" | buttons to | |
adjust the current time of day | ||
depression of the button will increase or decrease | ||
the time of day setting (1 min. increments). When | ||
the correct time of day has been established, push | ||
the "Set" button to activate the time of day clock | ||
setting (colons stop flashing). To change the time | ||
of day clock setting, push and hold the "clock" | ||
button (3 seconds) until the colons (:) flash. Adjust | ||
the time of day clock setting (time adjust buttons) | ||
then push the "Set" button to activate time of day | ||
clock setting (colons (:) stop flashing). |
| |
NOTE: The time of day clock setting on the remote control unit operates independently and does not control the time of day clock setting on the main unit.
3.Mode Setting: Press the “Mode” button to select the desired operating mode. Each depression of the button will advance to a different setting
the temperature settings (1°C increments, 2°F increments). The temperature selected will be displayed in the remote LCD window. Remote temperature ranges
5.Fan Speed Setting: Press the remote “Fan” button to select the desired operating fan speed. Depending on the mode selection, each depression of the fan button will advance to a different fan speed
MODE | FAN SPEEDS |
Cool | |
Heat | |
Dry | Auto (Medium Only) |
Fan |
"AUTO" is equivalent to "MEDIUM" (fan speed setting) on the main unit control panel.
LCD Window | 3 |
1A
1
4 | TEMP | CLOCK 20:50 | 2 |
25°C |
|
| |
|
|
| |
5 | SPEED | 7 | |
| |||
|
|
MODE
I/O TEMP./TIME
20