CAUTION: Before you perform this procedure, see "Safety
CAUTION: See "Protecting Against Electrostatic Discharge" in the safety instructions in your System Information Guide.
1.Connect the power cable and the interface cable to the diskette drive.
2.Slide the diskette drive into the externally accessible drive bay (see Figure
3.Stand the system upright.
4.Install the cover (see "Installing the Cover" in "Troubleshooting Your System").
5.Install the bezel (see "Installing the Bezel" in "Troubleshooting Your System").
6.Reconnect the system to its electrical outlet and turn the system on, including any attached peripherals.
Front-Panel Drive Inserts
To help keep dust and dirt out of the system, a plastic insert in the bezel covers each empty external drive bay. Additionally, each empty external drive bay is covered by a metal insert in the chassis to maintain to maintain Federal Communications Commission (FCC) certification of the system.
Before you install a
Removing the Front-Panel Drive Inserts
CAUTION: Before you perform this procedure, see "Safety
1.Turn off the system, including any attached peripherals, and disconnect the system from the electrical outlet.
2.Remove the bezel (see "Removing the Bezel" in "Troubleshooting Your System").
3.Remove the cover (see "Removing the Cover" in "Troubleshooting Your System").
4.Remove the bezel drive insert:
a.From inside the bezel, press the tabs at each end of the insert inward with your thumbs.
b.Pull the insert out of the bezel.
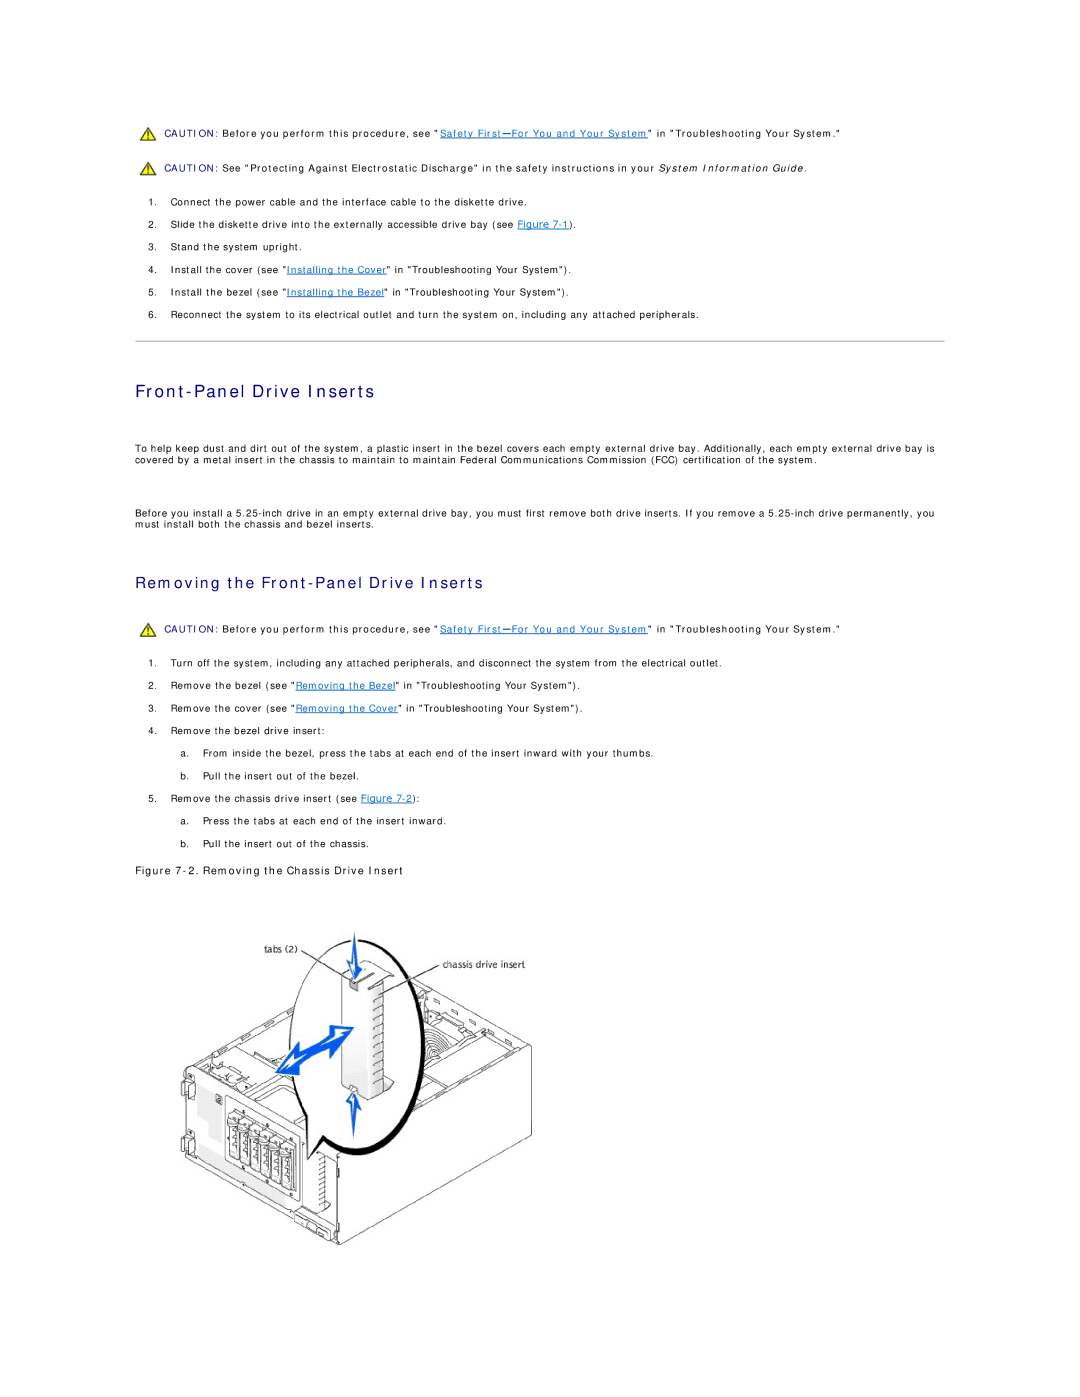
5.Remove the chassis drive insert (see Figure
a.Press the tabs at each end of the insert inward.
b.Pull the insert out of the chassis.