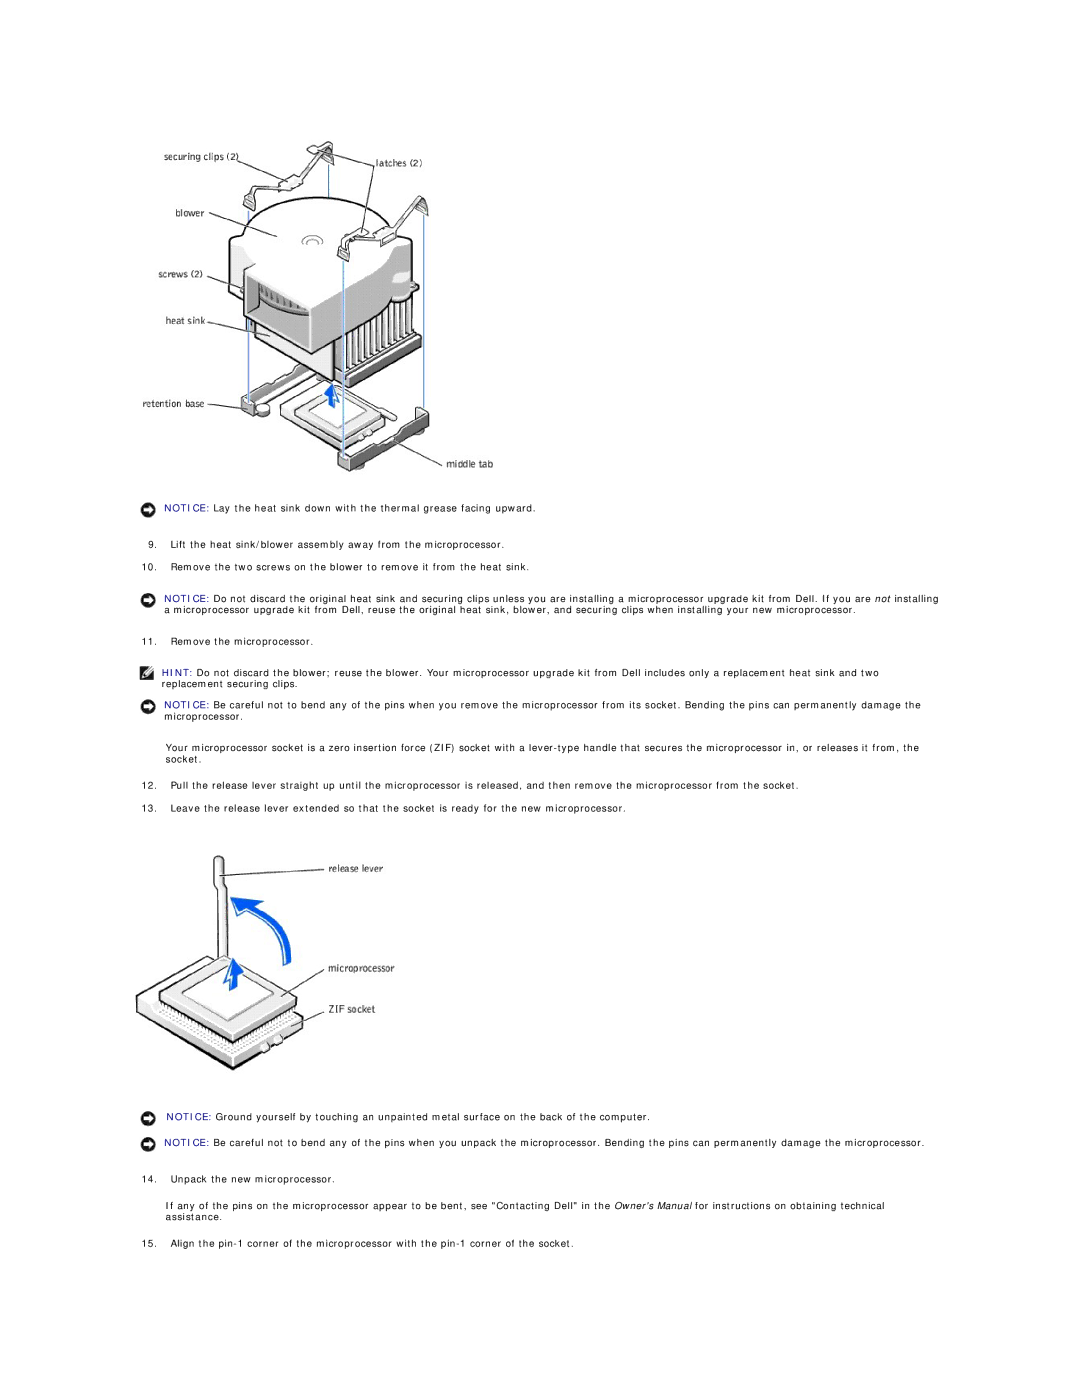
NOTICE: Lay the heat sink down with the thermal grease facing upward.
9.Lift the heat sink/blower assembly away from the microprocessor.
10.Remove the two screws on the blower to remove it from the heat sink.
NOTICE: Do not discard the original heat sink and securing clips unless you are installing a microprocessor upgrade kit from Dell. If you are not installing a microprocessor upgrade kit from Dell, reuse the original heat sink, blower, and securing clips when installing your new microprocessor.
11.Remove the microprocessor.
HINT: Do not discard the blower; reuse the blower. Your microprocessor upgrade kit from Dell includes only a replacement heat sink and two replacement securing clips.
NOTICE: Be careful not to bend any of the pins when you remove the microprocessor from its socket. Bending the pins can permanently damage the microprocessor.
Your microprocessor socket is a zero insertion force (ZIF) socket with a
12.Pull the release lever straight up until the microprocessor is released, and then remove the microprocessor from the socket.
13.Leave the release lever extended so that the socket is ready for the new microprocessor.
NOTICE: Ground yourself by touching an unpainted metal surface on the back of the computer.
NOTICE: Be careful not to bend any of the pins when you unpack the microprocessor. Bending the pins can permanently damage the microprocessor.
14.Unpack the new microprocessor.
If any of the pins on the microprocessor appear to be bent, see "Contacting Dell" in the Owner's Manual for instructions on obtaining technical assistance.
15.Align the