![]() 1
1 ![]() captive screws (4)
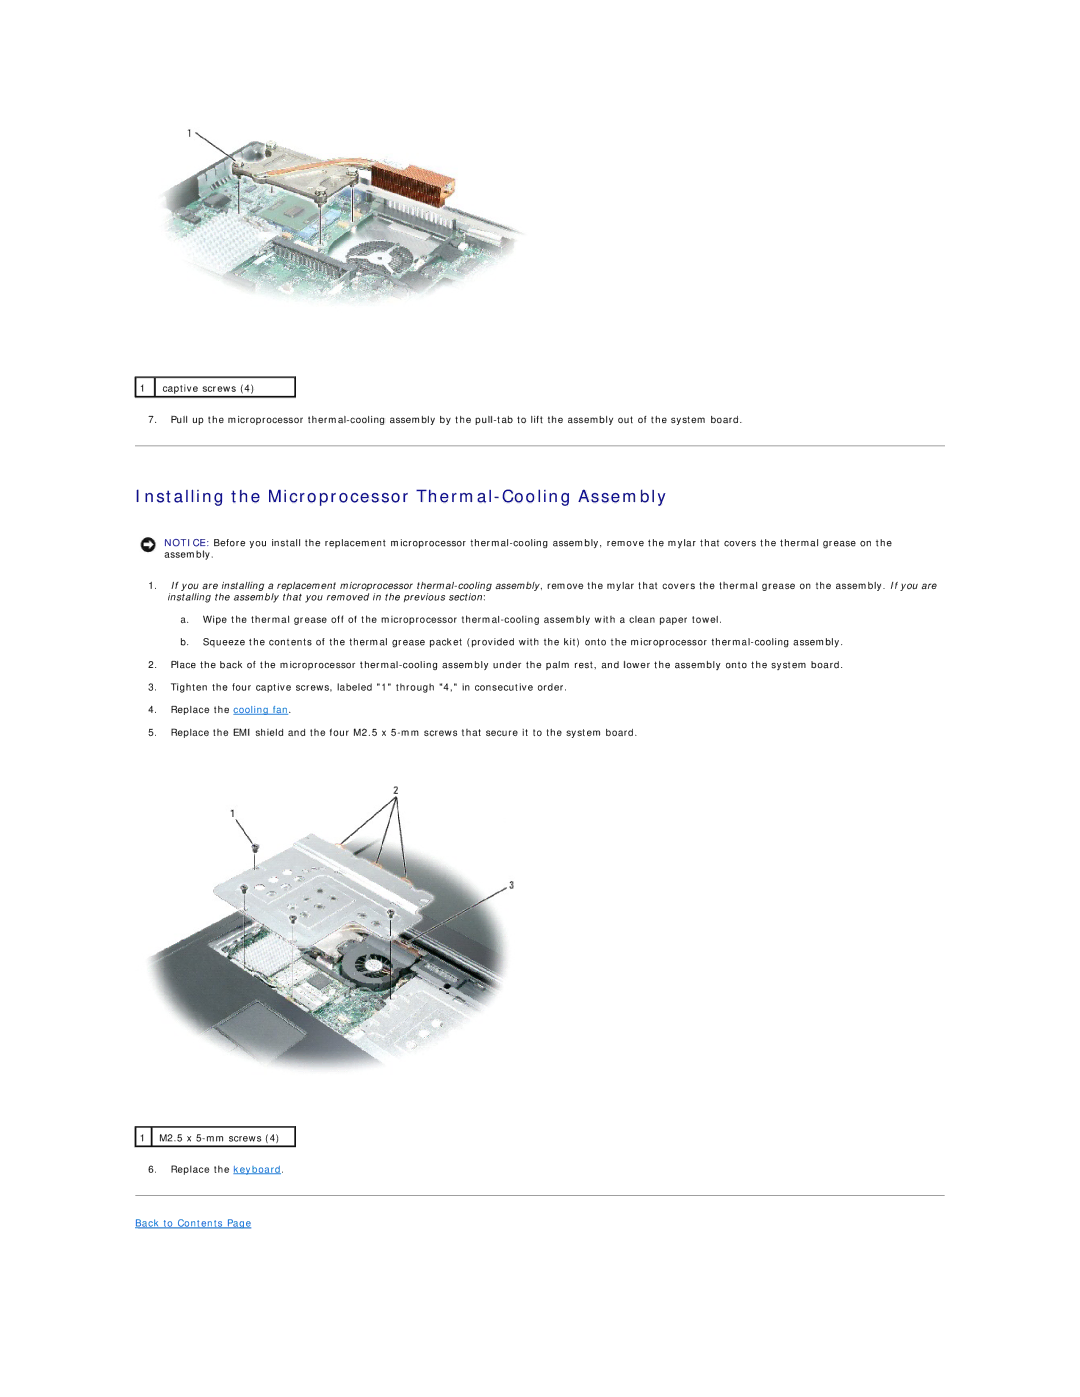
captive screws (4)
7.Pull up the microprocessor
Installing the Microprocessor Thermal-Cooling Assembly
NOTICE: Before you install the replacement microprocessor
1.If you are installing a replacement microprocessor
a.Wipe the thermal grease off of the microprocessor
b.Squeeze the contents of the thermal grease packet (provided with the kit) onto the microprocessor
2.Place the back of the microprocessor
3.Tighten the four captive screws, labeled "1" through "4," in consecutive order.
4.Replace the cooling fan.
5.Replace the EMI shield and the four M2.5 x
![]() 1
1 ![]() M2.5 x
M2.5 x
6.Replace the keyboard.