Table
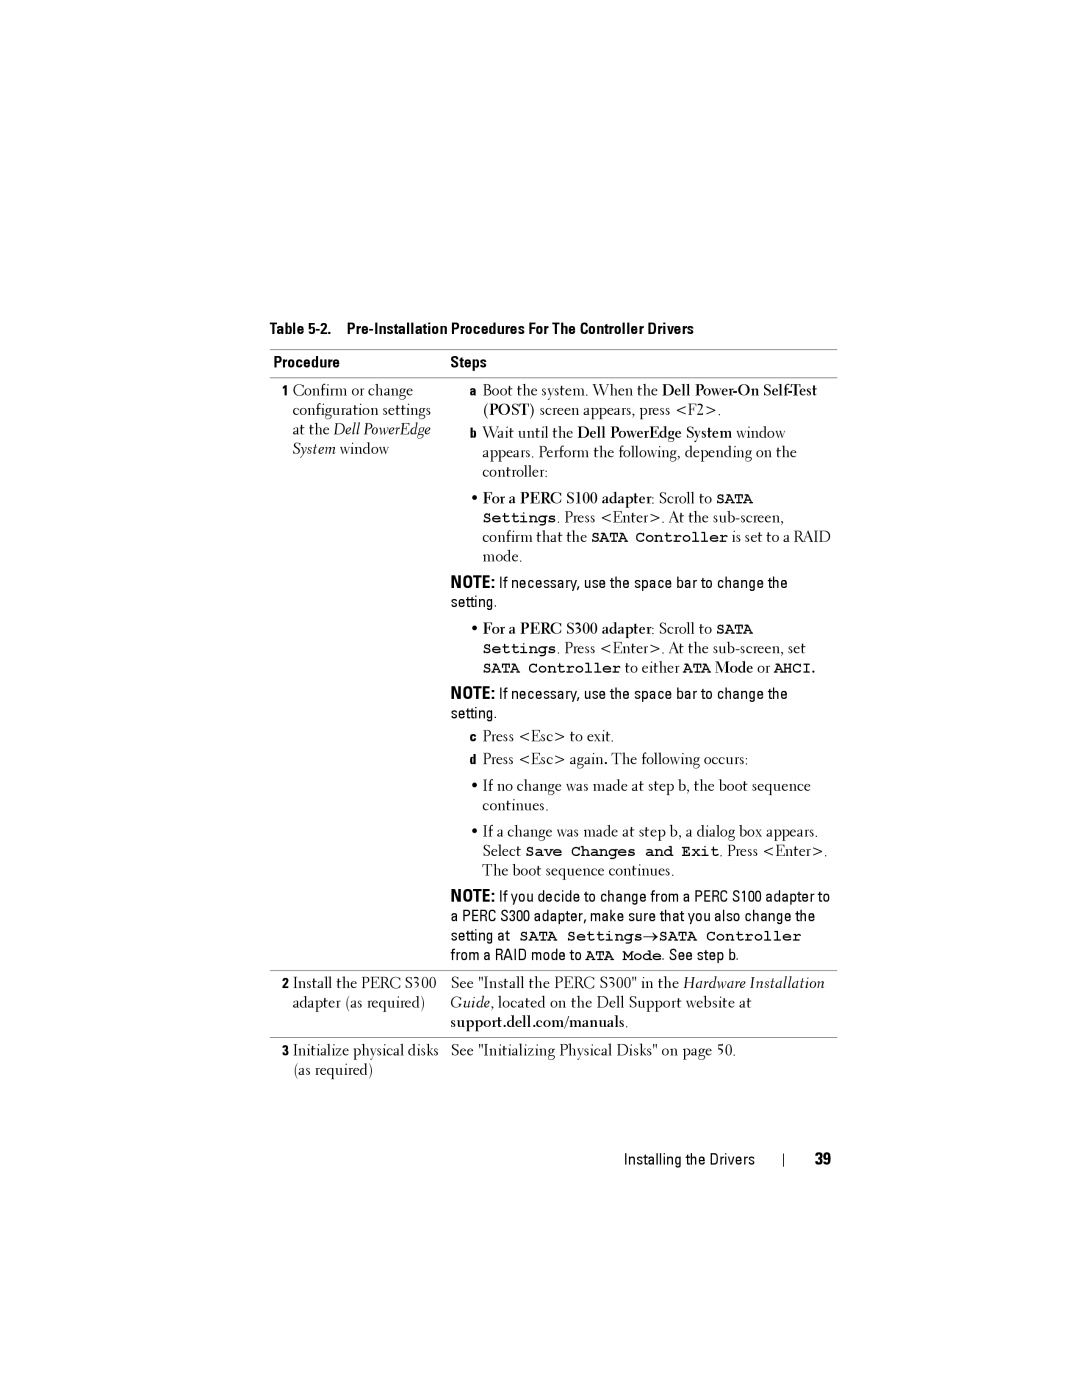
ProcedureSteps
1 Confirm or change configuration settings at the Dell PowerEdge System window
aBoot the system. When the Dell
bWait until the Dell PowerEdge System window appears. Perform the following, depending on the controller:
•For a PERC S100 adapter: Scroll to SATA Settings. Press <Enter>. At the
NOTE: If necessary, use the space bar to change the setting.
•For a PERC S300 adapter: Scroll to SATA Settings. Press <Enter>. At the
SATA Controller to either ATA Mode or AHCI.
NOTE: If necessary, use the space bar to change the setting.
cPress <Esc> to exit.
dPress <Esc> again. The following occurs:
•If no change was made at step b, the boot sequence continues.
•If a change was made at step b, a dialog box appears. Select Save Changes and Exit. Press <Enter>. The boot sequence continues.
NOTE: If you decide to change from a PERC S100 adapter to a PERC S300 adapter, make sure that you also change the setting at SATA Settings→SATA Controller from a RAID mode to ATA Mode. See step b.
2 Install the PERC S300 See "Install the PERC S300" in the Hardware Installation adapter (as required) Guide, located on the Dell Support website at
support.dell.com/manuals.
3 Initialize physical disks See "Initializing Physical Disks" on page 50. (as required)
Installing the Drivers
39