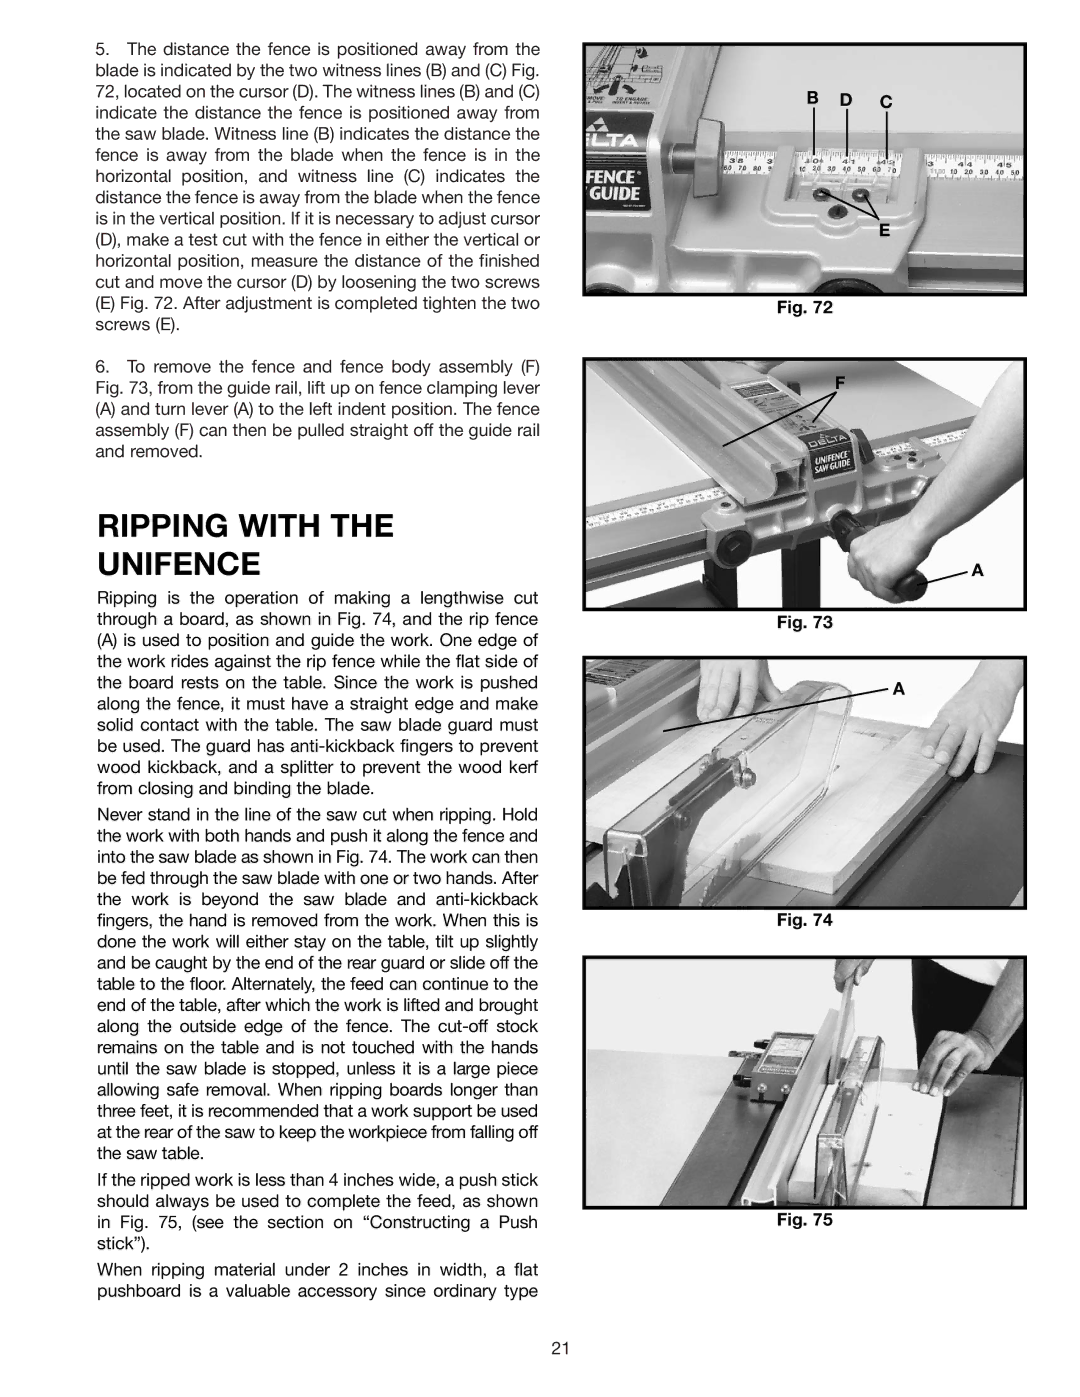
5.The distance the fence is positioned away from the blade is indicated by the two witness lines (B) and (C) Fig. 72, located on the cursor (D). The witness lines (B) and (C) indicate the distance the fence is positioned away from the saw blade. Witness line (B) indicates the distance the fence is away from the blade when the fence is in the horizontal position, and witness line (C) indicates the distance the fence is away from the blade when the fence is in the vertical position. If it is necessary to adjust cursor (D), make a test cut with the fence in either the vertical or horizontal position, measure the distance of the finished cut and move the cursor (D) by loosening the two screws
(E) Fig. 72. After adjustment is completed tighten the two screws (E).
6.To remove the fence and fence body assembly (F) Fig. 73, from the guide rail, lift up on fence clamping lever
(A) and turn lever (A) to the left indent position. The fence assembly (F) can then be pulled straight off the guide rail and removed.
RIPPING WITH THE
UNIFENCE
Ripping is the operation of making a lengthwise cut through a board, as shown in Fig. 74, and the rip fence
(A)is used to position and guide the work. One edge of the work rides against the rip fence while the flat side of the board rests on the table. Since the work is pushed along the fence, it must have a straight edge and make solid contact with the table. The saw blade guard must be used. The guard has
Never stand in the line of the saw cut when ripping. Hold the work with both hands and push it along the fence and into the saw blade as shown in Fig. 74. The work can then be fed through the saw blade with one or two hands. After the work is beyond the saw blade and
If the ripped work is less than 4 inches wide, a push stick should always be used to complete the feed, as shown in Fig. 75, (see the section on “Constructing a Push stick”).
When ripping material under 2 inches in width, a flat pushboard is a valuable accessory since ordinary type
B D C
E
Fig. 72
F
A
Fig. 73
A
Fig. 74
Fig. 75
21