ADJUSTING CLAMPING ACTION OF FENCE LOCKING HANDLE
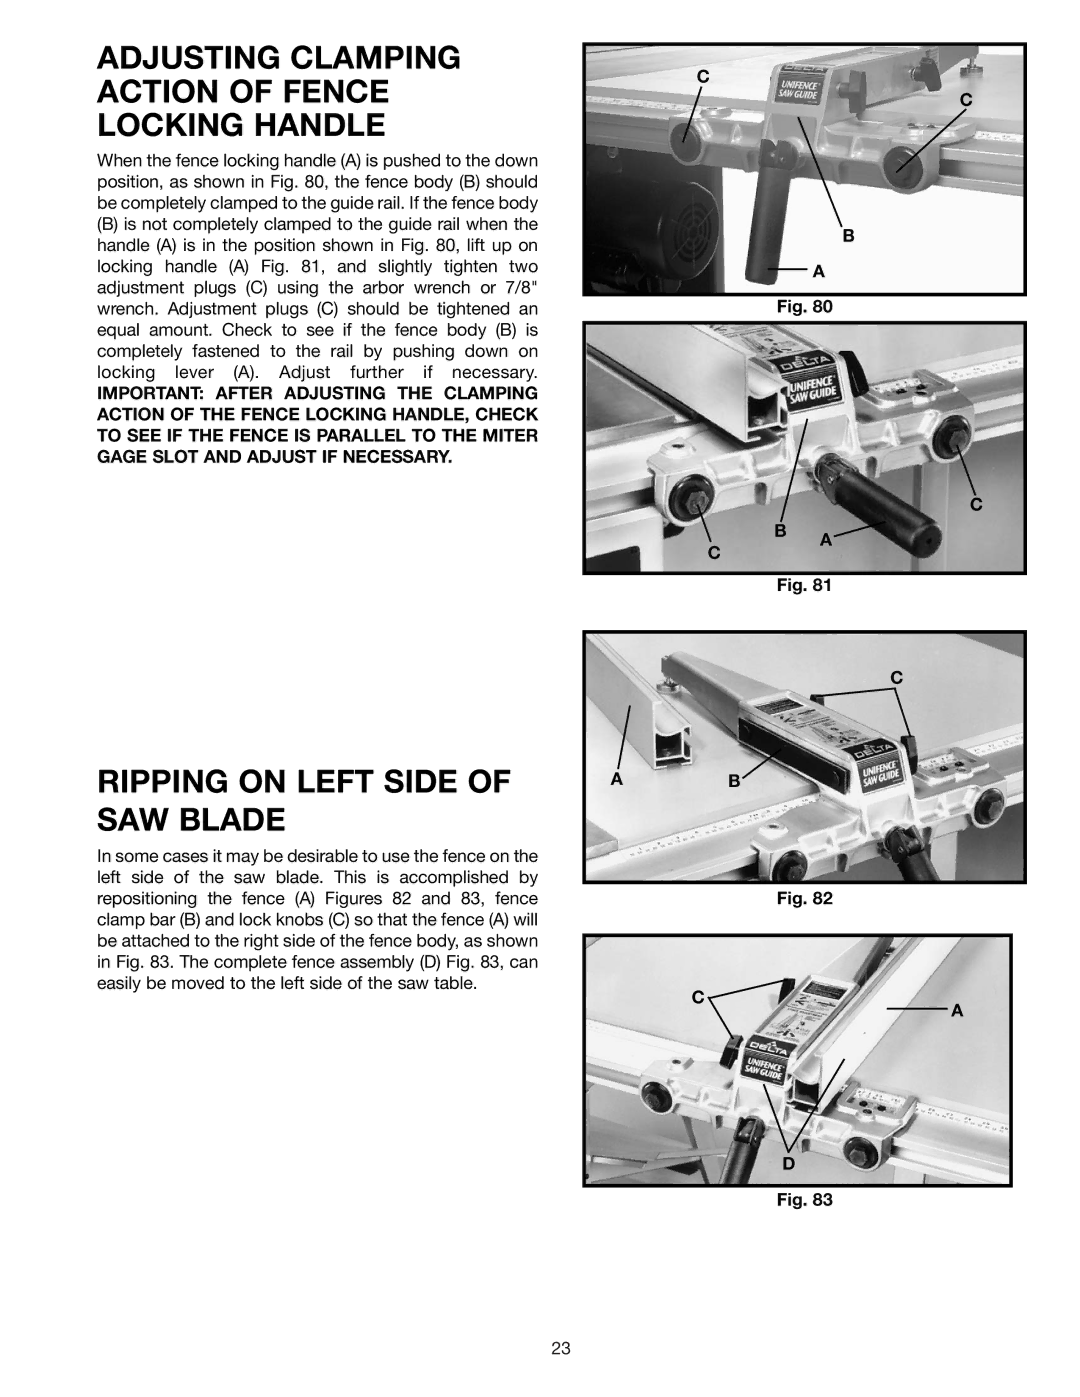
When the fence locking handle (A) is pushed to the down position, as shown in Fig. 80, the fence body (B) should be completely clamped to the guide rail. If the fence body
(B)is not completely clamped to the guide rail when the handle (A) is in the position shown in Fig. 80, lift up on locking handle (A) Fig. 81, and slightly tighten two adjustment plugs (C) using the arbor wrench or 7/8" wrench. Adjustment plugs (C) should be tightened an equal amount. Check to see if the fence body (B) is completely fastened to the rail by pushing down on locking lever (A). Adjust further if necessary.
IMPORTANT: AFTER ADJUSTING THE CLAMPING ACTION OF THE FENCE LOCKING HANDLE, CHECK TO SEE IF THE FENCE IS PARALLEL TO THE MITER GAGE SLOT AND ADJUST IF NECESSARY.
RIPPING ON LEFT SIDE OF SAW BLADE
In some cases it may be desirable to use the fence on the left side of the saw blade. This is accomplished by repositioning the fence (A) Figures 82 and 83, fence clamp bar (B) and lock knobs (C) so that the fence (A) will be attached to the right side of the fence body, as shown in Fig. 83. The complete fence assembly (D) Fig. 83, can easily be moved to the left side of the saw table.
C
C
B
A
Fig. 80
C
B A![]()
C
Fig. 81
C
AB
Fig. 82
C ![]()
A
D
Fig. 83
23