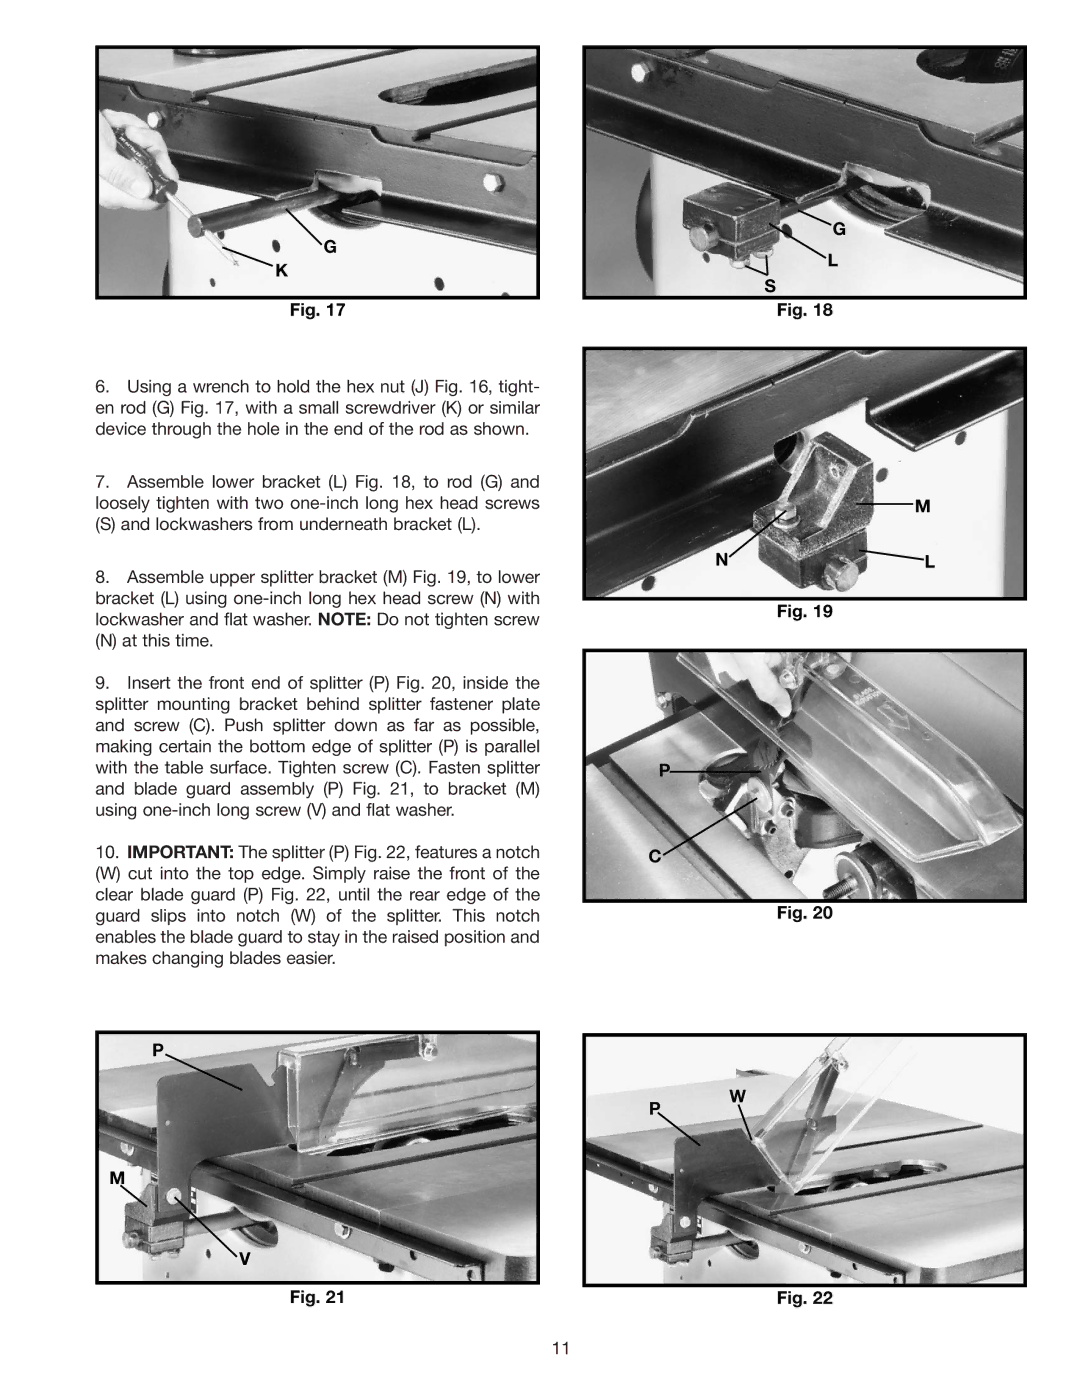
G
K
Fig. 17
6. Using a wrench to hold the hex nut (J) Fig. 16, tight- |
en rod (G) Fig. 17, with a small screwdriver (K) or similar |
device through the hole in the end of the rod as shown. |
7. Assemble lower bracket (L) Fig. 18, to rod (G) and |
loosely tighten with two |
(S) and lockwashers from underneath bracket (L). |
8. Assemble upper splitter bracket (M) Fig. 19, to lower |
bracket (L) using |
lockwasher and flat washer. NOTE: Do not tighten screw |
(N) at this time. |
9. Insert the front end of splitter (P) Fig. 20, inside the |
splitter mounting bracket behind splitter fastener plate |
and screw (C). Push splitter down as far as possible, |
making certain the bottom edge of splitter (P) is parallel |
with the table surface. Tighten screw (C). Fasten splitter |
and blade guard assembly (P) Fig. 21, to bracket (M) |
using |
10. IMPORTANT: The splitter (P) Fig. 22, features a notch |
(W) cut into the top edge. Simply raise the front of the |
clear blade guard (P) Fig. 22, until the rear edge of the |
G
L
S
Fig. 18
M
NL
Fig. 19
P
C
guard slips into notch (W) of the splitter. This notch |
enables the blade guard to stay in the raised position and |
makes changing blades easier. |
P
M
V
Fig. 21
P
Fig. 20
W
Fig. 22
11