Printing to the DiscPainter Printer
General Printing Instructions
Discus for DYMO automatically sets the printer options based on the settings you select on the Project Preview tab. However, if you are printing from another application, you may need to manually control the printer settings. When you are ready to print an image, follow the steps in this section.
To print to a DiscPainter printer
1Insert a blank disc into the printer (see "Loading Discs" on page 6 for information).
2Select Print. This command is typically accessed from the application’s File menu. A dialog box is displayed.
3Select the DiscPainter printer. (If you don’t see a list or menu used to select printers, see the documentation included with the program for instructions on selecting printers.)
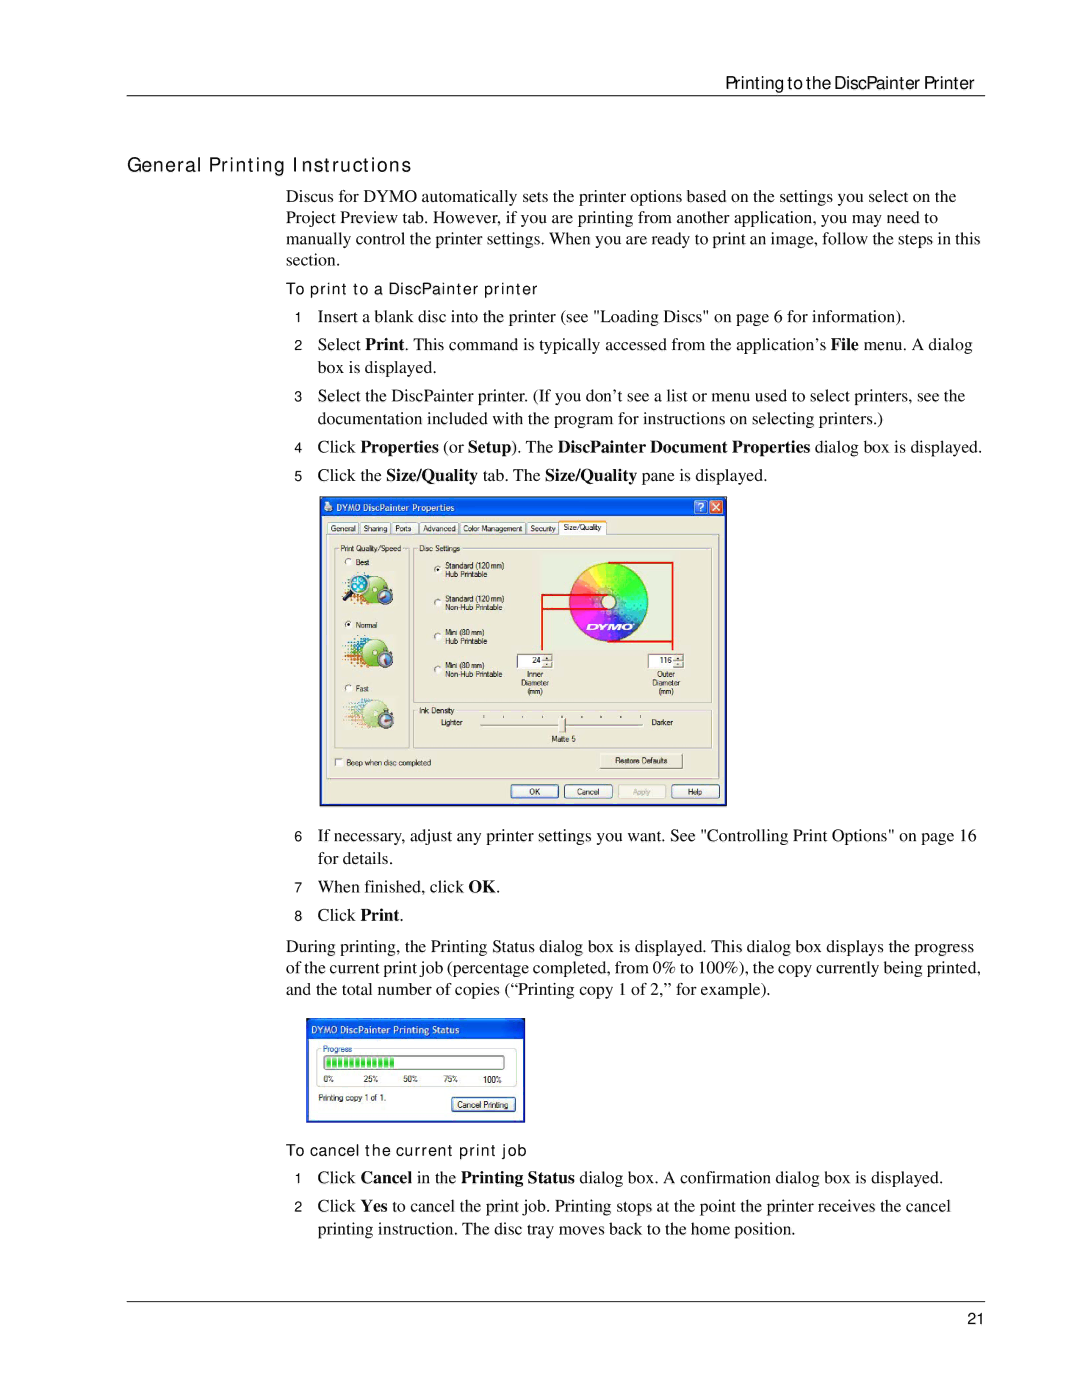
4Click Properties (or Setup). The DiscPainter Document Properties dialog box is displayed.
5Click the Size/Quality tab. The Size/Quality pane is displayed.
6If necessary, adjust any printer settings you want. See "Controlling Print Options" on page 16 for details.
7When finished, click OK.
8Click Print.
During printing, the Printing Status dialog box is displayed. This dialog box displays the progress of the current print job (percentage completed, from 0% to 100%), the copy currently being printed, and the total number of copies (“Printing copy 1 of 2,” for example).
To cancel the current print job
1Click Cancel in the Printing Status dialog box. A confirmation dialog box is displayed.
2Click Yes to cancel the print job. Printing stops at the point the printer receives the cancel printing instruction. The disc tray moves back to the home position.
21