The menu options for the web control screen are as follows.
zCamera – View live video and adjust the video format from the menu.
zLAN – Setup the camera LAN port functions in the menu.
zWLAN ( for
z
zMotion Detection – Configure the Motion Detection Actions here.
zSystem – Setup System utilities and settings in this menu.
zStatus – Shows the camera information and current status in this page.
zUsers – This camera support up to 4 user accounts. You can setup them in this menu.
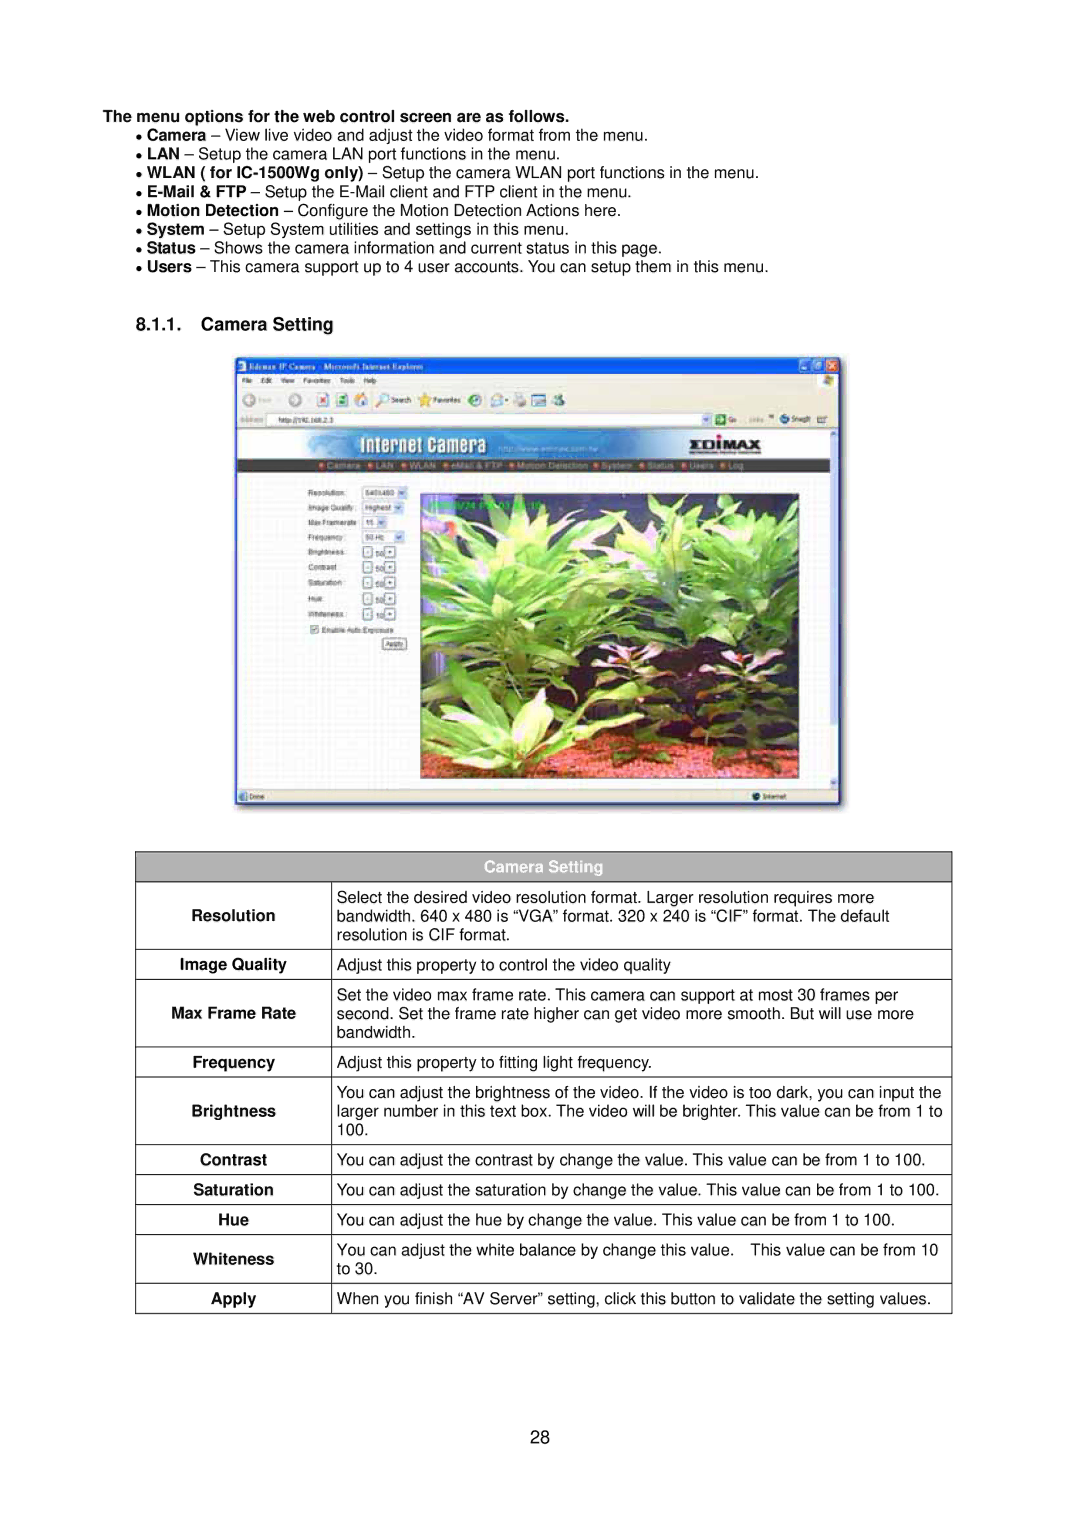
8.1.1.Camera Setting
|
| Camera Setting |
|
| |
| Resolution | Select the desired video resolution format. Larger resolution requires more |
| bandwidth. 640 x 480 is “VGA” format. 320 x 240 is “CIF” format. The default | |
|
| resolution is CIF format. |
| Image Quality | Adjust this property to control the video quality |
|
|
|
| Max Frame Rate | Set the video max frame rate. This camera can support at most 30 frames per |
| second. Set the frame rate higher can get video more smooth. But will use more | |
|
| bandwidth. |
|
|
|
| Frequency | Adjust this property to fitting light frequency. |
|
|
|
| Brightness | You can adjust the brightness of the video. If the video is too dark, you can input the |
| larger number in this text box. The video will be brighter. This value can be from 1 to | |
|
| 100. |
|
|
|
| Contrast | You can adjust the contrast by change the value. This value can be from 1 to 100. |
|
|
|
| Saturation | You can adjust the saturation by change the value. This value can be from 1 to 100. |
|
|
|
| Hue | You can adjust the hue by change the value. This value can be from 1 to 100. |
|
|
|
| Whiteness | You can adjust the white balance by change this value. This value can be from 10 |
| to 30. | |
|
| |
|
|
|
| Apply | When you finish “AV Server” setting, click this button to validate the setting values. |
|
|
|
28