M AG I C 2 6 0
Section 7: Rear Panel Overview
1 | 2 | 3 | 4 | 5 | 6 | 7 |
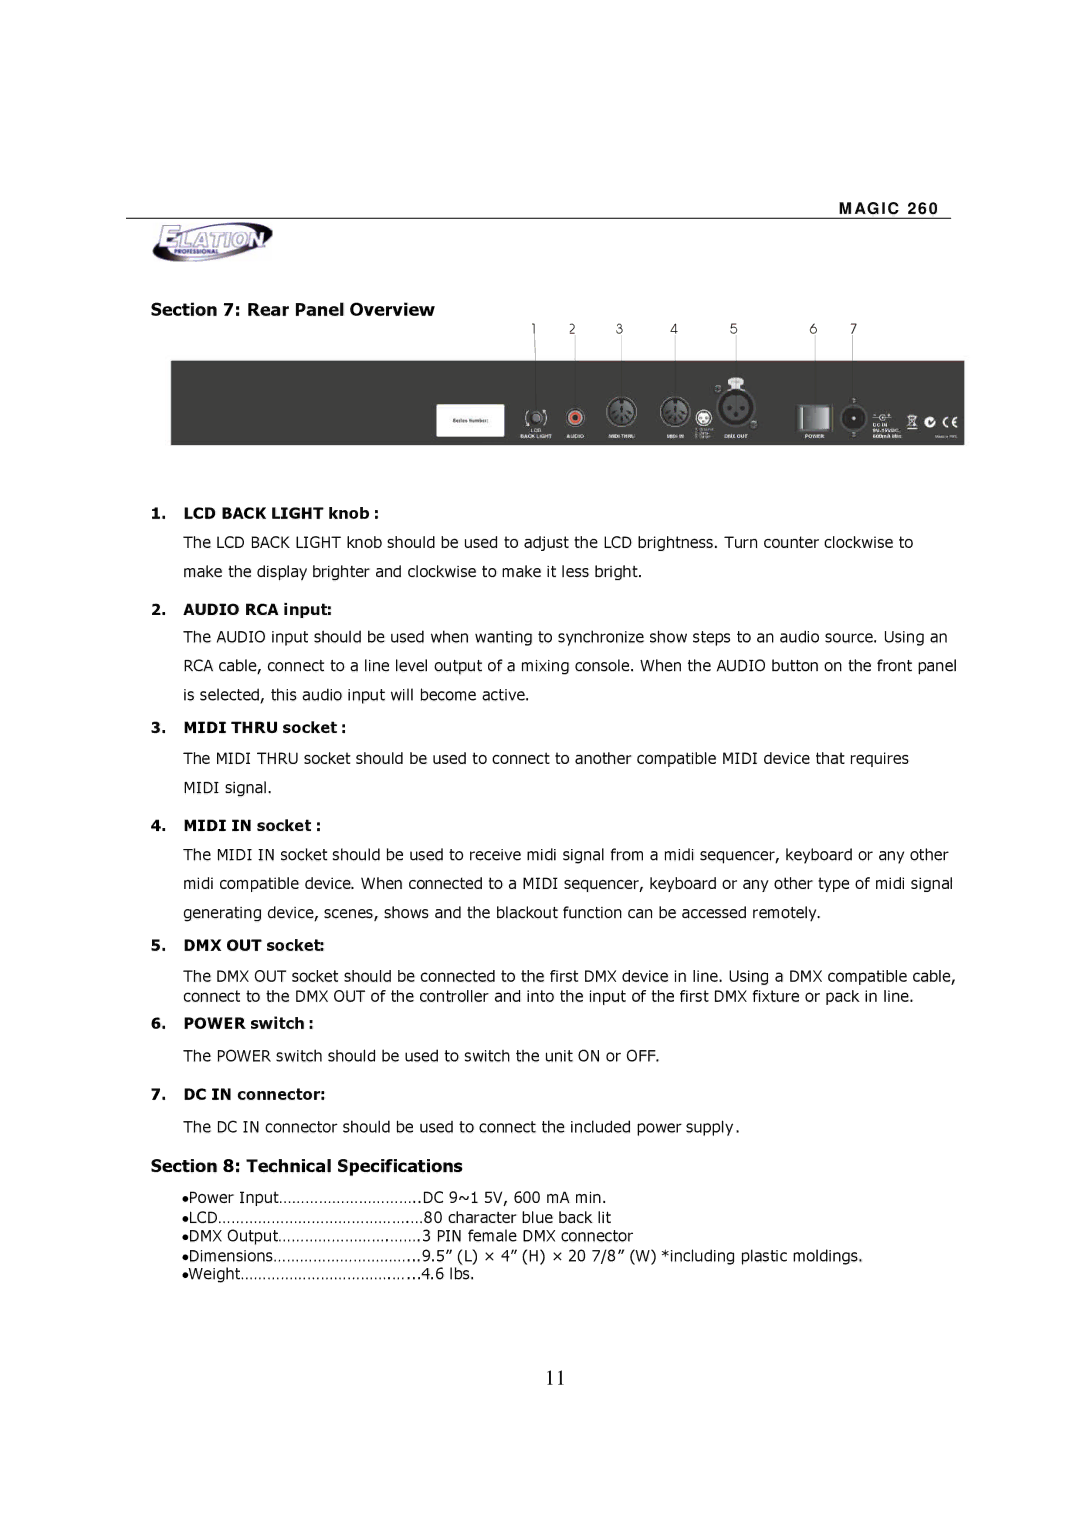
1.LCD BACK LIGHT knob :
The LCD BACK LIGHT knob should be used to adjust the LCD brightness. Turn counter clockwise to make the display brighter and clockwise to make it less bright.
2.AUDIO RCA input:
The AUDIO input should be used when wanting to synchronize show steps to an audio source. Using an RCA cable, connect to a line level output of a mixing console. When the AUDIO button on the front panel is selected, this audio input will become active.
3.MIDI THRU socket :
The MIDI THRU socket should be used to connect to another compatible MIDI device that requires MIDI signal.
4.MIDI IN socket :
The MIDI IN socket should be used to receive midi signal from a midi sequencer, keyboard or any other midi compatible device. When connected to a MIDI sequencer, keyboard or any other type of midi signal generating device, scenes, shows and the blackout function can be accessed remotely.
5.DMX OUT socket:
The DMX OUT socket should be connected to the first DMX device in line. Using a DMX compatible cable, connect to the DMX OUT of the controller and into the input of the first DMX fixture or pack in line.
6.POWER switch :
The POWER switch should be used to switch the unit ON or OFF.
7.DC IN connector:
The DC IN connector should be used to connect the included power supply .
Section 8: Technical Specifications
Power Input…………………………..DC 9~1 5V, 600 mA min.
LCD…………………………………….…80 character blue back lit
DMX Output…………………….…….3 PIN female DMX connector
Dimensions…………………………...9.5” (L) × 4” (H) × 20 7/8” (W) *including plastic moldings.
Weight…………………………….…...4.6 lbs.
11