Sawgrass Technologies, Inc. ChromaBlast™ Getting Started Guide for the EPSON Stylus C120/c110
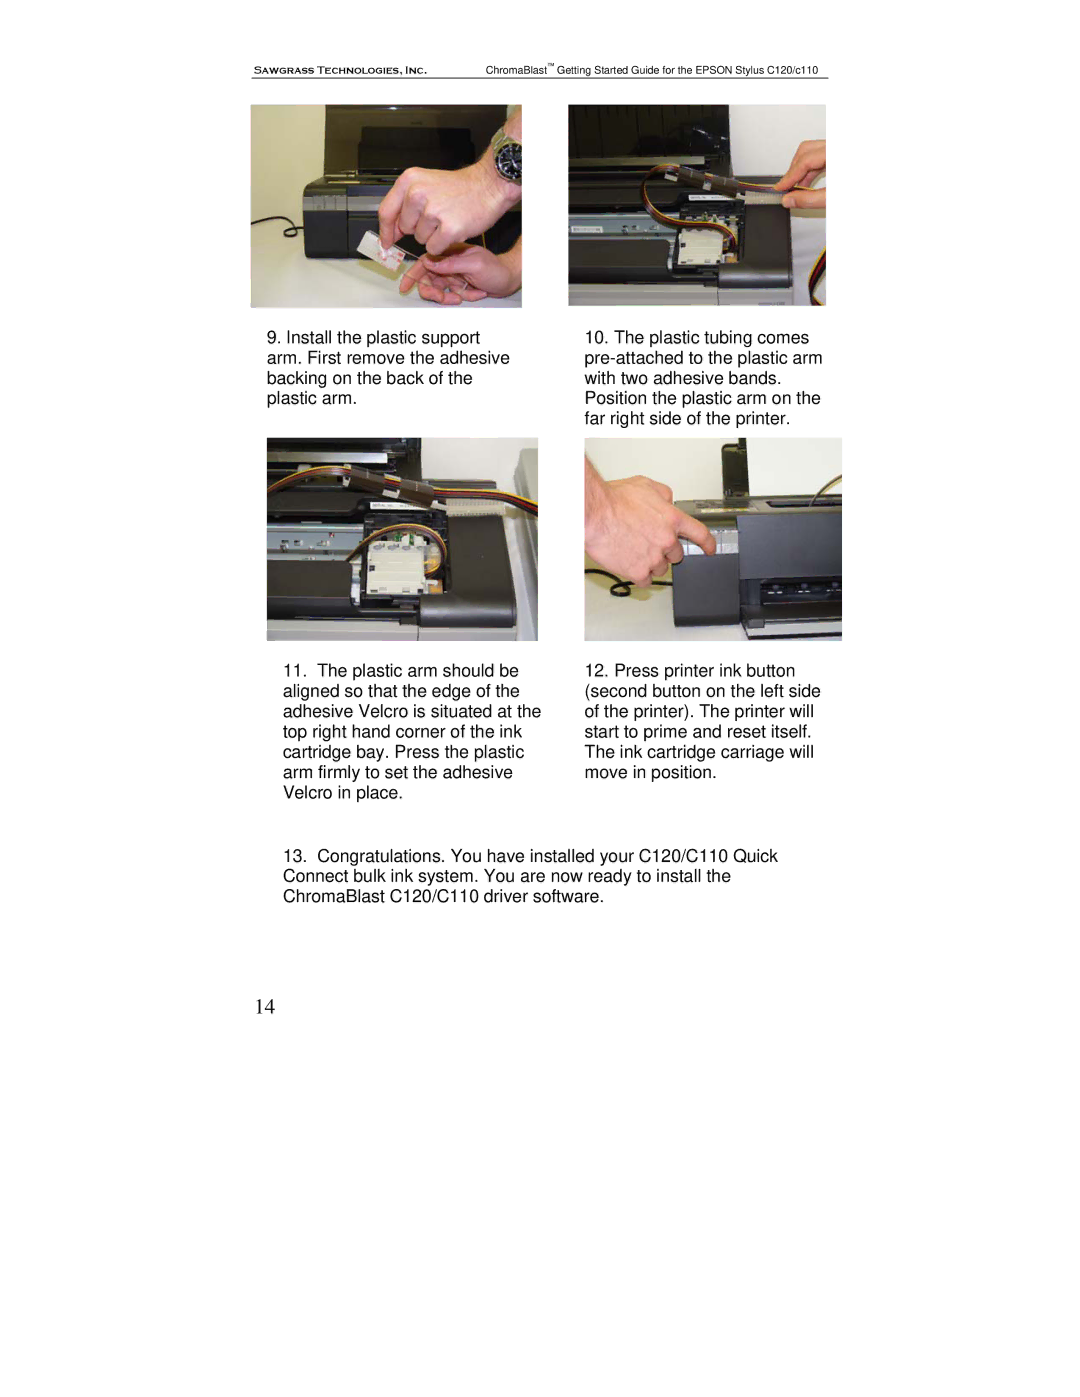
9.Install the plastic support arm. First remove the adhesive backing on the back of the plastic arm.
11.The plastic arm should be aligned so that the edge of the adhesive Velcro is situated at the top right hand corner of the ink cartridge bay. Press the plastic arm firmly to set the adhesive Velcro in place.
10.The plastic tubing comes
12.Press printer ink button (second button on the left side of the printer). The printer will start to prime and reset itself. The ink cartridge carriage will move in position.
13.Congratulations. You have installed your C120/C110 Quick Connect bulk ink system. You are now ready to install the ChromaBlast C120/C110 driver software.
14