Sawgrass Technologies, Inc. | ChromaBlast™ Getting Started Guide for the EPSON Stylus C88 /C88 + |
Quick Connect II™ Set-up for the
C88/C88+/D88+
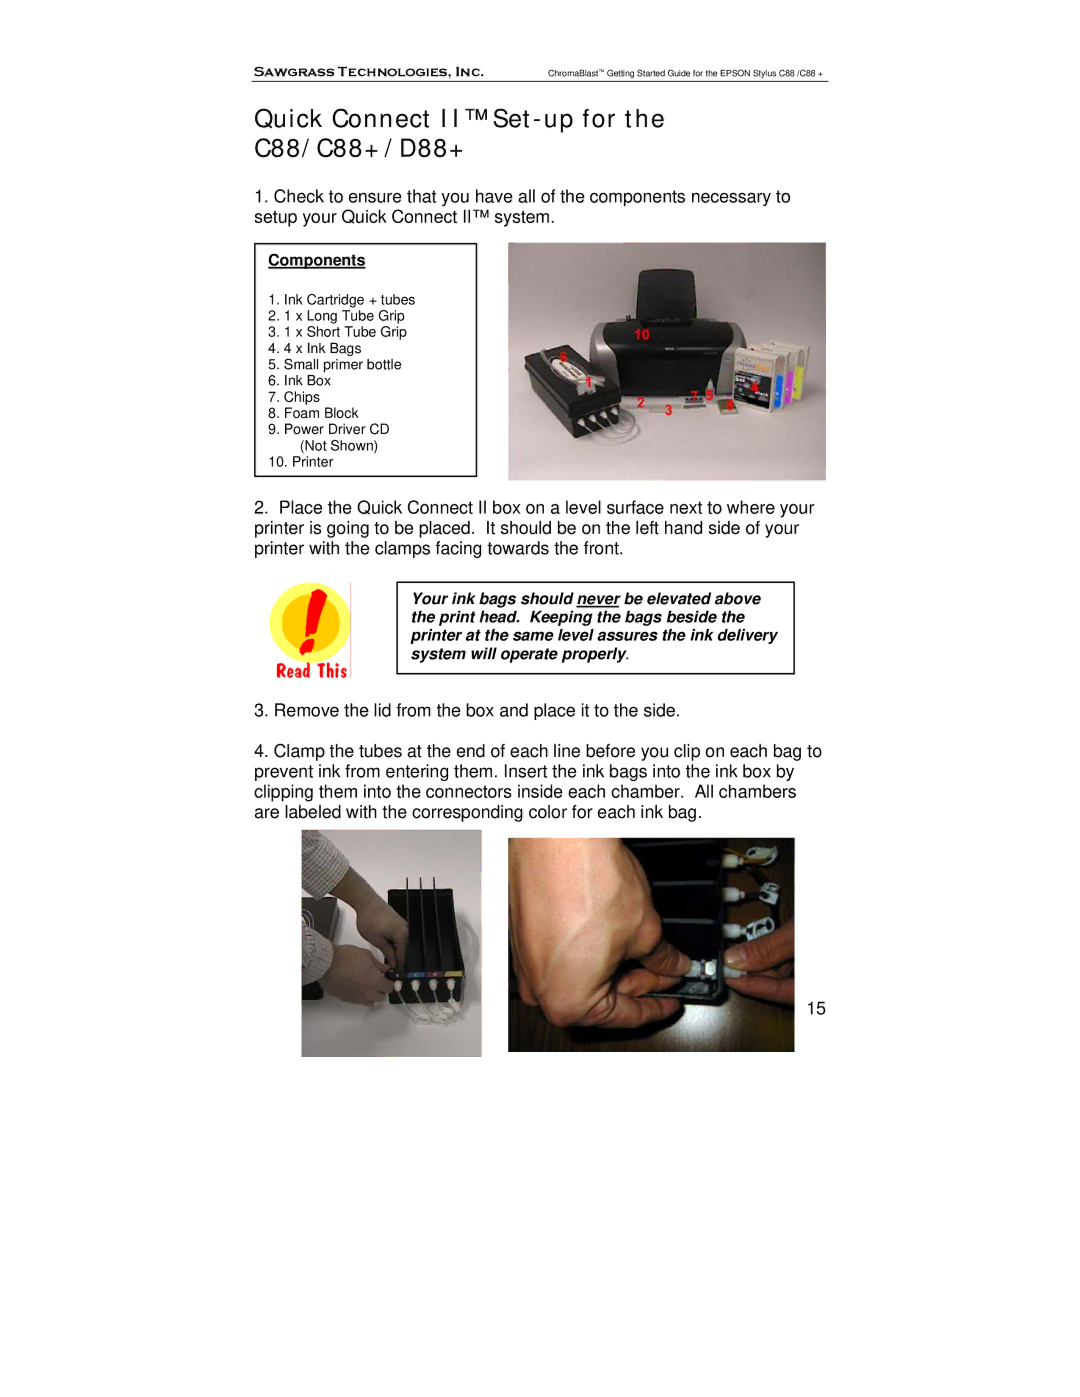
1.Check to ensure that you have all of the components necessary to setup your Quick Connect II™ system.
Components
1.Ink Cartridge + tubes
2.1 x Long Tube Grip
3.1 x Short Tube Grip
4.4 x Ink Bags
5.Small primer bottle
6.Ink Box
7.Chips
8.Foam Block
9.Power Driver CD (Not Shown)
10.Printer
2.Place the Quick Connect II box on a level surface next to where your printer is going to be placed. It should be on the left hand side of your printer with the clamps facing towards the front.
Your ink bags should never be elevated above the print head. Keeping the bags beside the printer at the same level assures the ink delivery system will operate properly.
3.Remove the lid from the box and place it to the side.
4.Clamp the tubes at the end of each line before you clip on each bag to prevent ink from entering them. Insert the ink bags into the ink box by clipping them into the connectors inside each chamber. All chambers are labeled with the corresponding color for each ink bag.
15
