5.3.4Video Loss
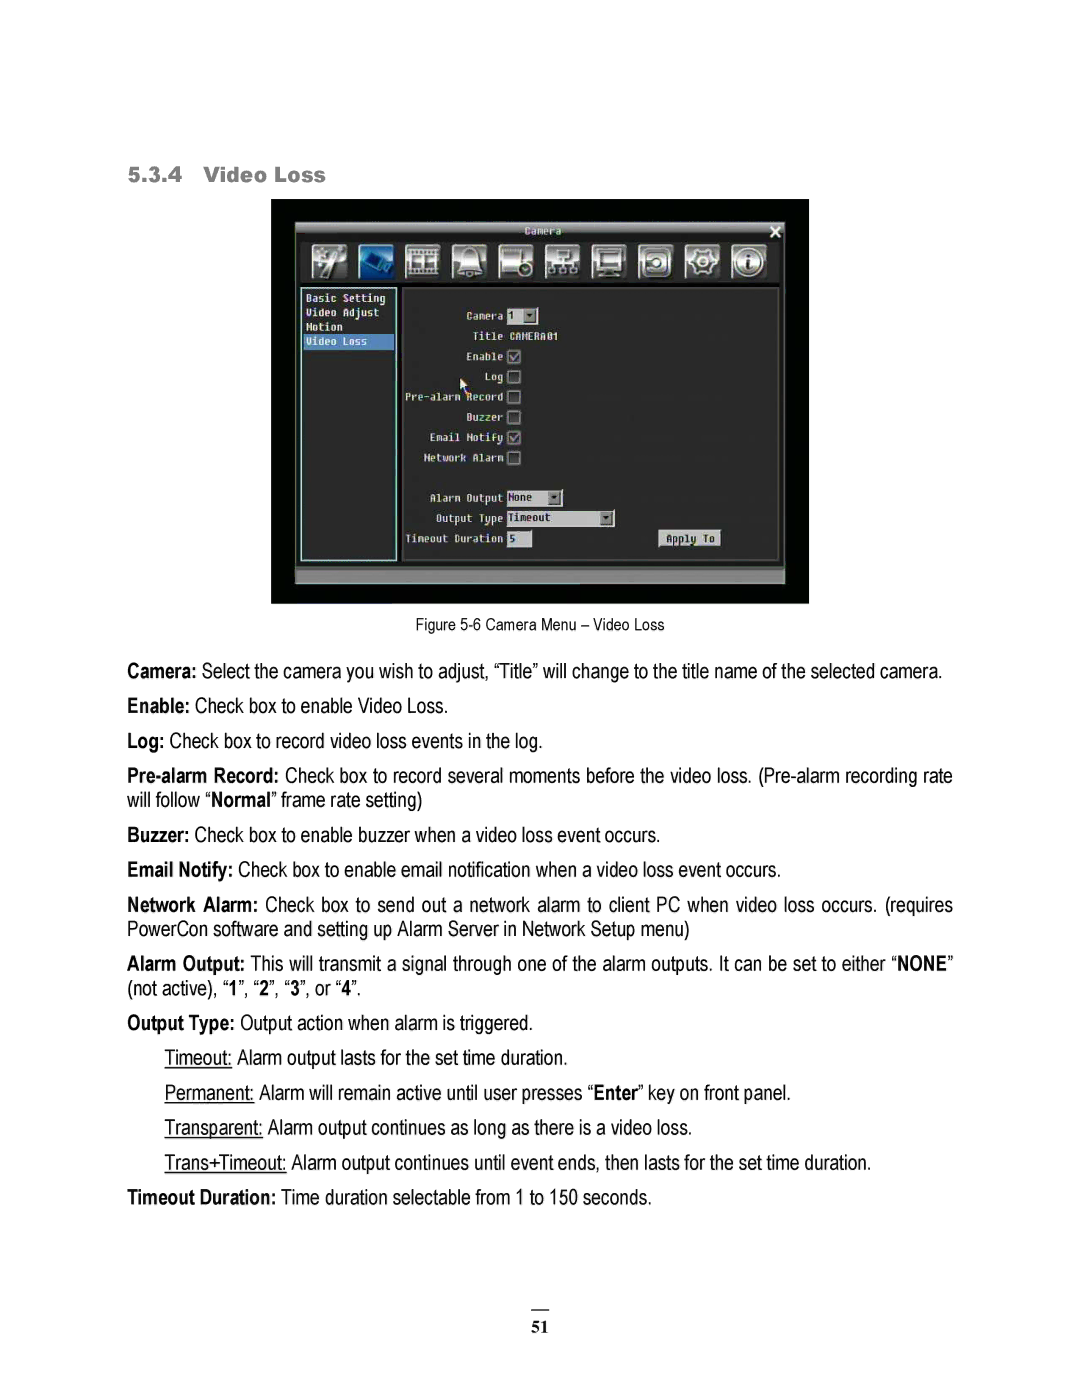
Figure 5-6 Camera Menu – Video Loss
Camera: Select the camera you wish to adjust, “Title” will change to the title name of the selected camera.
Enable: Check box to enable Video Loss.
Log: Check box to record video loss events in the log.
Buzzer: Check box to enable buzzer when a video loss event occurs.
Email Notify: Check box to enable email notification when a video loss event occurs.
Network Alarm: Check box to send out a network alarm to client PC when video loss occurs. (requires PowerCon software and setting up Alarm Server in Network Setup menu)
Alarm Output: This will transmit a signal through one of the alarm outputs. It can be set to either “NONE” (not active), “1”, “2”, “3”, or “4”.
Output Type: Output action when alarm is triggered.
Timeout: Alarm output lasts for the set time duration.
Permanent: Alarm will remain active until user presses “Enter” key on front panel.
Transparent: Alarm output continues as long as there is a video loss.
Trans+Timeout: Alarm output continues until event ends, then lasts for the set time duration. Timeout Duration: Time duration selectable from 1 to 150 seconds.
51