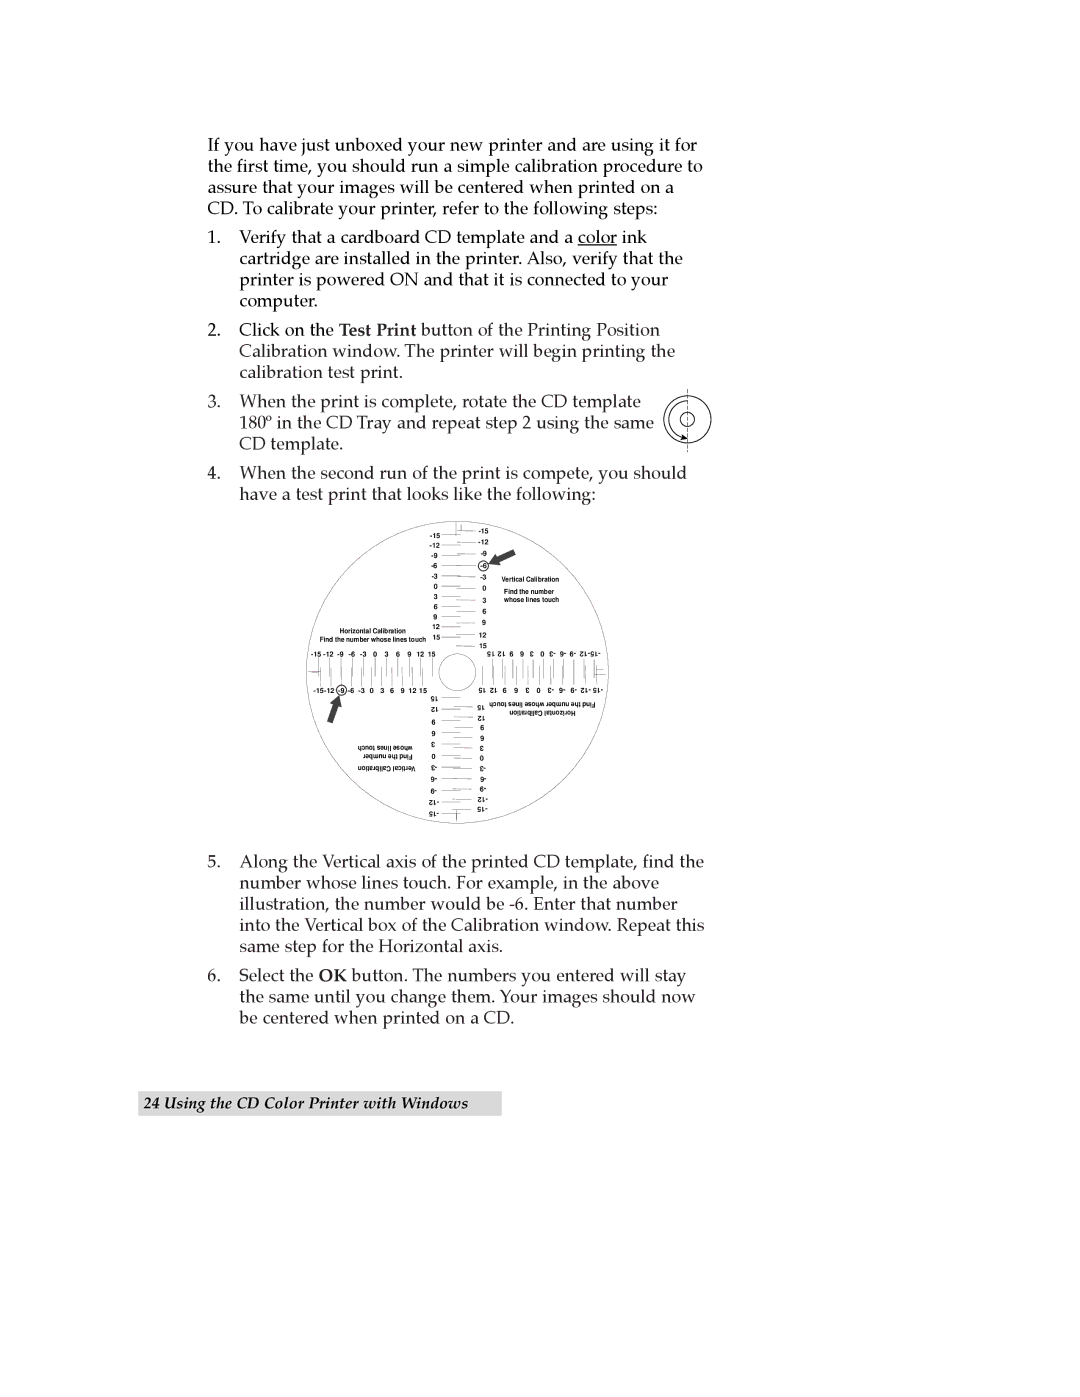
If you have just unboxed your new printer and are using it for the first time, you should run a simple calibration procedure to assure that your images will be centered when printed on a CD. To calibrate your printer, refer to the following steps:
1.Verify that a cardboard CD template and a color ink cartridge are installed in the printer. Also, verify that the printer is powered ON and that it is connected to your computer.
2.Click on the Test Print button of the Printing Position Calibration window. The printer will begin printing the calibration test print.
3.When the print is complete, rotate the CD template 180¼ in the CD Tray and repeat step 2 using the same
CD template.
4.When the second run of the print is compete, you should have a test print that looks like the following:
-15 -12 -9 -6 -3
| |
| |
| |
| |
Vertical Calibration | |
|
Horizontal Calibration
0
3
6
9
12
0Find the number
3whose lines touch
6
9
Find the number whose lines touch 15
12
15
15 12 | 9 | 6 | 3 | 0 | 3- | 6- | 9- |
| 15 | |
| 12 | |
| 9 | |
| 6 | |
touch lines whose | 3 | |
0 | ||
number the Find | ||
Calibration Vertical | 3- | |
| 6- | |
| 9- | |
| 12- | |
| 15- |
15
15 12 9 6 3 0 3- 6- 9- 12- 15-
12 9 | 6 | 3 | 0 | 3- 6- 9- | 12- 15- |
touch lines whose number the Find | |||||
| Calibration Horizontal |
| |||
5.Along the Vertical axis of the printed CD template, find the number whose lines touch. For example, in the above illustration, the number would be
6.Select the OK button. The numbers you entered will stay the same until you change them. Your images should now be centered when printed on a CD.