4.From within the printer driver setup window, click on the Cartridge button and then on the Change button to move the carrier to the load position. Note that the printer driver must be installed and that the printer must be connected to your computer (see Section 3) in order to complete this step.
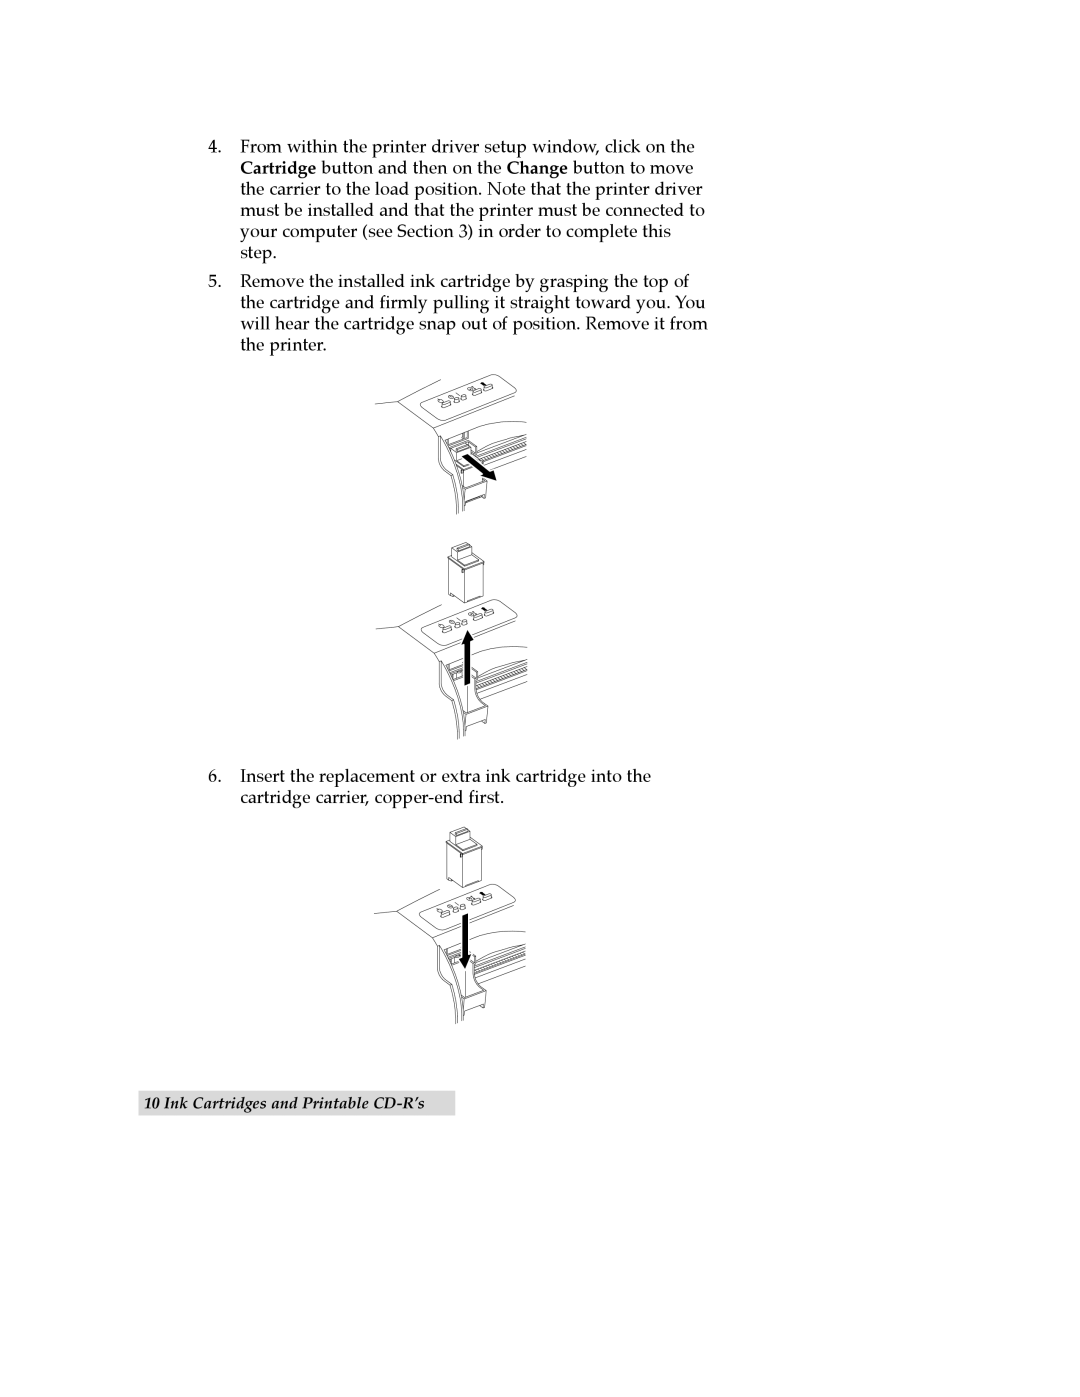
5.Remove the installed ink cartridge by grasping the top of the cartridge and firmly pulling it straight toward you. You will hear the cartridge snap out of position. Remove it from the printer.
6.Insert the replacement or extra ink cartridge into the cartridge carrier,
