Initial Setup
system operation
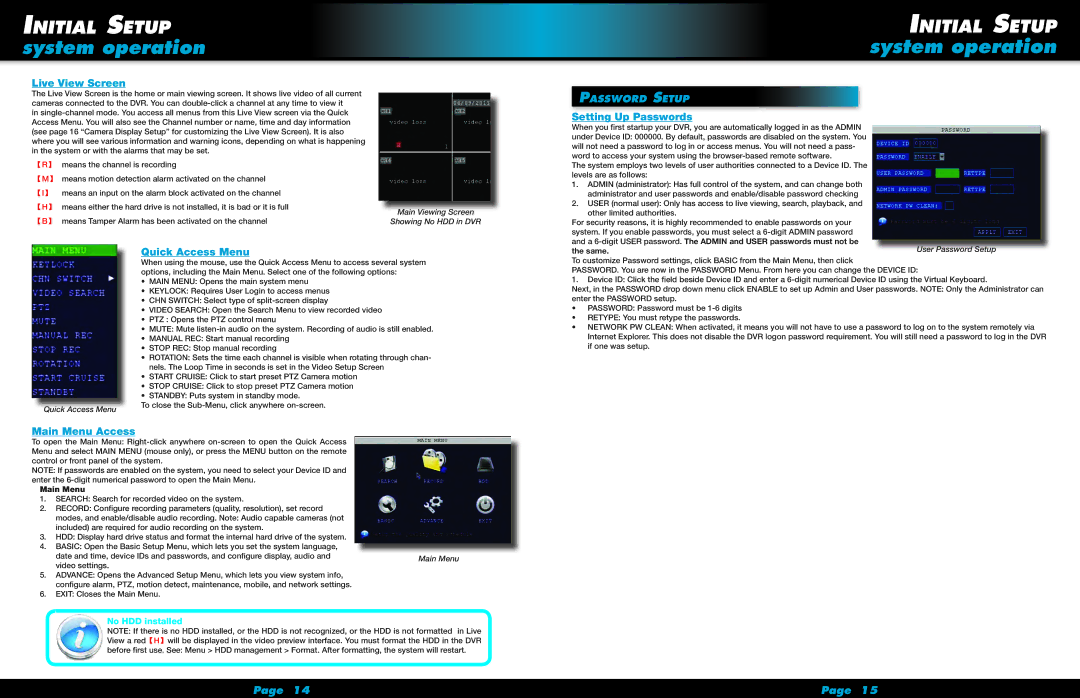
Live View Screen
The Live View Screen is the home or main viewing screen. It shows live video of all current cameras connected to the DVR. You can
in
【R】 means the channel is recording
【M】 means motion detection alarm activated on the channel
【I】 means an input on the alarm block activated on the channel 【H】 means either the hard drive is not installed, it is bad or it is full 【B】 means Tamper Alarm has been activated on the channel
Main Viewing Screen
Showing No HDD in DVR
Initial Setup
system operation
Password Setup
Setting Up Passwords
When you first startup your DVR, you are automatically logged in as the ADMIN under Device ID: 000000. By default, passwords are disabled on the system. You will not need a password to log in or access menus. You will not need a pass- word to access your system using the
The system employs two levels of user authorities connected to a Device ID. The levels are as follows:
1.ADMIN (administrator): Has full control of the system, and can change both administrator and user passwords and enable/disable password checking
2.USER (normal user): Only has access to live viewing, search, playback, and other limited authorities.
For security reasons, it is highly recommended to enable passwords on your |
system. If you enable passwords, you must select a |
and a |
Quick Access Menu
When using the mouse, use the Quick Access Menu to access several system
| options, including the Main Menu. Select one of the following options: |
| • MAIN MENU: Opens the main system menu |
| • KEYLOCK: Requires User Login to access menus |
| • CHN SWITCH: Select type of |
| • VIDEO SEARCH: Open the Search Menu to view recorded video |
| • PTZ : Opens the PTZ control menu |
| • MUTE: Mute |
| • MANUAL REC: Start manual recording |
| • STOP REC: Stop manual recording |
| • ROTATION: Sets the time each channel is visible when rotating through chan- |
| nels. The Loop Time in seconds is set in the Video Setup Screen |
| • START CRUISE: Click to start preset PTZ Camera motion |
| • STOP CRUISE: Click to stop preset PTZ Camera motion |
| • STANDBY: Puts system in standby mode. |
Quick Access Menu | To close the |
|
Main Menu Access
To open the Main Menu:
NOTE: If passwords are enabled on the system, you need to select your Device ID and enter the
Main Menu
1.SEARCH: Search for recorded video on the system.
2.RECORD: Configure recording parameters (quality, resolution), set record
modes, and enable/disable audio recording. Note: Audio capable cameras (not included) are required for audio recording on the system.
3.HDD: Display hard drive status and format the internal hard drive of the system.
4.BASIC: Open the Basic Setup Menu, which lets you set the system language,
date and time, device IDs and passwords, and configure display, audio and | Main Menu | |
video settings. | ||
|
5.ADVANCE: Opens the Advanced Setup Menu, which lets you view system info, configure alarm, PTZ, motion detect, maintenance, mobile, and network settings.
6.EXIT: Closes the Main Menu.
No HDD installed
NOTE: If there is no HDD installed, or the HDD is not recognized, or the HDD is not formatted in Live View a red【H】will be displayed in the video preview interface. You must format the HDD in the DVR before first use. See: Menu > HDD management > Format. After formatting, the system will restart.
the same. | User Password Setup |
To customize Password settings, click BASIC from the Main Menu, then click
PASSWORD. You are now in the PASSWORD Menu. From here you can change the DEVICE ID:
1.Device ID: Click the field beside Device ID and enter a
Next, in the PASSWORD drop down menu click ENABLE to set up Admin and User passwords. NOTE: Only the Administrator can enter the PASSWORD setup.
•PASSWORD: Password must be
•RETYPE: You must retype the passwords.
•NETWORK PW CLEAN: When activated, it means you will not have to use a password to log on to the system remotely via Internet Explorer. This does not disable the DVR logon password requirement. You will still need a password to log in the DVR if one was setup.
Page 14 | Page 15 |