Initial Setup
system operation
Camera Display Setup
Setting Up Cameras for Viewing and Recording
Use the Display Setup menu to customize channel titles, show/hide the date and time in live viewing and playback, and enable/ disable preview channels. To customize Display settings, click BASIC from the Main Menu, then click DISPLAY:
Initial Setup
system operation
Language, Date And Time
Setting Up Language/Date/Time
Set the system language, date and time, passwords, and configure audio and display options. The Basic Setup Menu contains the following
Display
1.Configure the following options:
•NAME: Click any of the fields and enter a new title for the selected channel using the Virtual Keyboard (mouse only)
•POSITION: Reposition the channel title; select TOPLEFT, BOTTOM- LEFT, TOPRIGHT, BOTTOMRIGHT, or OFF. If OFF, the title will not be displayed for the selected channel
•COLOR: Adjust CHROMATICITY, LUMINOSITY, CONTRAST, and SATU- RATION for the selected channel
•PREVIEW: This feature can be very useful if your display monitor is in public view. With PREVIEW in the OFF selection that channel will ap- pear black on the display to give the impression that no cameras are connected and the system is not recording. Select ON/OFF to enable or disable this feature
•PREVIEW TIME: Select ON/OFF to show/ hide the date and time during live viewing
•RECORD TIME: Select ON/OFF to show/hide the date and time during playback.
2.Click APPLY to save your settings. Click SURE in the REMARK window. Click EXIT.
Video/Audio
Use the Video/Audio menu to set the resolution and camera setup on the system. To configure Video/Audio options:
1.Under CAMERA SYSTEM, select NTSC or PAL. (See info box below)
2.Under LOOP TIME (SECOND), enter with virtual keypad from 1 to 300
3.Under VOLUME SETUP, adjust slider from 0 to 63. Click X to save.
4.Under MARGIN, adjust TOP, BOTTOM, LEFT, RIGHT margin with slider from 0
5.Click APPLY. Click SURE in the REMARK window.
6.Click EXIT in all menus until all windows are closed.
Display Setup Menu
Color
Language
To change the system language:, from the
NOTE: The system will restart when you finish system language setup. The default is English.
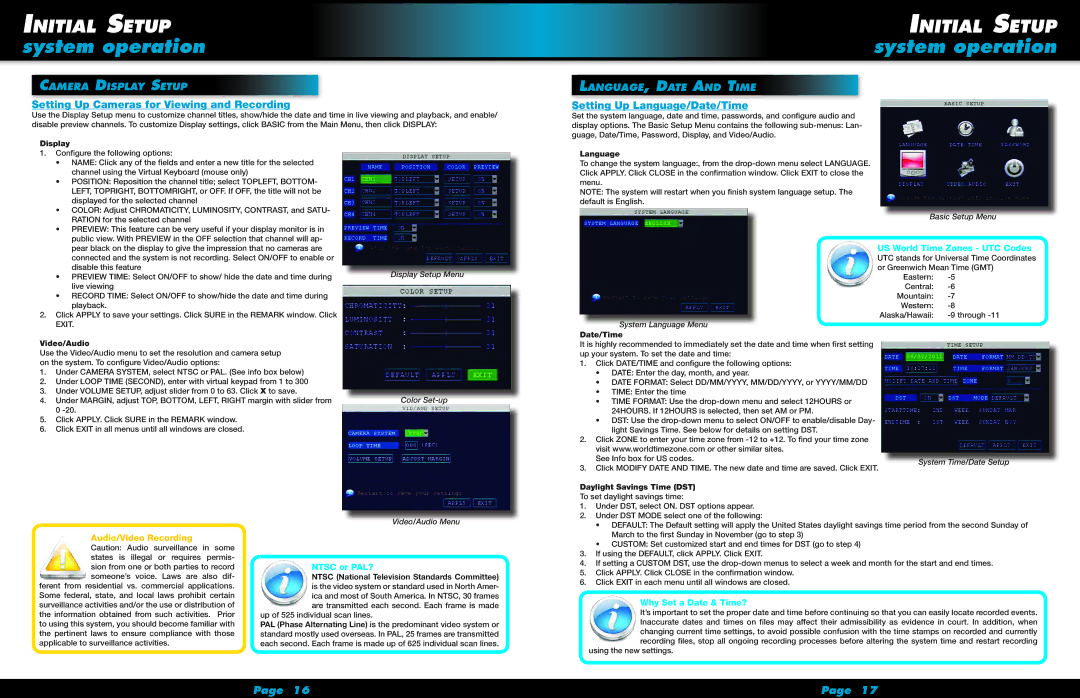
Basic Setup Menu
US World Time Zones - UTC Codes
UTC stands for Universal Time Coordinates or Greenwich Mean Time (GMT)
Eastern:
Central:
Mountain:
Western:
System Language Menu
Date/Time
It is highly recommended to immediately set the date and time when first setting up your system. To set the date and time:
1. | Click DATE/TIME and configure the following options: |
| |
| • DATE: Enter the day, month, and year. |
| |
| • DATE FORMAT: Select DD/MM/YYYY, MM/DD/YYYY, or YYYY/MM/DD |
| |
| • TIME: Enter the time |
| |
| • TIME FORMAT: Use the |
| |
| 24HOURS. If 12HOURS is selected, then set AM or PM. |
| |
| • DST: Use the |
| |
| light Savings Time. See below for details on setting DST. |
| |
2. | Click ZONE to enter your time zone from |
| |
| visit www.worldtimezone.com or other similar sites. |
| |
| See Info box for US codes. | System Time/Date Setup | |
3. | Click MODIFY DATE AND TIME. The new date and time are saved. Click EXIT. | ||
|
Daylight Savings Time (DST)
To set daylight savings time:
Video/Audio Menu
1.Under DST, select ON. DST options appear.
2.Under DST MODE select one of the following:
•DEFAULT: The Default setting will apply the United States daylight savings time period from the second Sunday of
Audio/Video Recording
Caution: Audio surveillance in some states is illegal or requires permis- sion from one or both parties to record someone’s voice. Laws are also dif-
ferent from residential vs. commercial applications. Some federal, state, and local laws prohibit certain surveillance activities and/or the use or distribution of the information obtained from such activities. Prior to using this system, you should become familiar with the pertinent laws to ensure compliance with those applicable to surveillance activities.
NTSC or PAL?
NTSC (National Television Standards Committee) is the video system or standard used in North Amer- ica and most of South America. In NTSC, 30 frames are transmitted each second. Each frame is made
up of 525 individual scan lines.
PAL (Phase Alternating Line) is the predominant video system or standard mostly used overseas. In PAL, 25 frames are transmitted each second. Each frame is made up of 625 individual scan lines.
March to the first Sunday in November (go to step 3)
• CUSTOM: Set customized start and end times for DST (go to step 4)
3.If using the DEFAULT, click APPLY. Click EXIT.
4.If setting a CUSTOM DST, use the
5.Click APPLY. Click CLOSE in the confirmation window.
6.Click EXIT in each menu until all windows are closed.
Why Set a Date & Time?
It’s important to set the proper date and time before continuing so that you can easily locate recorded events. Inaccurate dates and times on files may affect their admissibility as evidence in court. In addition, when changing current time settings, to avoid possible confusion with the time stamps on recorded and currently recording files, stop all ongoing recording processes before altering the system time and restart recording
using the new settings.
Page 16 | Page 17 |