B. All-track recording
When the source equipment starts to play, all tracks are recorded automatically and the recording stops automatically after the last track. This mode is convenient for recording an entire CD, DAT, MD or DCC(only S/P DIF).
•After loading the disc, check that the
In case it does not light steadily , refer to page 42.
•The AES/EBU digital input cannot be recorded with this function.
•The ANALOG input cannot be recorded with this function.
•Confirm the track to be recorded before recording.
•Every time the DIGITAL SYNCHRO button is pressed, the mode is changed in order of
Select
•Do not start the playback of the source player until the SYNC indicator starts to blink.
•The source unit stops playback and after no signal(less than - 90dB) condition lasts for the length set by the MENU button functions(see page 24), the unit reverts to the status noted in step 4 and
Be careful not to restart playback of the source player under this condition, for this will start the recording again.
1 4 | 2 |
|
|
|
|
| REC |
|
| FADER | TRACK NO. |
|
| WREITE | |
|
| REPEAT |
|
| 6 |
|
|
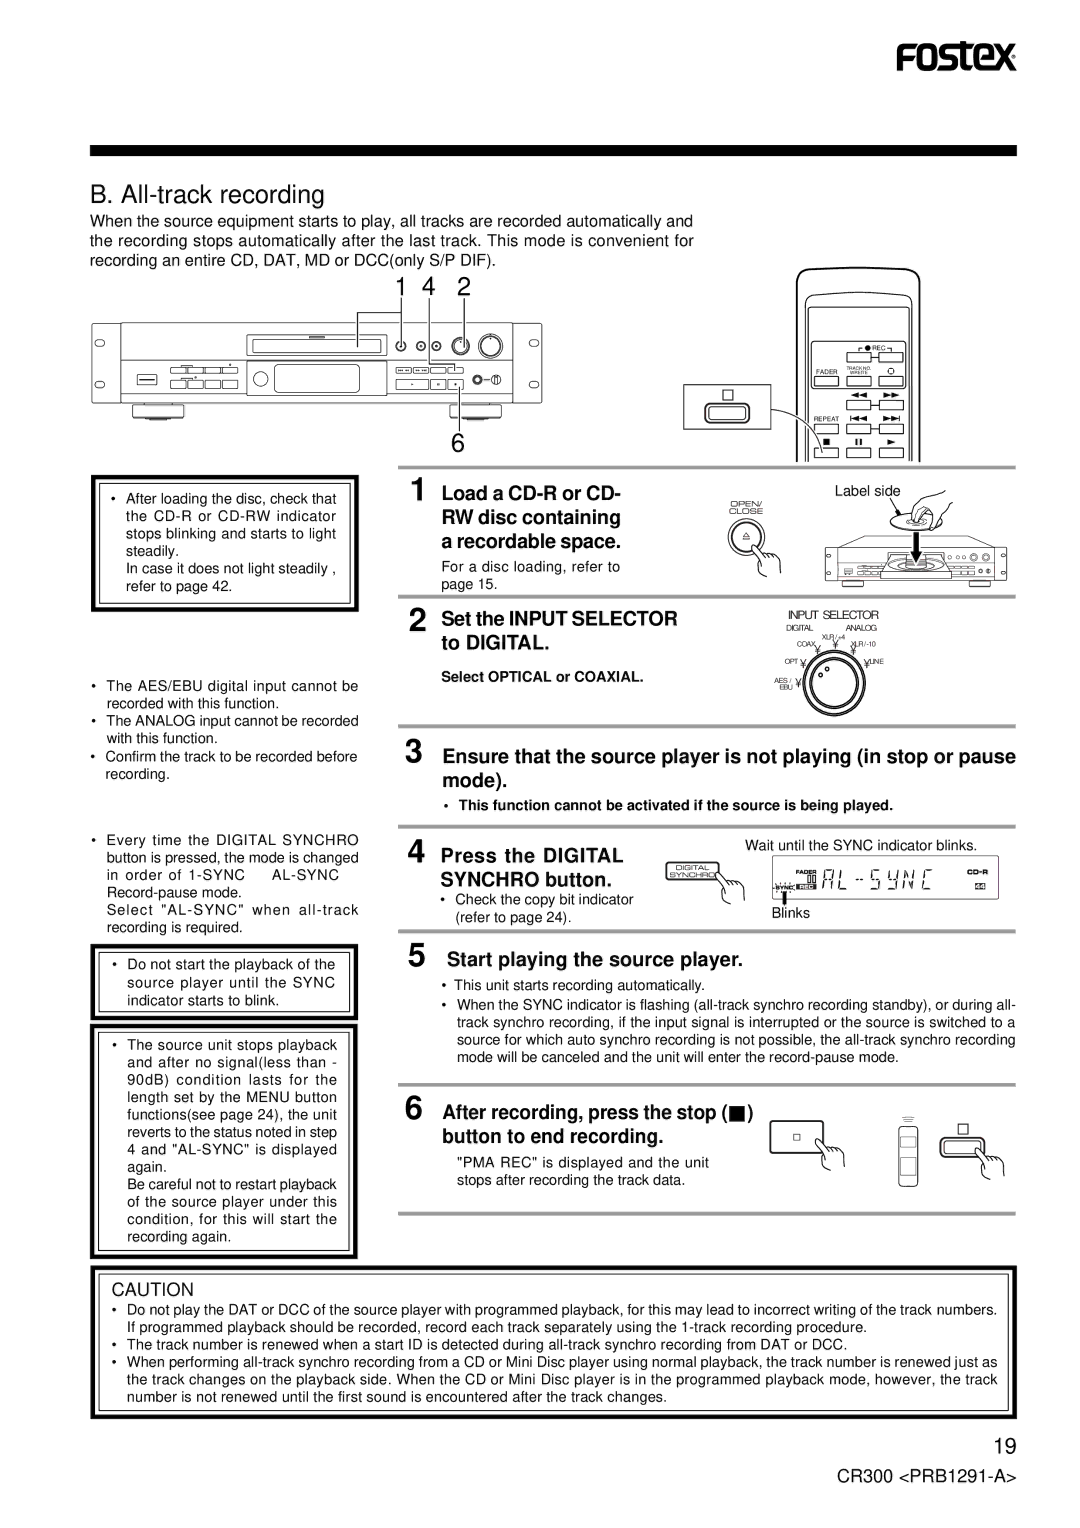
1 Load a | Label side | ||
| RW disc containing |
|
|
| a recordable space. |
|
|
| For a disc loading, refer to |
|
|
| page 15. |
|
|
2 Set the INPUT SELECTOR | INPUT SELECTOR | ||
DIGITAL | ANALOG | ||
| to DIGITAL. | XLR/+4 | • |
| • • | ||
|
| COAX | |
| Select OPTICAL or COAXIAL. | OPT • | • LINE |
| AESEBU/ • |
| |
3 Ensure that the source player is not playing (in stop or pause mode).
• This function cannot be activated if the source is being played.
4 | Press the DIGITAL | Wait until the SYNC indicator blinks. |
|
SYNCHRO button.
• Check the copy bit indicator |
|
|
(refer to page 24). | Blinks | |
|
| |
|
|
|
5 Start playing the source player.
•This unit starts recording automatically.
•When the SYNC indicator is flashing
6 After recording, press the stop (![]()
![]() ) button to end recording.
) button to end recording.
"PMA REC" is displayed and the unit stops after recording the track data.
CAUTION
•Do not play the DAT or DCC of the source player with programmed playback, for this may lead to incorrect writing of the track numbers. If programmed playback should be recorded, record each track separately using the
•The track number is renewed when a start ID is detected during
•When performing
19
CR300