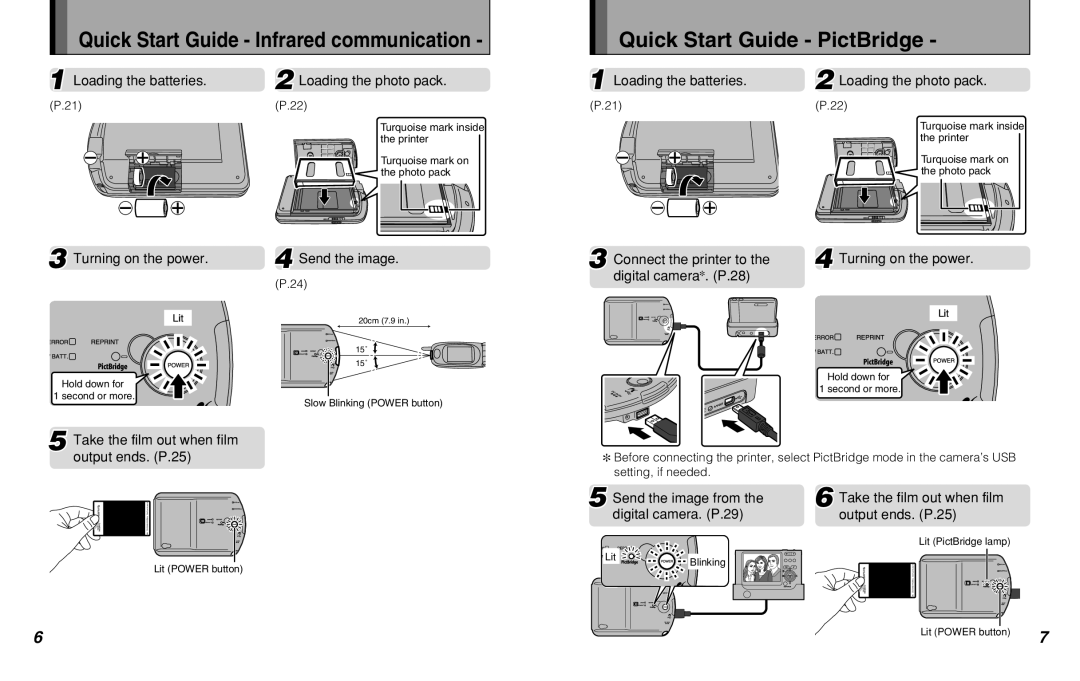
Quick Start Guide - Infrared communication -
1 Loading the batteries. | 2 Loading the photo pack. |
(P.21) | (P.22) |
| Turquoise mark inside |
| the printer |
| Turquoise mark on |
| the photo pack |
Quick Start Guide - PictBridge -
1 Loading the batteries. | 2 Loading the photo pack. |
(P.21) | (P.22) |
| Turquoise mark inside |
| the printer |
| Turquoise mark on |
| the photo pack |
3 Turning on the power.
Lit
Hold down for
1 second or more.
4 Send the image.
(P.24)
20cm (7.9 in.)
15˚ ![]() 15˚
15˚
Slow Blinking (POWER button)
3 Connect the printer to the digital camerac. (P.28)
4 Turning on the power.
Lit
Hold down for
1 second or more.
5 Take the film out when film output ends. (P.25)
c Before connecting the printer, select PictBridge mode in the camera’s USB setting, if needed.
Lit (POWER button)
5 Send the image from the | 6 Take the film out when film | |
digital camera. (P.29) | output ends. (P.25) | |
|
| Lit (PictBridge lamp) |
Lit | Blinking |
|
|
| |
6 | Lit (POWER button) | 7 |
|
