G e t t i n g t o K n o w Y o u r L i f e B o o k
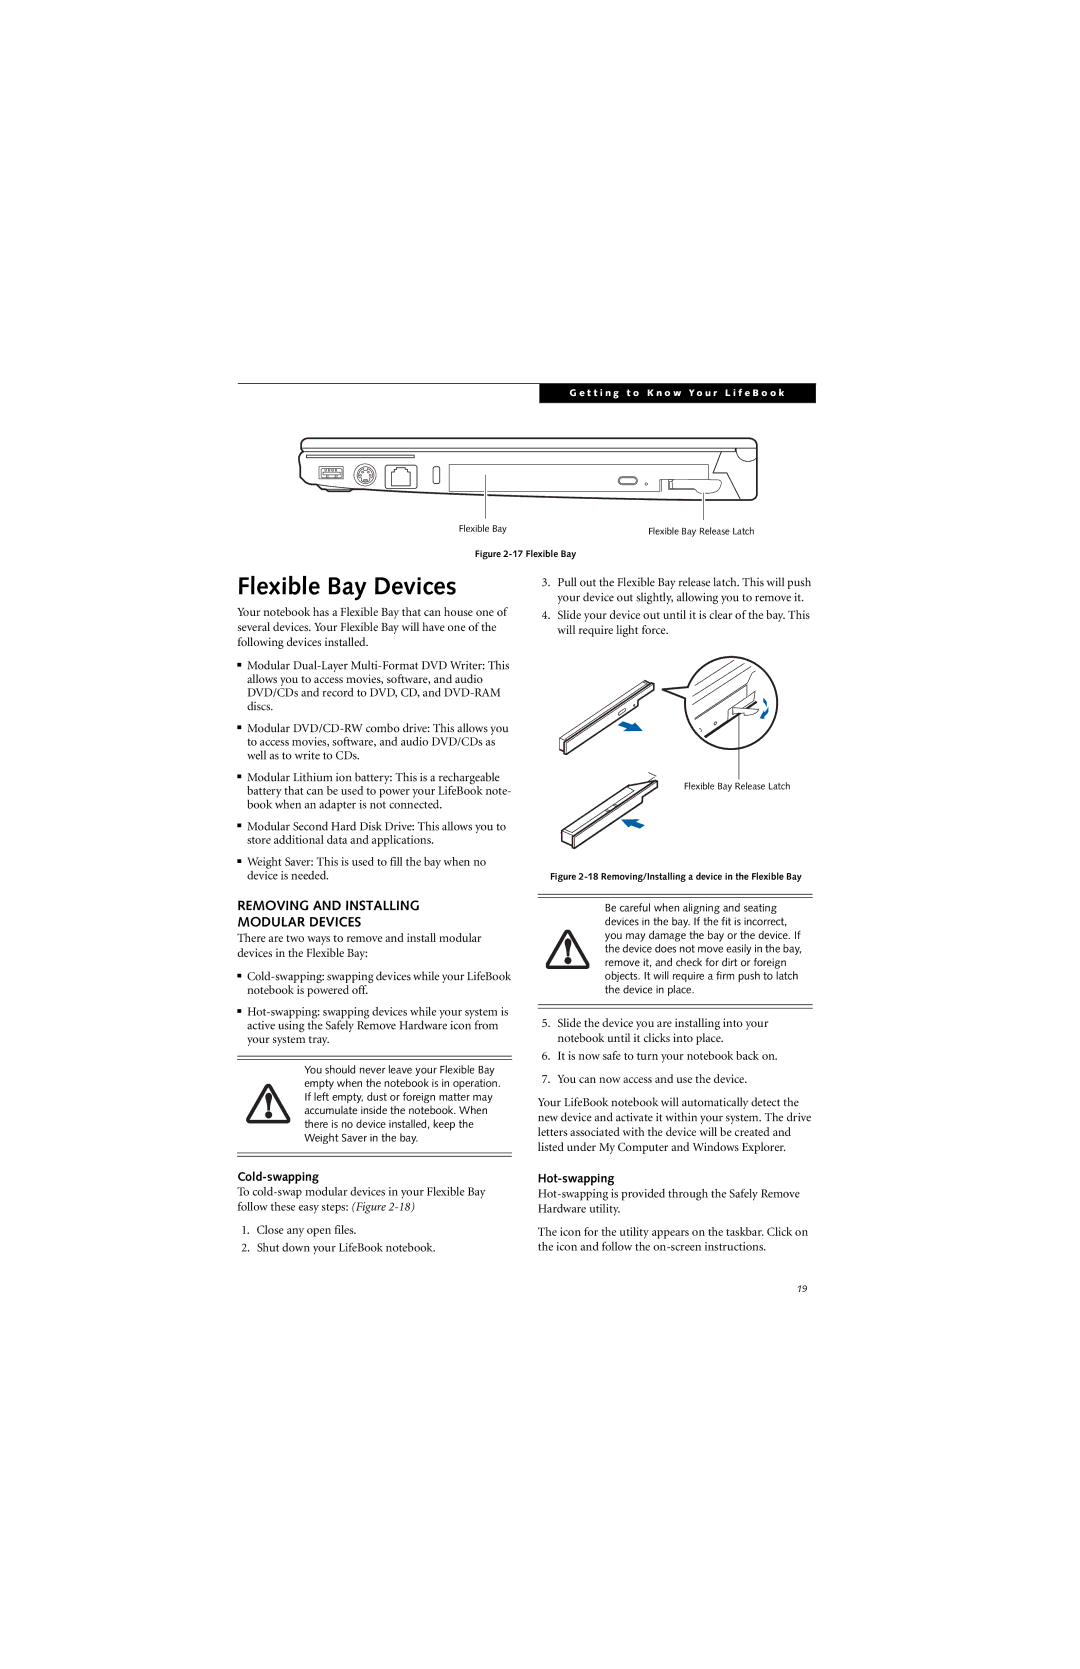
Flexible Bay | Flexible Bay Release Latch |
Figure 2-17 Flexible Bay
Flexible Bay Devices
Your notebook has a Flexible Bay that can house one of several devices. Your Flexible Bay will have one of the following devices installed.
■Modular
■Modular
■Modular Lithium ion battery: This is a rechargeable battery that can be used to power your LifeBook note- book when an adapter is not connected.
■Modular Second Hard Disk Drive: This allows you to store additional data and applications.
■Weight Saver: This is used to fill the bay when no device is needed.
REMOVING AND INSTALLING
MODULAR DEVICES
There are two ways to remove and install modular devices in the Flexible Bay:
■
■
You should never leave your Flexible Bay empty when the notebook is in operation. If left empty, dust or foreign matter may accumulate inside the notebook. When there is no device installed, keep the Weight Saver in the bay.
Cold-swapping
To
1.Close any open files.
2.Shut down your LifeBook notebook.
3.Pull out the Flexible Bay release latch. This will push your device out slightly, allowing you to remove it.
4.Slide your device out until it is clear of the bay. This will require light force.
Flexible Bay Release Latch
Figure 2-18 Removing/Installing a device in the Flexible Bay
Be careful when aligning and seating devices in the bay. If the fit is incorrect, you may damage the bay or the device. If the device does not move easily in the bay, remove it, and check for dirt or foreign objects. It will require a firm push to latch the device in place.
5.Slide the device you are installing into your notebook until it clicks into place.
6.It is now safe to turn your notebook back on.
7.You can now access and use the device.
Your LifeBook notebook will automatically detect the new device and activate it within your system. The drive letters associated with the device will be created and listed under My Computer and Windows Explorer.
Hot-swapping
The icon for the utility appears on the taskbar. Click on the icon and follow the
19
