24 The Gateway 2000 Solo Multimedia Notebook
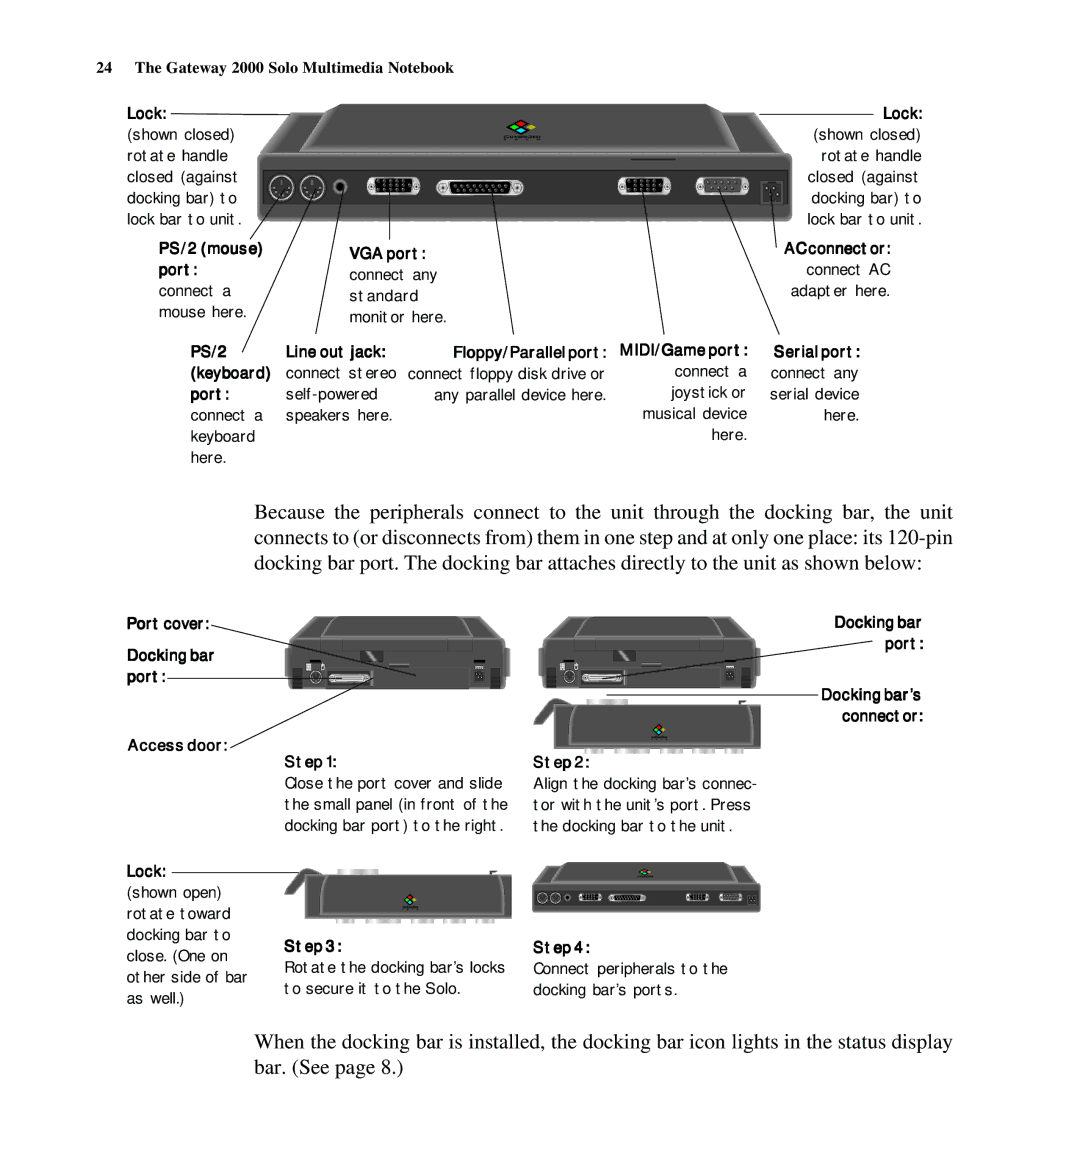
Lock:
(shown closed) rotate handle closed (against docking bar) to lock bar to unit.
PS/2 (mouse) | VGA port: |
port: | connect any |
connect a | standard |
mouse here. | monitor here. |
PS/2 | Line out jack: | Floppy/Parallel port: | MIDI/Game port: |
(keyboard) | connect stereo | connect floppy disk drive or | connect a |
port: | any parallel device here. | joystick or | |
connect a | speakers here. |
| musical device |
keyboard |
|
| here. |
here. |
|
|
|
Lock:
(shown closed) rotate handle closed (against docking bar) to lock bar to unit.
AC connector:
connect AC adapter here.
Serial port:
connect any serial device here.
Because the peripherals connect to the unit through the docking bar, the unit connects to (or disconnects from) them in one step and at only one place: its
Port cover:
Docking bar port:
Access door:
Step 1: | Step 2: |
Docking bar port:
Docking bar’s connector:
Lock:
(shown open) rotate toward docking bar to close. (One on other side of bar as well.)
Close the port cover and slide | Align the docking bar’s connec- | |||
the small panel (in front of the | tor with the unit’s port. Press | |||
docking bar port) to the right. | the docking bar to the unit. | |||
|
|
|
|
|
|
|
|
|
|
|
|
|
|
|
|
|
|
|
|
Step 3: | Step 4: |
Rotate the docking bar’s locks | Connect peripherals to the |
to secure it to the Solo. | docking bar’s ports. |
When the docking bar is installed, the docking bar icon lights in the status display bar. (See page 8.)