Installation | |
|
|
If the laminator is in a crate:
1.Remove the top of the crate and then the sides in the order shown in Figure
![]() CAUTION
CAUTION
Do not allow the top to fall into the crate. It can
damage the laminator.
Do not put packing screws on the floor. They can cause problems when trying to roll the machine into position.
A second person must support the side labeled 5
in Figure
laminator.
![]()
![]()
![]() CAUTION
CAUTION
Do not use a knife or other sharp instrument
during installation or while servicing the
laminator. You can cause irreparable damage to
the rolls.
3.Carefully remove any accessories packed with the laminator. The accessory pack should contain:
1 Set, hex wrenches
1 Slitting knife
1 Manual
1 Set, spare fuses
1 Tape measure
1 Roll of masking tape
1 Rubber cement eraser
| 1 |
4 | 5 |
3 | 2 |
| |
| WARN |
| ACHTUINNGG |
Figure 2-4: Removing the Crate
2.Gently unwrap the shrink wrap from around the laminator.

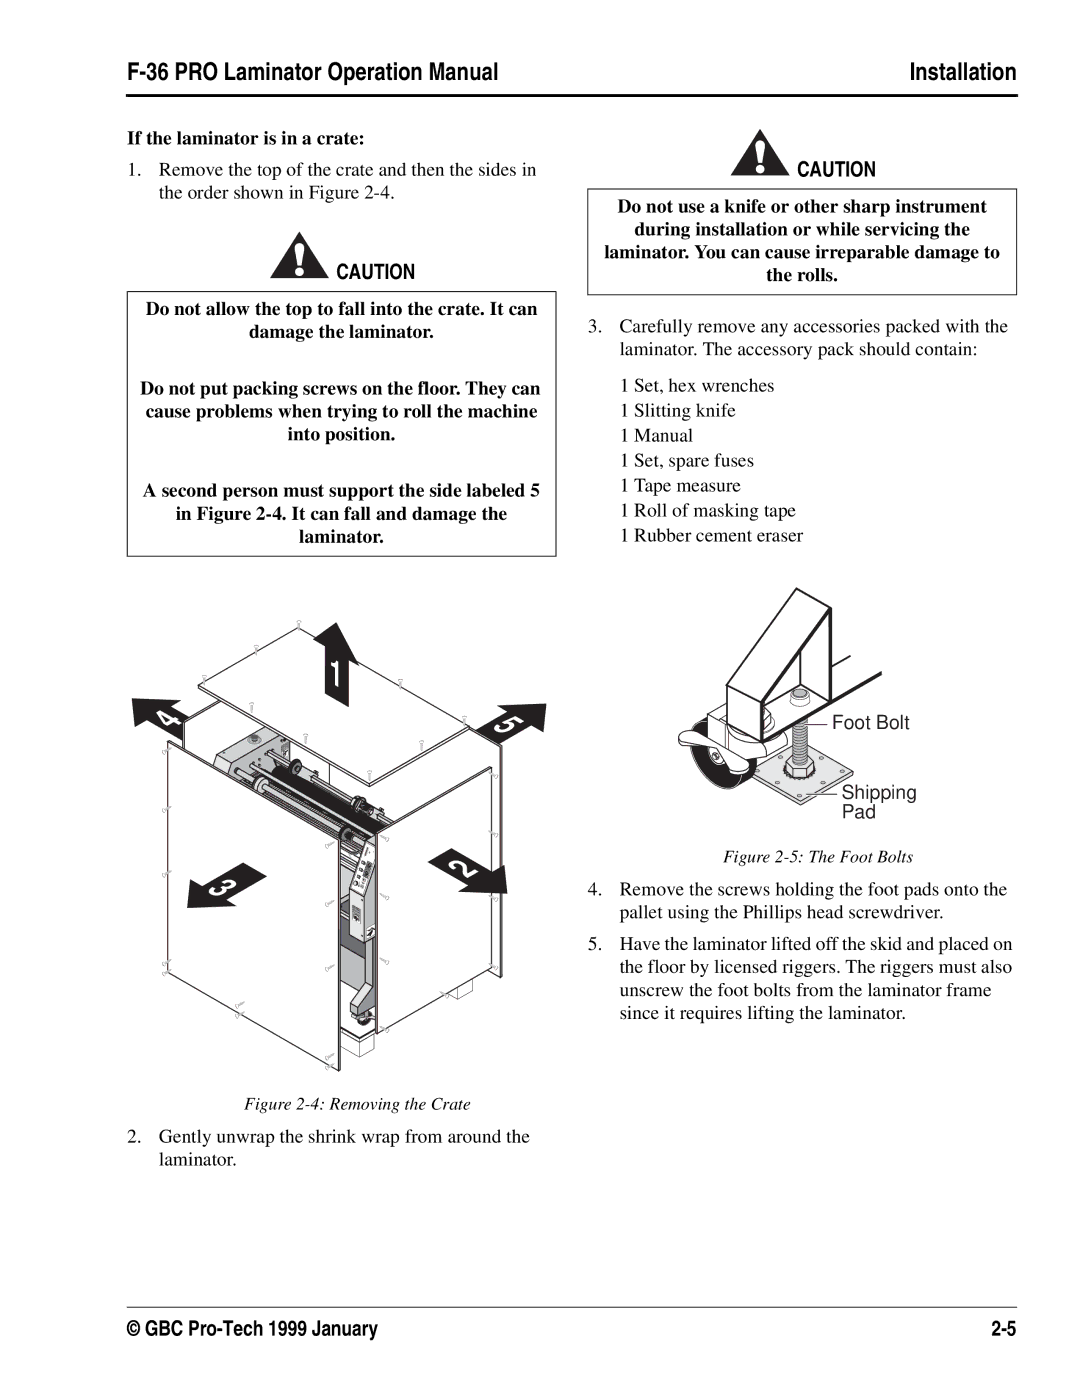
 Foot Bolt
![]()
![]() Shipping
Shipping
Pad
Figure 2-5: The Foot Bolts
4.Remove the screws holding the foot pads onto the pallet using the Phillips head screwdriver.
5.Have the laminator lifted off the skid and placed on the floor by licensed riggers. The riggers must also unscrew the foot bolts from the laminator frame since it requires lifting the laminator.
© GBC |