~Spills and spatters are easy to remove from walls and floor. That’s because there’s little heat except in the food, or sometimes in the utensil. Some spatters wipe up with a paper towel, some may require a damp cloth. Remove greasy spatters with a sudsy cloth, then rinse and dry.
NEVER USE A COMMERCIAL OVEN CLEANER ON ANY P~T OF YOUR MICROWAVE OVEN.
Wipe up spatters on the window on the inside of the door daily. Wash window, when it’s soiled, with a minimum of sudsy, warm
water. Rinse thoroughly and dry.
Wipe metal and plastic parts on the inside of the door frequently.
Use a damp cloth to remove all soil. DO NOT USE ABRASIVES, such as cleaning powders or steel and plastic pads. They may mar the surface.
Door Surface. When cleaning surfaces of door and oven that come together on closing the door, use only mild, nonabrasive soaps or detergents applied with a sponge or soft cloth.
Using a Brown ‘N Sear Dish? Use Bon Ami@ brand cleanser.
High heat generated on the bottom of the Brown ‘N Sear Dish can cause scorched appearing stains to bake onto the floor if grease is present. These may be removed with Bon Ami@ brand cleanser.
After using this cleaner, rinse and dry thoroughly, following instructions on can. Do not use it on the painted surfaces such as the
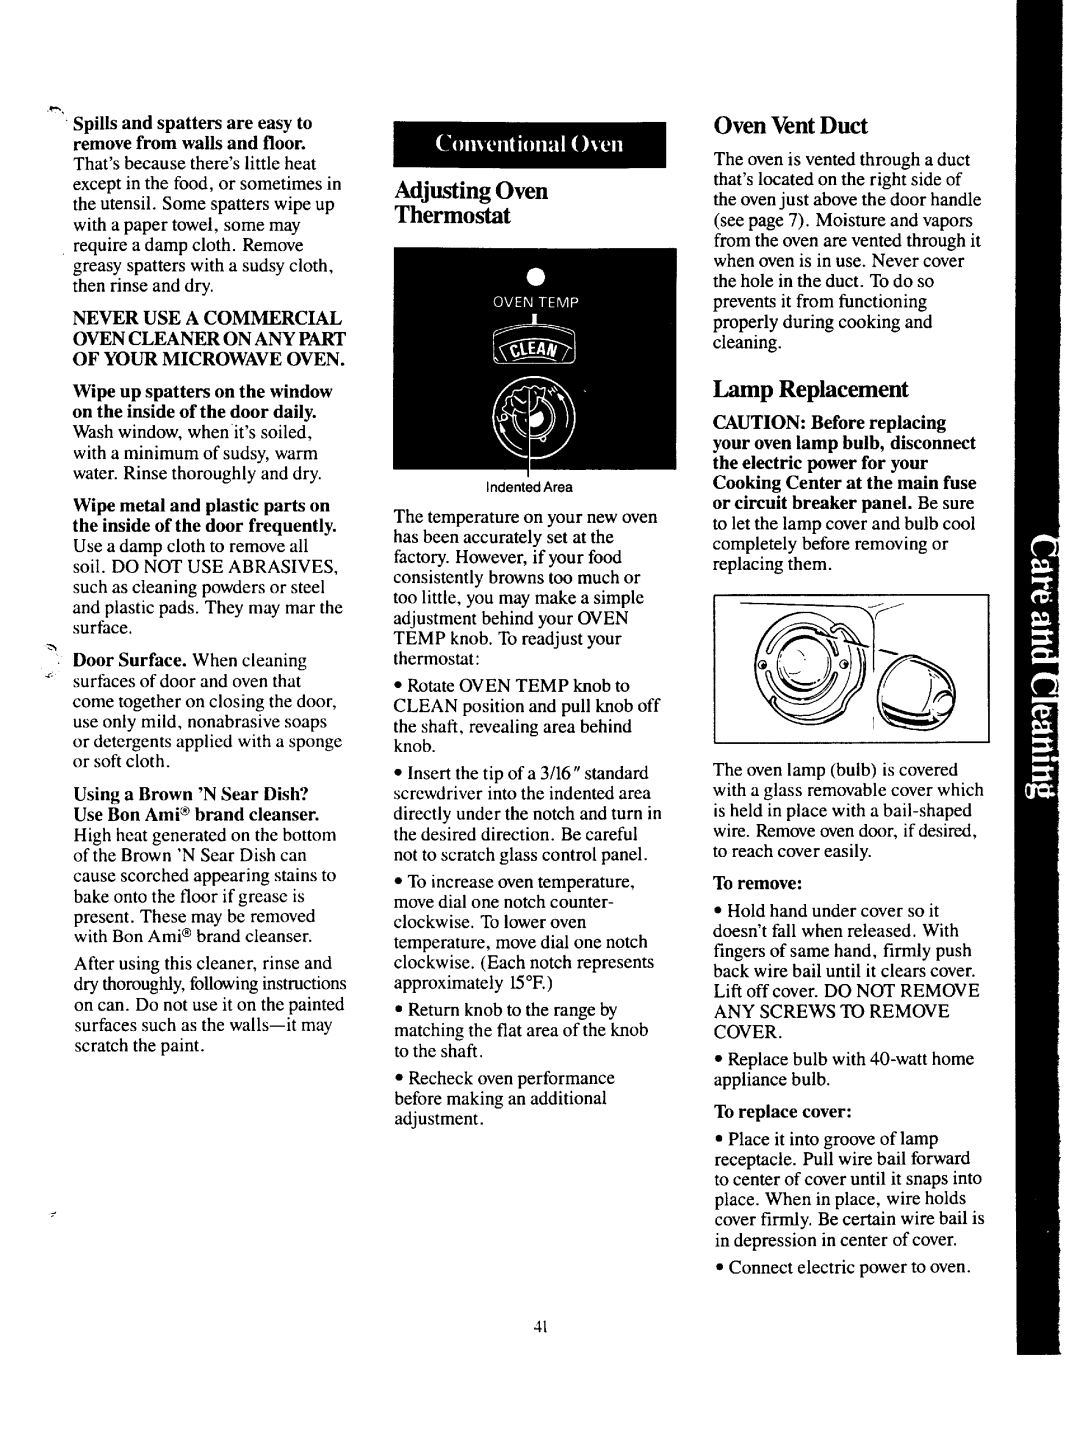
Indented Area
The temperature on your new oven has been accurately set at the factory. However, if your food consistently browns too much or too little, you may make a simple adjustment behind your OVEN TEMP knob. To readjust your thermostat:
●Rotate OVEN TEMP knob to CLEAN position and pull knob off the shaft, revealing area behind knob.
●Insert the tip of a 3/16” standard screwdriver into the indented area directly under the notch and turn in the desired direction. Be careful not to scratch glass control panel.
●To increase oven temperature, move dial one notch counter- clockwise. To lower oven temperature, move dial one notch clockwise. (Each notch represents approximately lS°F.)
●Return knob to the range by matching the flat area of the knob to the shaft.
●Recheck oven performance
before making an additional adjustment.
Oven Vent Duct
The oven is vented through a duct that’s located on the right side of the oven just above the door handle (see page 7). Moisture and vapors from the oven are vented through it when oven is in use. Never cover the hole in the duct. To do so prevents it from fi.mctioning properly during cooking and cleaning.
Lamp Replacement
CAUTION: Before replacing your oven lamp bulb, disconnect the electric power for your Cooking Center at the main fuse or circuit breaker panel. Be sure to let the lamp cover and bulb cool completely before removing or replacing them.
The oven lamp (bulb) is covered with a glass removable cover which is held in place with a
To remove:
●Hold hand under cover so it doesn’t fall when released. With fingers of same hand, firmly push back wire bail until it clears cover. Lift off cover. DO NOT REMOVE ANY SCREWS TO REMOVE COVER.
●Replace bulb with
To replace cover:
●Place it into groove of lamp receptacle. Pull wire bail forward to center of cover until it snaps into place. When in place, wire holds cover firmly. Be certain wire bail is in depression in center of cover.
●Connect electric power to oven.
41