
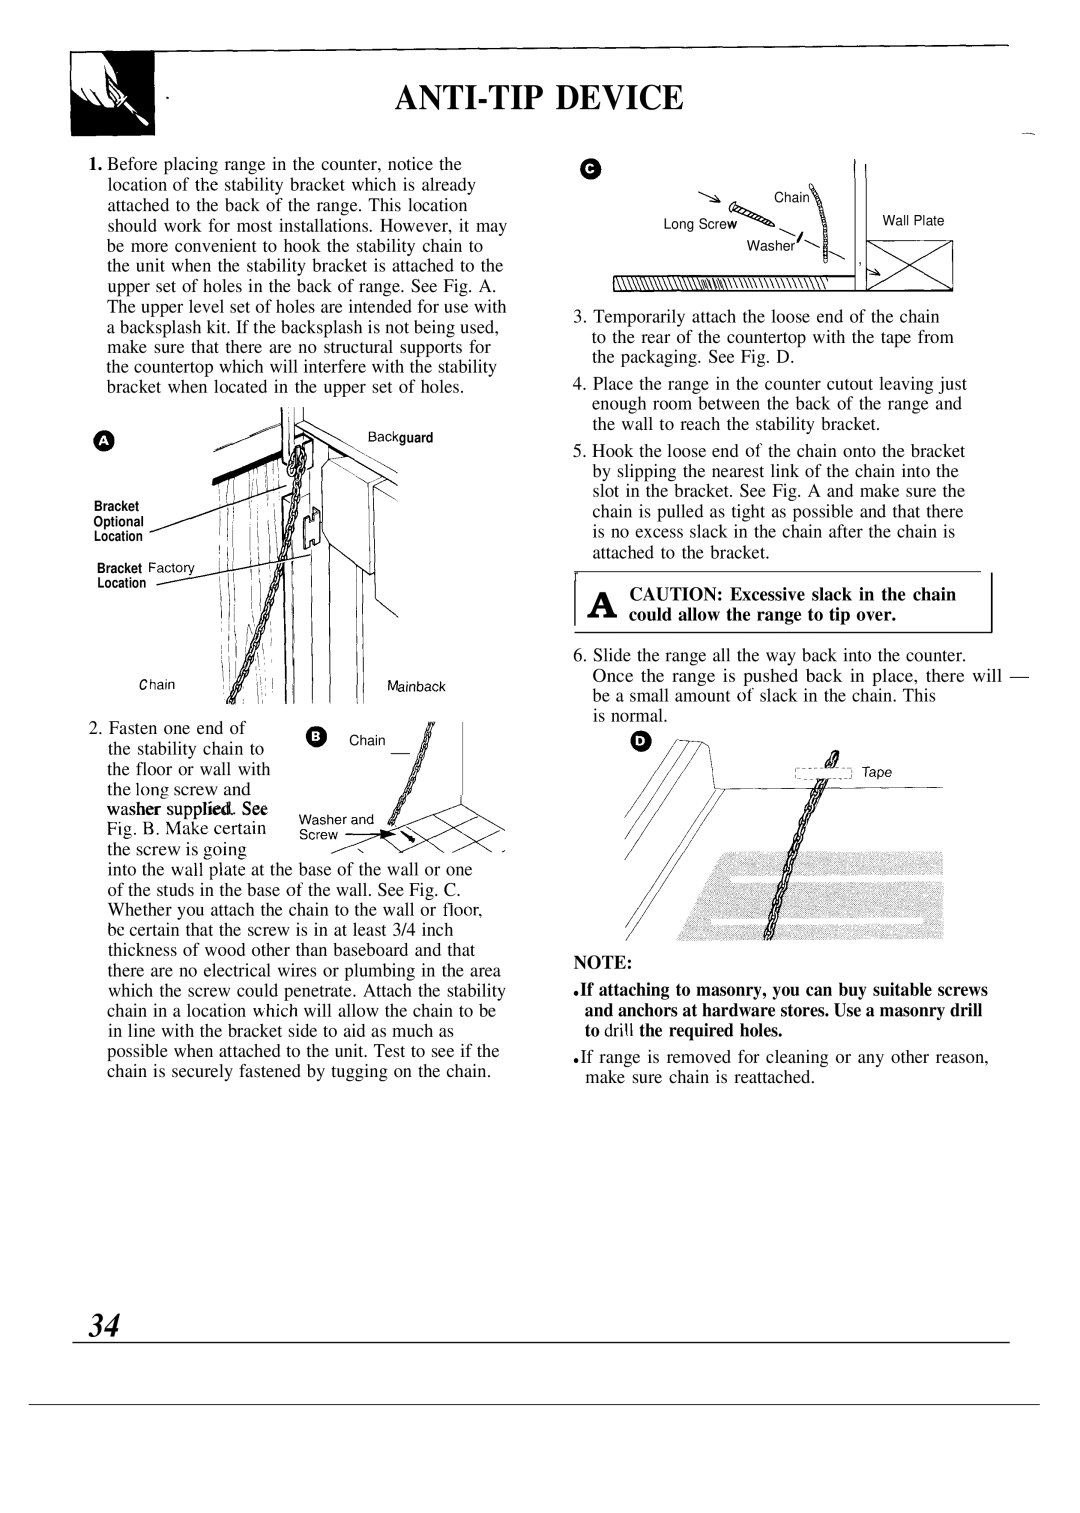
JSP38, JSP40 specifications
The GE JSP40 and JSP38 are advanced gas turbine models developed by General Electric, renowned for their efficiency, reliability, and cutting-edge technology in power generation. These turbines are designed to meet the demanding requirements of modern energy markets, providing flexible solutions for various applications, including peaking power and baseload generation.One of the main features of the JSP40 and JSP38 is their advanced aerodynamics, which contribute to high thermal efficiency and reduced emissions. The innovative design of the turbine blades enhances airflow and maximizes energy extraction from the combustion process, leading to improved overall performance. With a base load efficiency exceeding 40 percent, these turbines are positioned as leaders in their class, offering significant fuel savings for operators.
The JSP40 and JSP38 utilize advanced materials and coatings that enhance durability and resistance to high temperatures. This enables them to operate at higher pressure ratios and temperatures compared to earlier models, thereby increasing power output. The use of advanced nickel-based superalloys in the manufacturing of turbine components ensures long service life even under harsh operational conditions.
Additionally, these turbines are equipped with GE’s proprietary DLN (Dry Low NOx) combustion technology. This technology minimizes nitrogen oxide emissions, making the JSP40 and JSP38 compliant with stringent environmental regulations. The DLN systems achieve stable combustion across a wide range of loads, providing operators with the flexibility to efficiently manage varying demand levels while maintaining low emissions.
Both models feature integrated digital controls that provide real-time monitoring and analytics, improving operational efficiency and reducing downtime. GE's sophisticated control systems enable predictive maintenance, ensuring that potential issues are identified before they escalate, thus optimizing maintenance schedules and maximizing turbine availability.
Furthermore, the JSP40 and JSP38 are designed with adaptability in mind. They can be configured to burn a variety of fuels, including natural gas and distillate fuels, allowing fleets to respond to market changes and regulatory requirements seamlessly. This versatility empowers operators to take advantage of different fuel prices while maintaining a reliable power supply.
In summary, the GE JSP40 and JSP38 gas turbines represent a significant advancement in energy technology, combining high efficiency, reliability, and environmental performance. Their innovative features and advanced technologies make them an excellent choice for energy producers looking to meet the challenges of today’s dynamic energy landscape. With continued investment in research and development, GE is poised to maintain its position as a leader in the global power generation market.