Installation Preparation
TOOLS AND MATERIALS REQUIRED | 1/4″ pivoting |
|
|
|
| |
(NOT SUPPLIED) |
| 1″ conduit (for remote |
|
| ||
|
| hex socket |
|
| ||
|
|
| mounting only) |
|
| |
|
|
|
|
|
| |
Aluminized |
|
|
| 3/8″ socket/ | Electric drill and | |
duct tape | Silicone |
|
| appropriate bits | ||
Pencil and tape measure |
|
| nut driver |
|
| |
|
|
|
|
|
| |
| Safety glasses | Wire nuts |
|
|
|
|
Spirit level |
|
|
| Tin snips |
| 8″ ducting and |
|
|
|
|
| caps as needed | |
| Gloves |
|
|
|
|
|
Knife | Step ladder |
|
|
|
|
|
| Phillips and |
|
| |||
Plumb line | Flashlight |
| Strain relief | |||
screwdrivers | Wire cutter/stripper | |||||
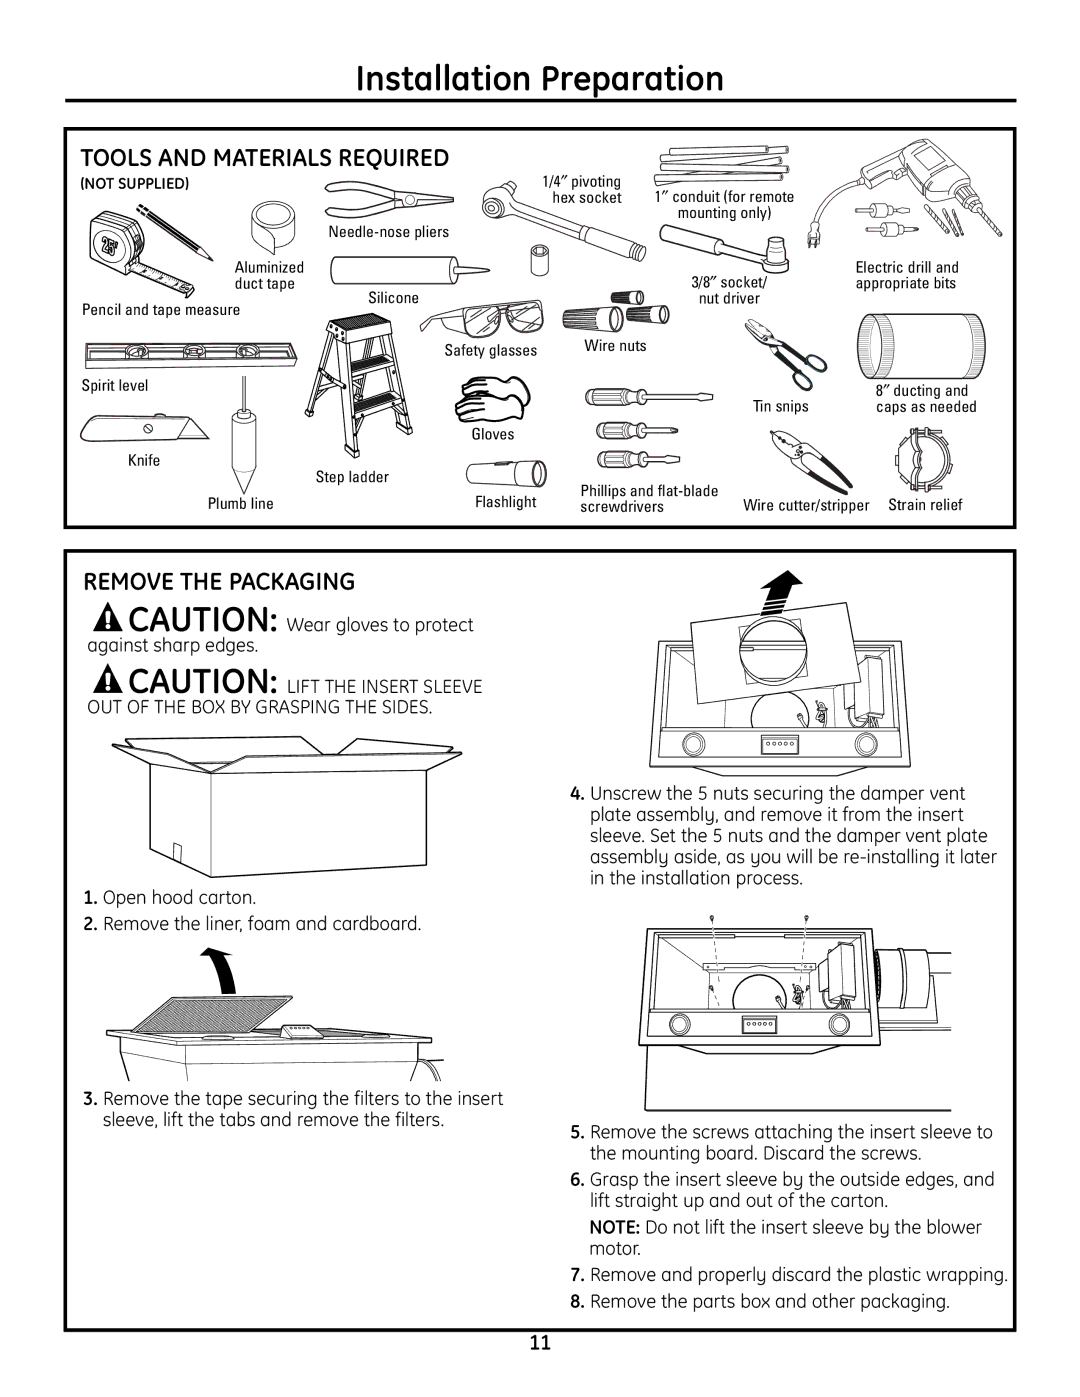
REMOVE THE PACKAGING
![]() CAUTION: Wear gloves to protect against sharp edges.
CAUTION: Wear gloves to protect against sharp edges.
![]() CAUTION: LIFT THE INSERT SLEEVE OUT OF THE BOX BY GRASPING THE SIDES.
CAUTION: LIFT THE INSERT SLEEVE OUT OF THE BOX BY GRASPING THE SIDES.
1.Open hood carton.
2.Remove the liner, foam and cardboard.
3.Remove the tape securing the filters to the insert sleeve, lift the tabs and remove the filters.
4.Unscrew the 5 nuts securing the damper vent plate assembly, and remove it from the insert sleeve. Set the 5 nuts and the damper vent plate assembly aside, as you will be
5.Remove the screws attaching the insert sleeve to the mounting board. Discard the screws.
6.Grasp the insert sleeve by the outside edges, and lift straight up and out of the carton.
NOTE: Do not lift the insert sleeve by the blower motor.
7.Remove and properly discard the plastic wrapping.
8.Remove the parts box and other packaging.
11