Installation Instructions
STEP 3 INSTALL INSERT SLEEVE
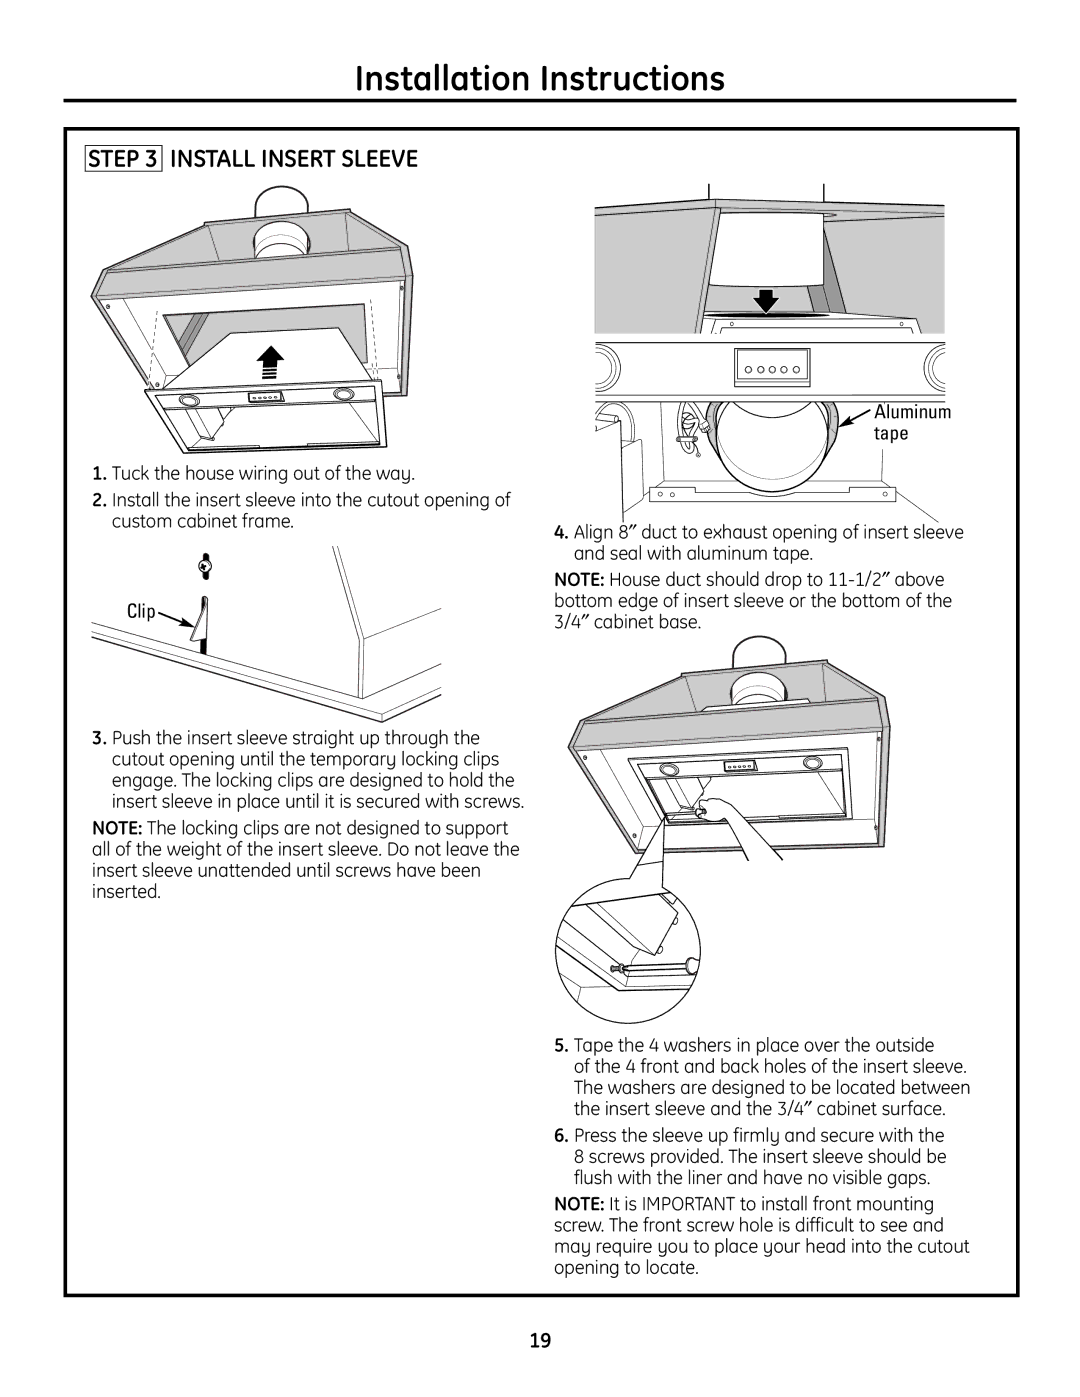
1.Tuck the house wiring out of the way.
2.Install the insert sleeve into the cutout opening of custom cabinet frame.
Clip ![]()
![]()
3.Push the insert sleeve straight up through the cutout opening until the temporary locking clips engage. The locking clips are designed to hold the insert sleeve in place until it is secured with screws.
NOTE: The locking clips are not designed to support all of the weight of the insert sleeve. Do not leave the insert sleeve unattended until screws have been inserted.
![]() Aluminum tape
Aluminum tape
4.Align 8″ duct to exhaust opening of insert sleeve and seal with aluminum tape.
NOTE: House duct should drop to
5.Tape the 4 washers in place over the outside
of the 4 front and back holes of the insert sleeve.
The washers are designed to be located between the insert sleeve and the 3/4″ cabinet surface.
6.Press the sleeve up firmly and secure with the 8 screws provided. The insert sleeve should be flush with the liner and have no visible gaps.
NOTE: It is IMPORTANT to install front mounting screw. The front screw hole is difficult to see and may require you to place your head into the cutout opening to locate.
19