Headstock Tilting
The head tilts from 45º right to 45º left (see Figure 22). However, the headstock can be tilted past 45ºR or 45º. If this is done, you will not be able to use the angle scale, and the headstock lock bolts may bind.
NOTICE
This mill is designed to operate with a right- left headstock tilt of 45º. To prevent head- stock binding and insufficient support, do not tilt the headstock to a full 90º. Binding occurs when one of the hex bolts on the side of the headstock (Figures
Tilt
Figure 22. Head tilted 45° to the left.
Tools Needed | Qty |
Wrench 19mm | 1 |
To tilt the head: |
|
1.DISCONNECT MILL FROM POWER!
2.Loosen the two locking hex nuts on both sides of the turret (see Figures
Hold the motor housing when tilting. Do not hold the drawbar cap. If you do, the cap can come off and the headstock can swing down uncontrollably, causing severe per- sonal injury or machine damage.
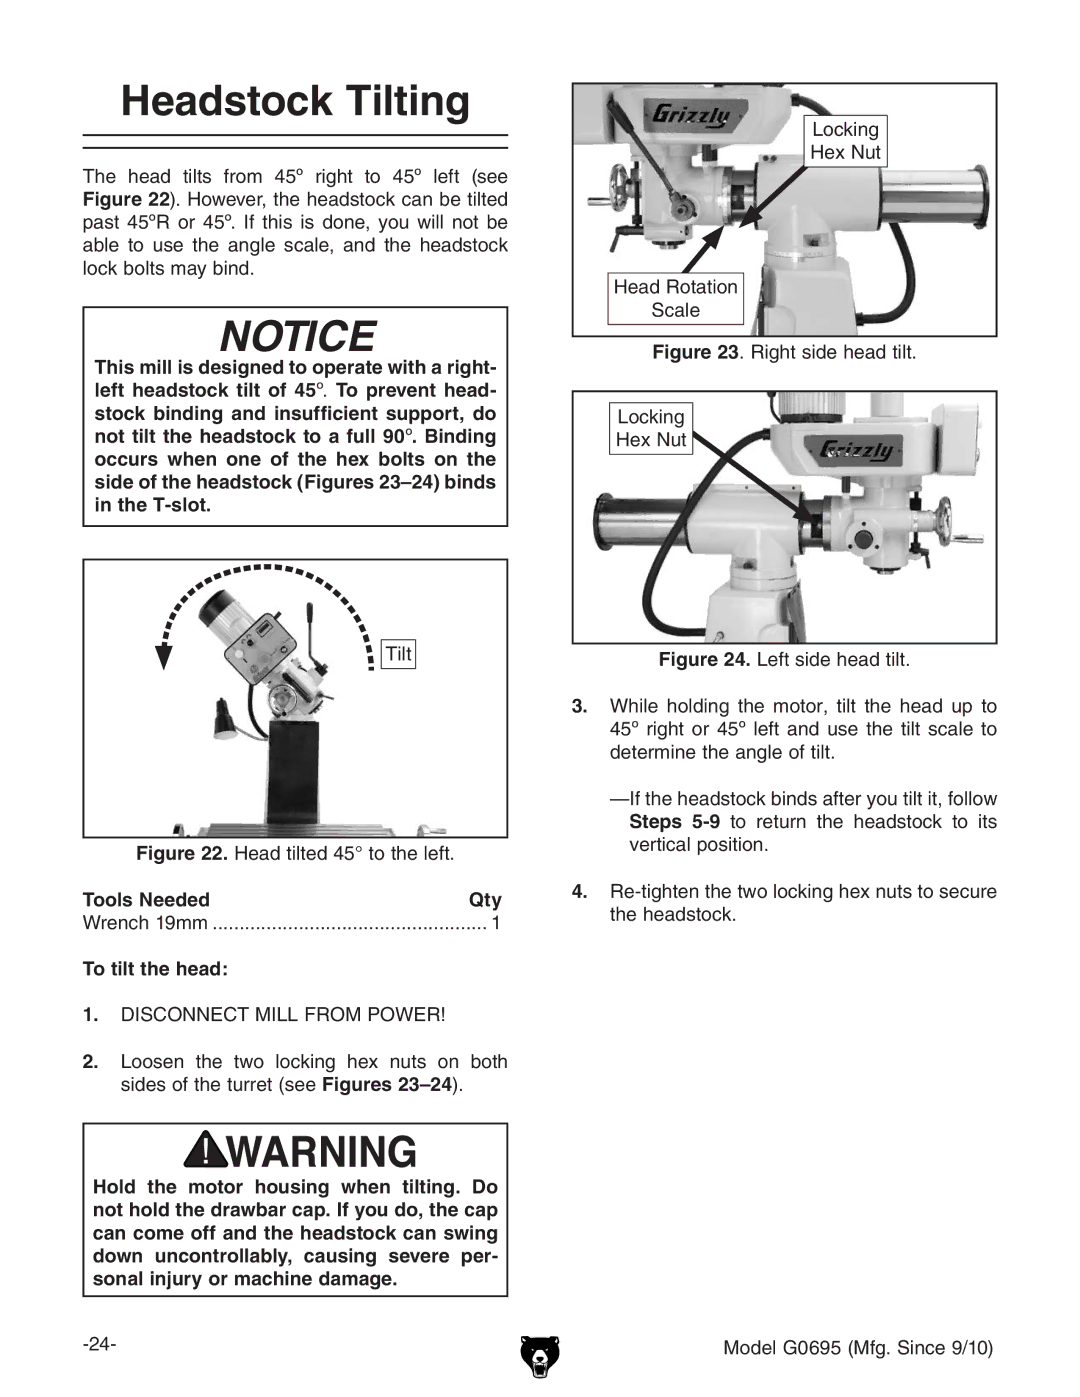
Locking
Hex Nut
Head Rotation
Scale