Manuals
/
GSI Outdoors
/
Household Appliance
/
Fan
GSI Outdoors
2TAF, 2TFC
installation instructions
Installation
Models:
2TF
2TAF
2TFC
1
22
57
57
Download
57 pages
2.26 Kb
19
20
21
22
23
24
25
26
Install
Main Power Schematic
Safety Alert Symbol
Conduit Runs Control Wires
Warranty
Battery Hook-Up
Multi-Grain Temperature Sensor
Component Placement
Safety Precautions
Safety
Page 22
Image 22
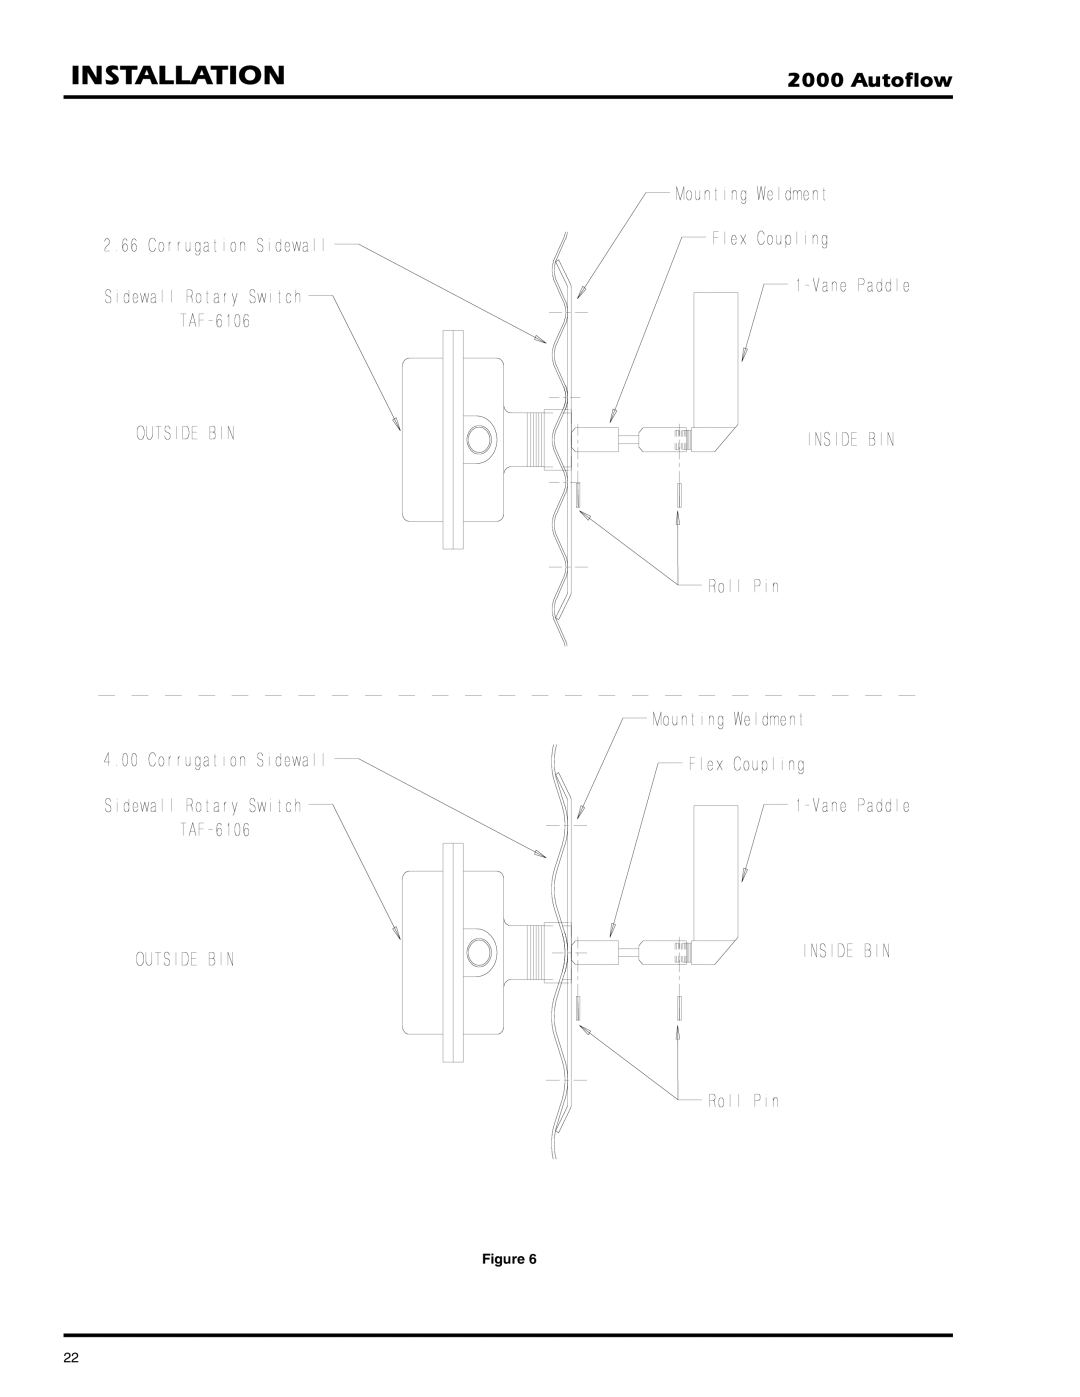
INSTALLATION
2000 Autoflow
Figure 6
22
Page 21
Page 23
Page 22
Image 22
Page 21
Page 23
Contents
Series Autoflow Fan/Heater Control Installation Instructions
Autoflow
Table of Contents
Safety Alert Symbol
Roof WARNING, Operation & Safety
Series 2000 Autoflow Installation & Operating Instructions
Roof Damage Warning and Disclaimer
Safety
Safety Precautions
Use Caution Operation of this Equipment
Safety SIGN-OFF Sheet
Top Dry Bin Eave Height
Installation
Fan and Heater Mounting
Autoflow Control Box Mounting
Component Placement
Series 2000 Autoflow Control Box Bolt Pattern
Control BOX Mounting
Fill System Control Box Mounting
Fill System Control Box Bolt Pattern
Actuator Control Box Mounting
Bolt pattern to drill holes for the Actuator Control Box
Multi-Grain Temperature Sensor
Grain Temperature Sensor Mounted to Leveling Band Post
Close-Up Detail of Grain Temperture Sensor Wiring
Plenum Temperature Sensor
Airswitch
Installation
Wet Supply Rotary Switch
Installation
Storage Chamber High Limit Rotary Switch Installation
Installation
Drying Chamber Rotary Switches Mounted in Bin Roof
Drying Chamber Low-Level Rotary Switch Installation
Installation
Drying Chamber High-Level Rotary Switch Installation
Installation
Drying Chamber Overflow Rotary Switch Installation
Installation
Liquid Propane LP
Natural Gas NG
Power/Motor Wires
Electrical Power Supply
Conduit Runs Control Wires
Grounding
Proper Installation of Ground Rod
Power Supply
Transformer and Wiring Voltage Drop
Machine to Earth Grounding
Top Dry and ground rod attachment illustration
POWER/MOTOR Wiring
Main Power Schematic
Electrical Load Information
Wire Size Information
Voltage Horsepower
Fill System Control Box Electrical Load Information
Starter
Electrical Power Supply
Autoflow to Master Fan/Heater Unit Interconnect
Autoflow to Actuator Interconnect
Autoflow to Wet Supply Rotary Switch Interconnect
Autoflow to Storage Chamber Rotary Switch Inerconnect
Electrial Power Supply
Autoflow to Drying Chamber Rotary Switches Interconnect
Electrial Power Supply
Autoflow to Fill System Control Box Interconnect
Autoflow to Ground Interconnect
Master to Slave Interconnect
Slave to Slave Interconnect
Battery Hook-Up
Dump Chute Cable Installation
Electrical Power Supply
Warranty
Revision #1 February
Airstream Grain Conditioning Systems
Top
Page
Image
Contents