2000 Autoflow
INSTALLATION
Wet Supply Rotary Switch
1)Drill a 2” diameter hole through the hopper bottom.
If a flat bottom bin is being used for a wet storage tank the Wet Supply Rotary Switch would be mounted 45 degrees up the sidewall from the center of the bin. Example: If the wet storage bin is 18’ in diameter then the Wet Supply Rotary Switch would be mounted 9’ up the sidewall.
2)If the bin is 2.66” corrugation the hole should be centered on an outside hill.
3)If the bin is 4.00” corrugation the hole should be centered on an outside valley.
4)Use the mounting plate as a pattern and drill four 3/8” holes through the sidewall at the swich location so the place can be bolted to the bin.
5)Add foam weather strip around the top and side of the mounting plate.
6)Caulk the underside of the mounting plate, on all sides of the 2” hole, and where the plate meets the bin.
7)Bolt the mounting plate to the sidewall.
8)Attach the flex coupling to the rotary switch power pack using a roll pin.
9)Attach the
10)Apply teflon tape or pipe sealant (not included) to the rotary switch power pak threads and thread the rotary switch power pack into the mounting plate coupling.
11)Make sure that the conduit hole is facing down or is horizontal.
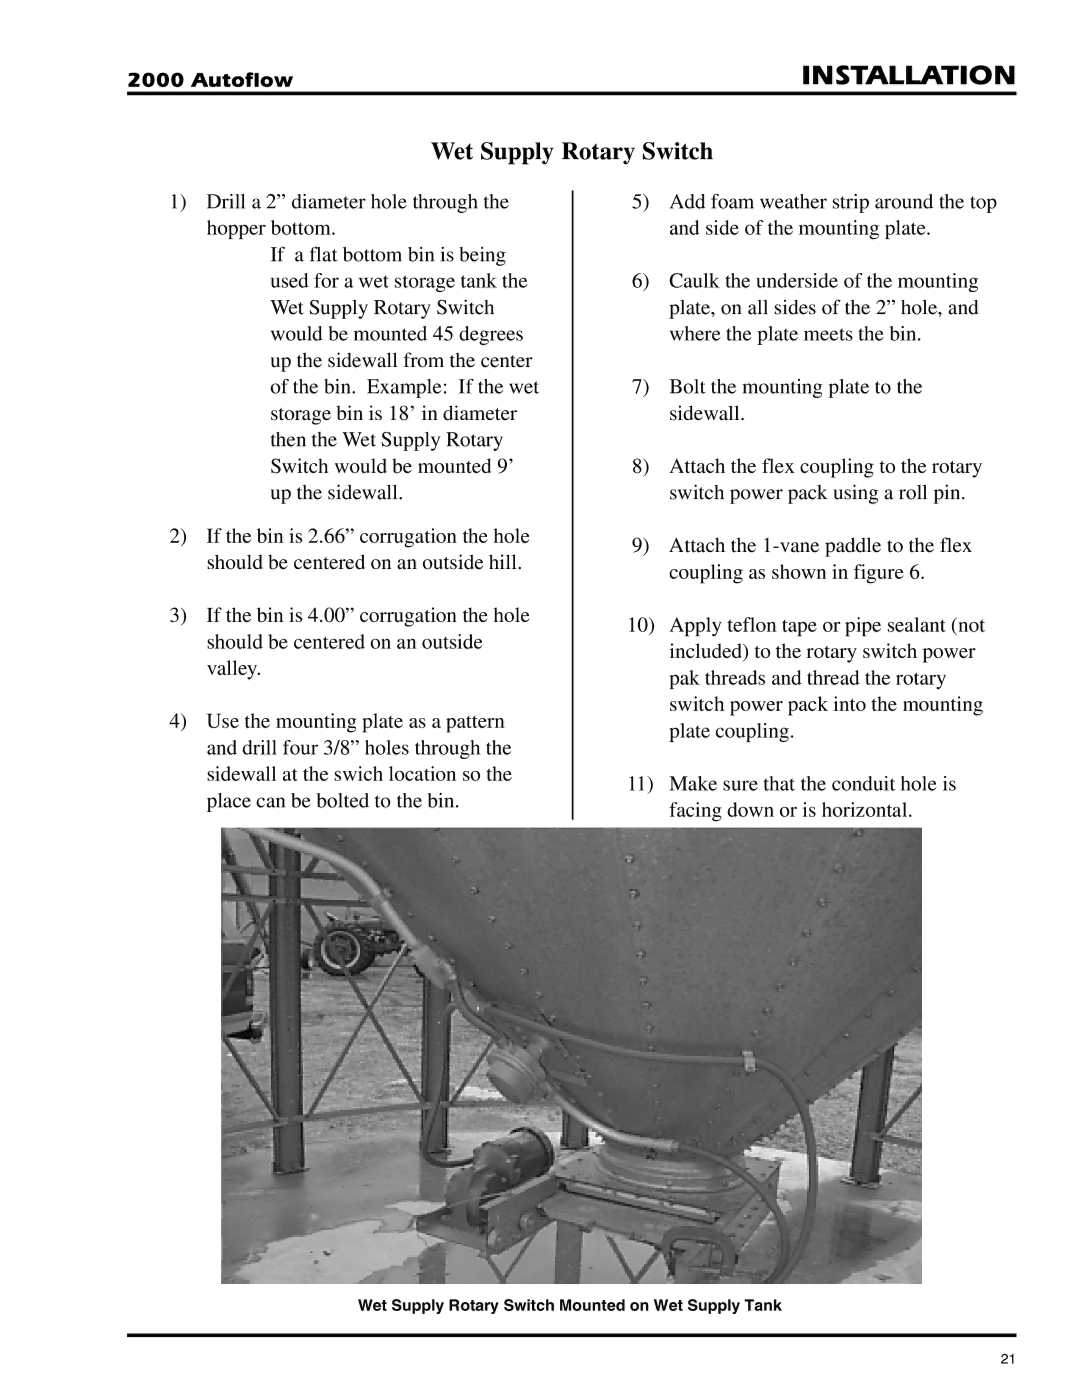
Wet Supply Rotary Switch Mounted on Wet Supply Tank
21