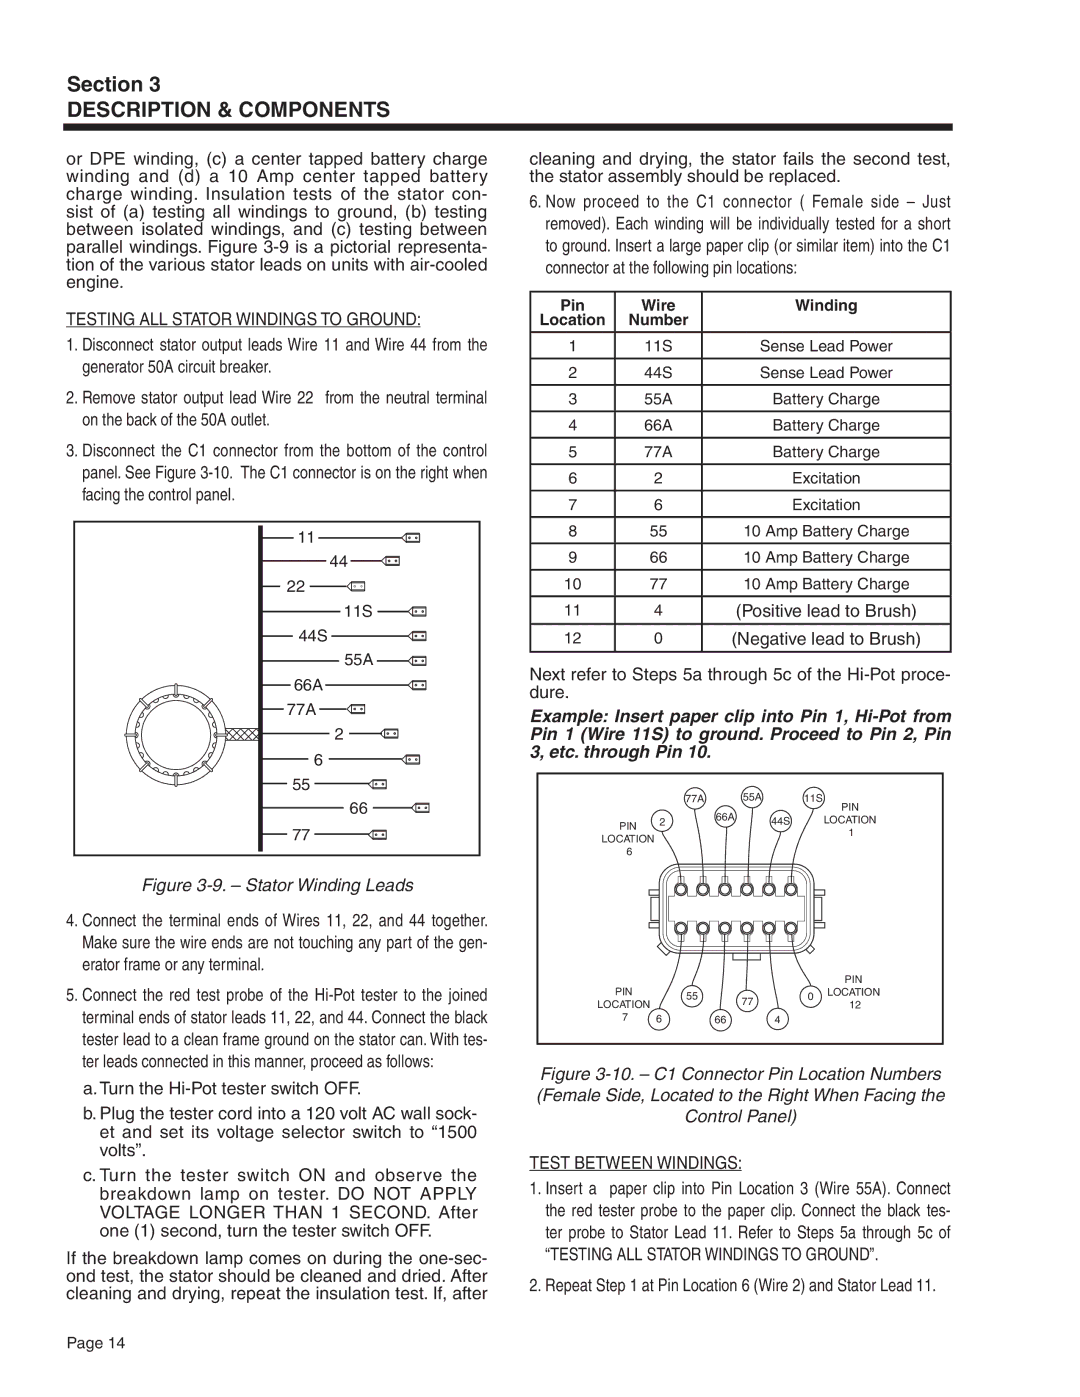
5308, 4583, 4451 & 4986, 4582 & 4987 specifications
Guardian Technologies has carved a niche in the market with its innovative air purification and UV-C sanitization products. The company's model numbers, including 4582, 4987, 4451, 4986, 4583, and 5308, represent a diverse range of solutions designed to enhance indoor air quality and safety in both residential and commercial settings.The Guardian Technologies 4582 is equipped with a true HEPA filter that captures 99.97% of dust, pollen, smoke, and other particles as small as 0.3 microns. This model features a smart sensor that adjusts the fan speed according to the air quality in real-time. The UV-C light technology integrated into this device works to eliminate viruses and bacteria, providing an additional layer of protection against airborne pathogens.
The 4987 model follows suit with similar advanced features but adds a sleek design ideal for modern interiors. With multiple speed settings and a night mode, the 4987 is perfect for bedrooms or quiet spaces. Its energy-efficient operation coupled with an indicator that signals filter replacement ensures that users maintain optimal performance effortlessly.
The Guardian Technologies 4451 and 4986 models are particularly notable for their enhanced capacity and filtration efficiency. Both units incorporate a three-in-one filtration system that includes a pre-filter, activated charcoal filter, and HEPA filter. With their strategic design, these models not only purify the air but also trap common household odors, making them a popular choice for families with pets.
The 4583 model stands out with a unique combination of design and functionality. It features a low-profile design, making it easy to fit into any space. Its UV-C light technology not only disinfects air but can also sanitize surfaces, bridging the gap between air purification and direct sanitation.
Finally, the Guardian Technologies 5308 caters to larger spaces, offering impressive air circulation and filtration capabilities. Equipped with a high-efficiency particulate air (HEPA) filter and a powerful fan, it effectively cleans larger areas while maintaining whisper-quiet operation.
In summary, Guardian Technologies’ products exemplify a commitment to improving air quality and promoting health through innovative technology. With features like HEPA filtration, UV-C sanitization, smart sensors, and sleek designs, consumers can choose from a range of models that best fit their needs, ensuring cleaner, safer indoor environments.