Installation Service
10.INSTALL OUTDOOR UNIT
10.3Air Purging - (Continued)
5.With the vacuum pump still running, close the "Low" knob of the manifold valve. Then stop the vacuum pump.
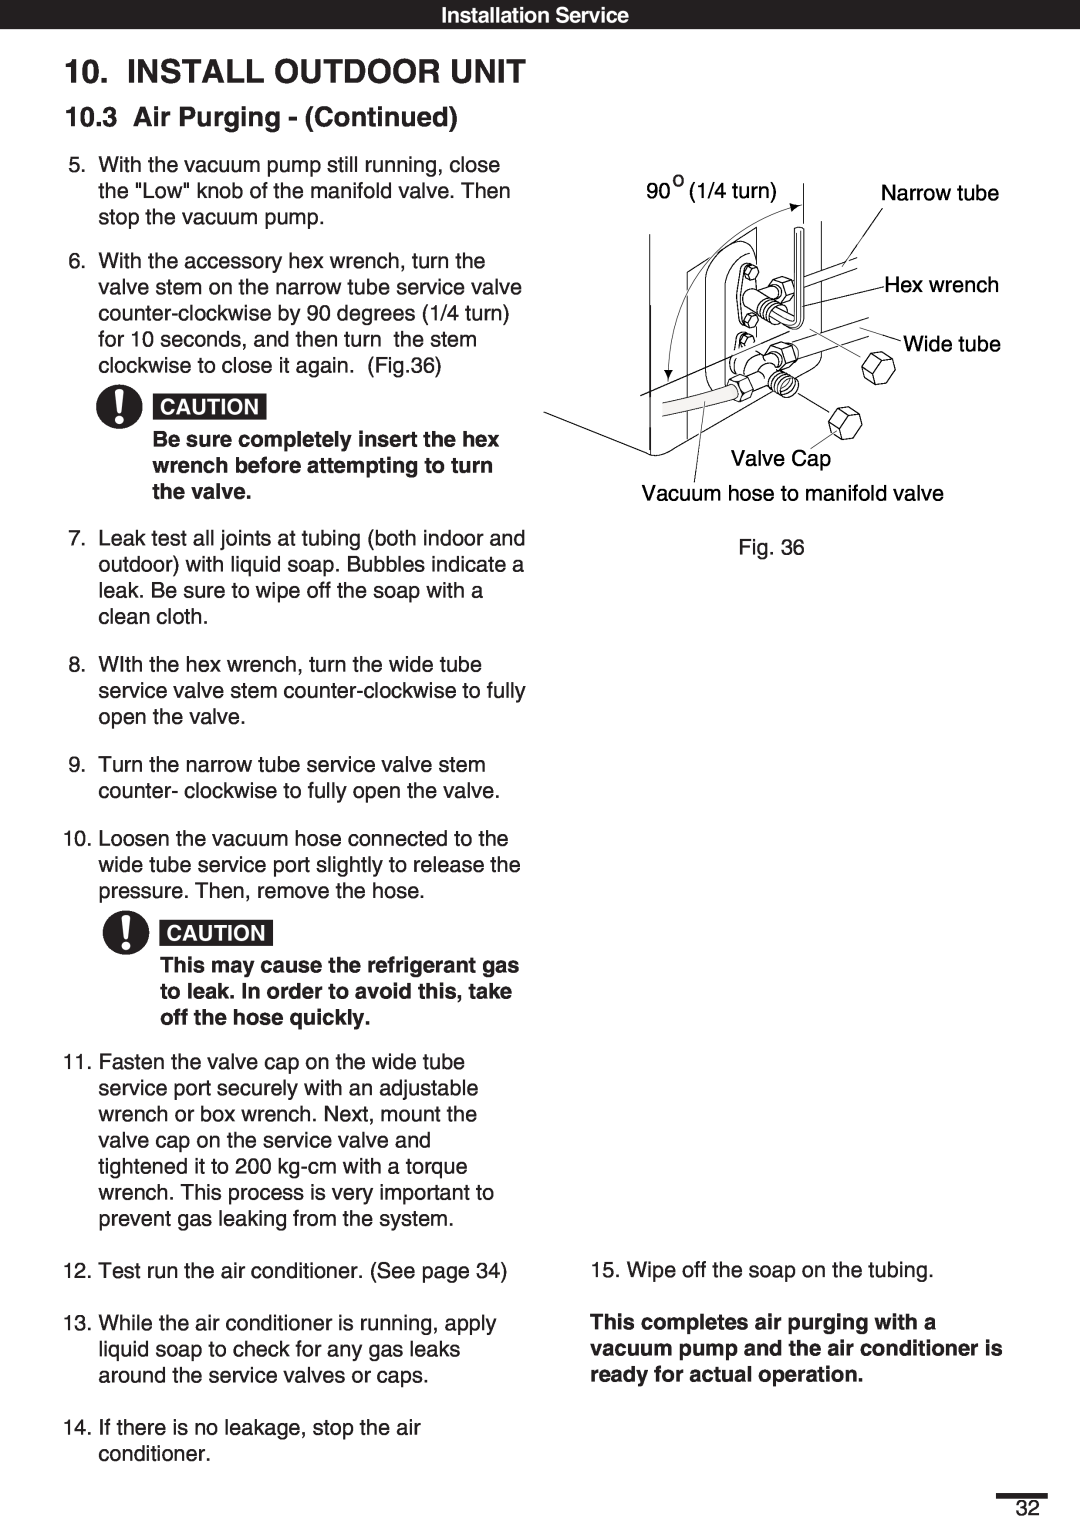
6.With the accessory hex wrench, turn the valve stem on the narrow tube service valve
CAUTION
Be sure completely insert the hex wrench before attempting to turn the valve.
7.Leak test all joints at tubing (both indoor and outdoor) with liquid soap. Bubbles indicate a leak. Be sure to wipe off the soap with a clean cloth.
8.WIth the hex wrench, turn the wide tube service valve stem
9.Turn the narrow tube service valve stem counter- clockwise to fully open the valve.
10.Loosen the vacuum hose connected to the wide tube service port slightly to release the pressure. Then, remove the hose.
CAUTION
This may cause the refrigerant gas to leak. In order to avoid this, take off the hose quickly.
11.Fasten the valve cap on the wide tube service port securely with an adjustable wrench or box wrench. Next, mount the valve cap on the service valve and tightened it to 200
12.Test run the air conditioner. (See page 34)
13.While the air conditioner is running, apply liquid soap to check for any gas leaks around the service valves or caps.
14.If there is no leakage, stop the air conditioner.
90 o (1/4 turn) | Narrow tube |
Hex wrench
Wide tube
Valve Cap
Vacuum hose to manifold valve
Fig. 36
15. Wipe off the soap on the tubing.
This completes air purging with a vacuum pump and the air conditioner is ready for actual operation.
32