Setting Up The Weld
![]() WARNING!
WARNING!
Before welding, make sure to read and understand all safety precautions and warnings discussed on pages 3 through 10.
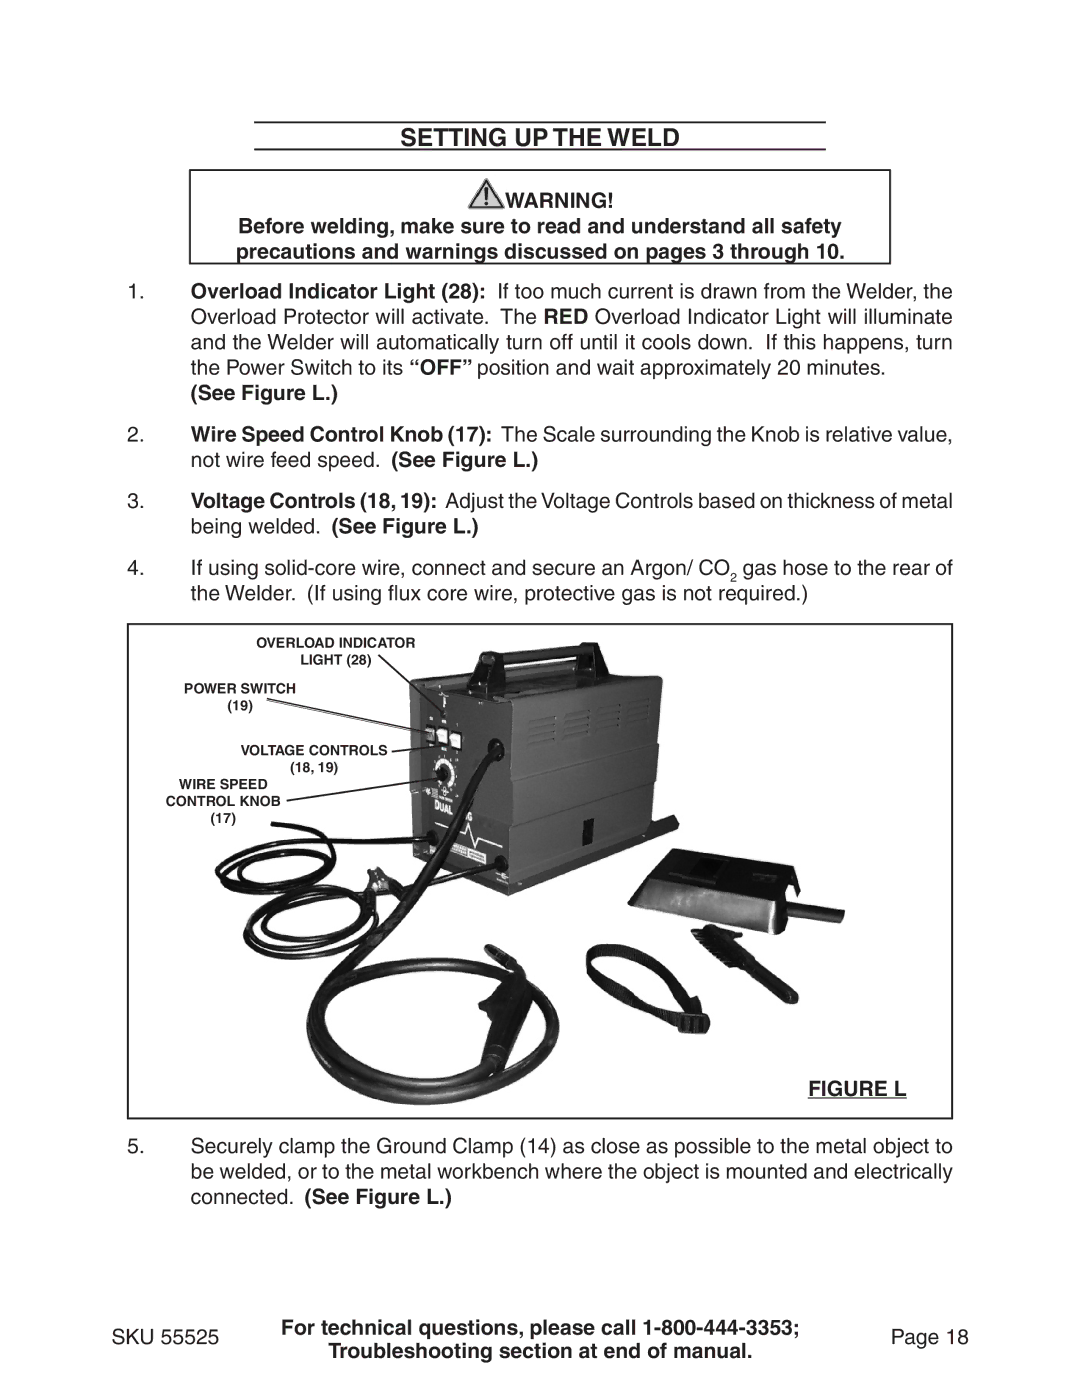
1.Overload Indicator Light (28): If too much current is drawn from the Welder, the Overload Protector will activate. The RED Overload Indicator Light will illuminate and the Welder will automatically turn off until it cools down. If this happens, turn the Power Switch to its “OFF” position and wait approximately 20 minutes.
(See Figure L.)
2.Wire Speed Control Knob (17): The Scale surrounding the Knob is relative value, not wire feed speed. (See Figure L.)
3.Voltage Controls (18, 19): Adjust the Voltage Controls based on thickness of metal being welded. (See Figure L.)
4.If using
OVERLOAD INDICATOR
LIGHT (28)
POWER SWITCH
(19)
VOLTAGE CONTROLS ![]() (18, 19)
(18, 19)
WIRE SPEED
CONTROL KNOB
(17)
FIGURE L
5.Securely clamp the Ground Clamp (14) as close as possible to the metal object to be welded, or to the metal workbench where the object is mounted and electrically connected. (See Figure L.)
SKU 55525 | For technical questions, please call | Page 18 | |
Troubleshooting section at end of manual. | |||
|
|